- 36 -
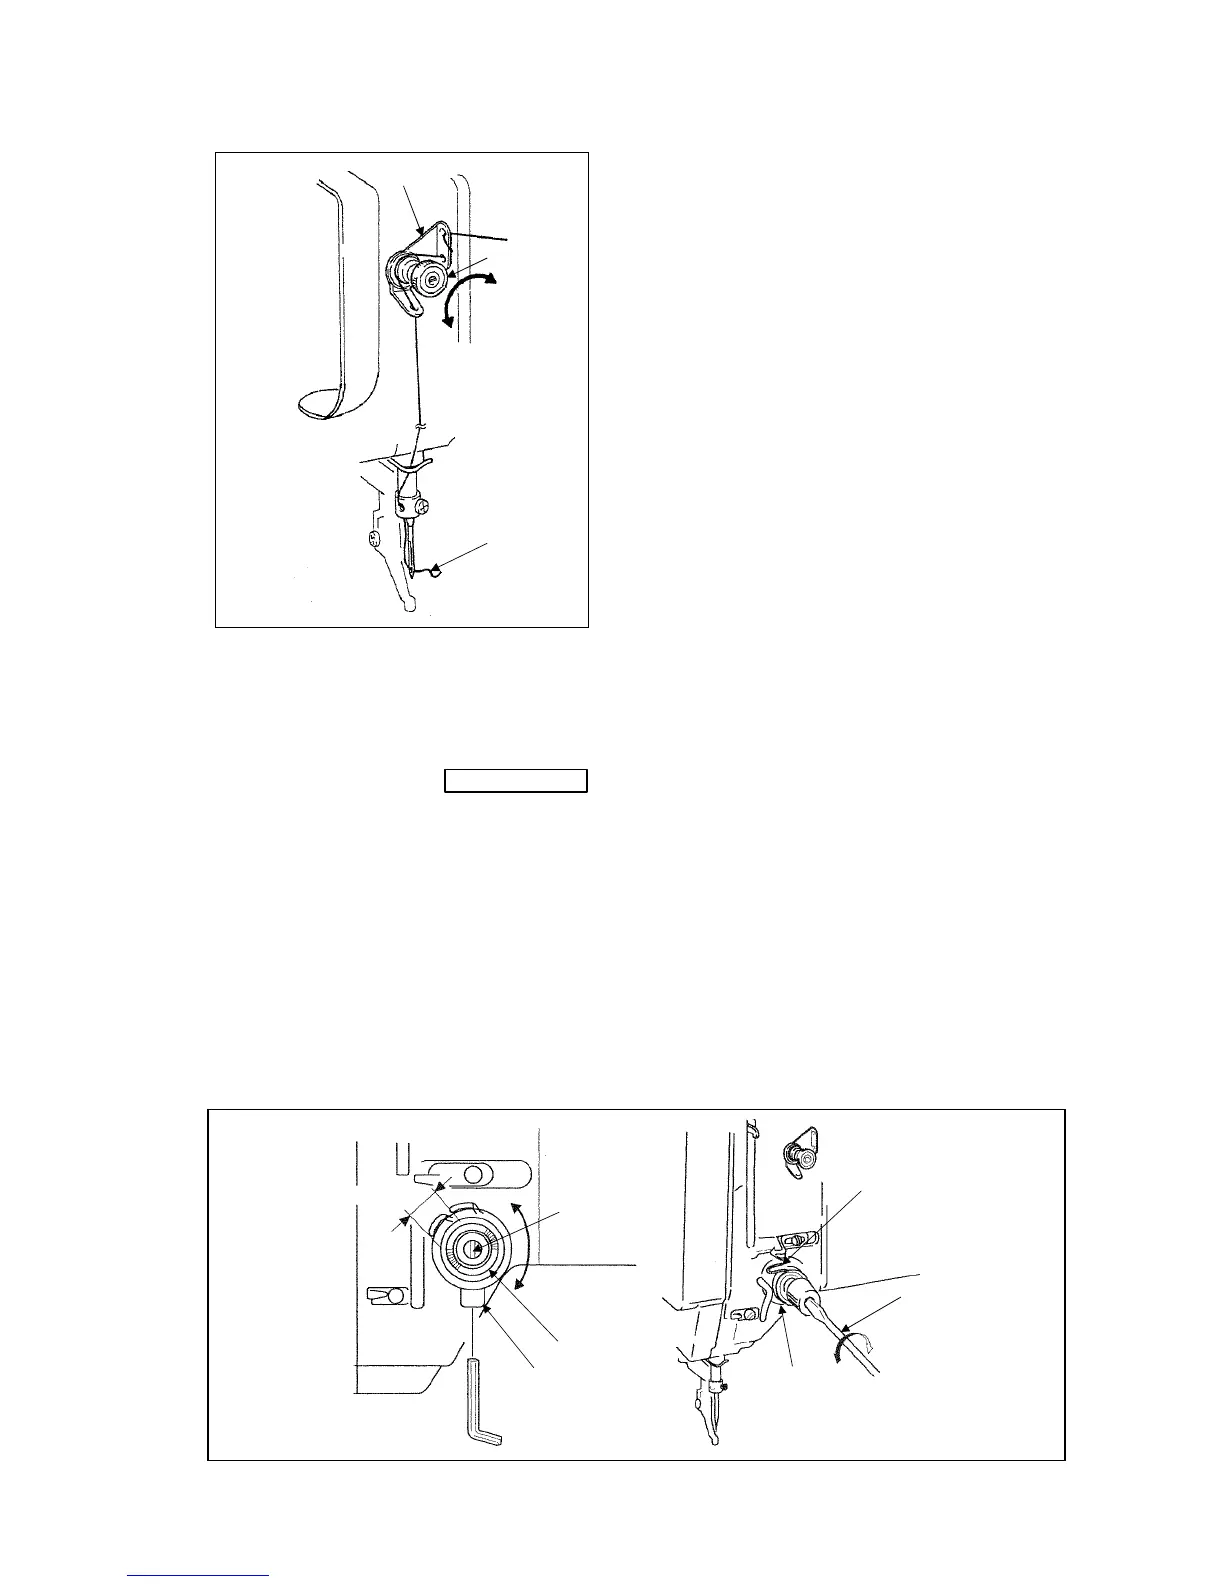
7-11 Adjustment of the thread rail after the trimming
2)
1)
3)
Adjust the thread tail (No.3) from the needle after the
trimming with turning the nut (No.2) of the pretension
(No.1).
If turn the nut (No.2) to the clockwise, the thread tail
becomes shorter and if turn the nut (No.2) to the
counter-clockwise, the thread tail becomes longer.
7-12 Cancellation of the trimming function
If the automatic trimming is not required during the sewing operation, cancel the trimming function with
the operation panel.
For the detail of this instructions, please refer to the paragraph [16.Program mode or 17.Program mode
list] on the technical manual Operation Panel
.
7-13 Adjustment of the thread take up spring swing stroke
Loosen the set screw (No.2) and turn the whole thread tension regulator (No.3) then, adjust the thread
take up spring swing stroke to be become 9 to 10mm.
After the adjustment, tighten the set screw (No.2) securely.
7-14 Adjustment of the thread take up spring tension
Insert the screw driver (No.5) into the slit (No.4) of the thread tension regulator (No.3) and adjust the
thread take up spring (No.1) tension. If turn the screw driver to the clockwise, the thread take up spring
tension becomes tight, and if turn the screw driver to the counter clockwise, the thread take up spring
tension becomes loose.
4)
3)
2)
9 to 10mm
1)
5)
3)
 Loading...


