1-26 | ni.com
Chapter 1 Getting Started with the cDAQ Controller
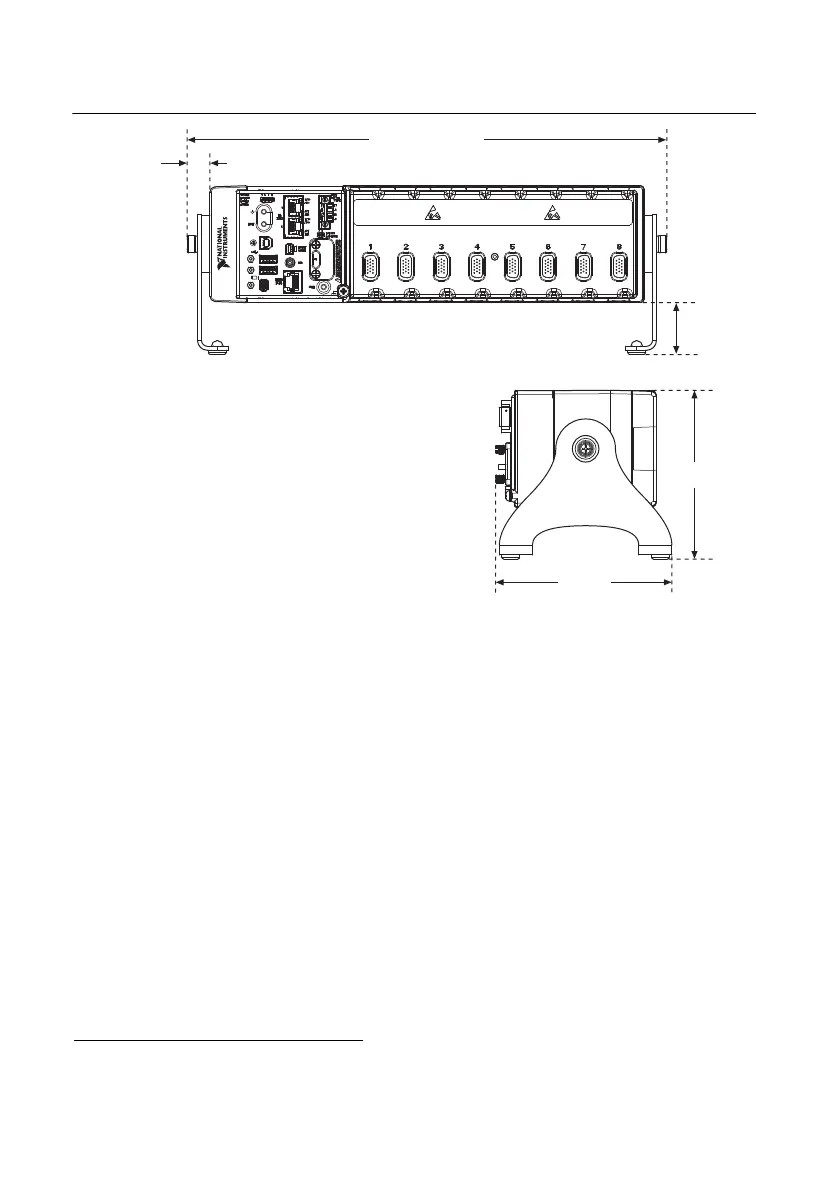
Figure 1-18. Dimensions of the cDAQ-9133/9135/9137 with Desktop Mounting Kit Installed
Mounting the cDAQ Controller on a DIN Rail
Use the DIN rail mounting method if you already have a DIN rail configuration or if you need
to be able to remove the controller quickly. You can use the NI DIN rail mount kit to mount the
controller on a DIN rail. You need one clip for mounting the controller on a standard 35 mm DIN
rail. Refer to the Cables and Accessories section for the accessory part number for your cDAQ
controller. Complete the following steps to mount the controller on a DIN rail.
1. Fasten the DIN rail clip to the controller using a number 2 Phillips screwdriver and M4 × 10
screws
1
. National Instruments provides these screws with the DIN rail mount kit. Tighten
the screws to a maximum torque of 1.3 N · m (11.5 lb · in.). Make sure the DIN rail kit is
installed as shown in Figure 1-19, with the larger lip of the DIN clip positioned up. When
the DIN rail kit is properly installed, the cDAQ controller is centered on the DIN rail.
1
The NI cDAQ-9132/9134/9136 controller DIN rail clip requires two screws.
The NI cDAQ-9133/9135/9137 controller DIN rail clip requires three screws.
39.12 mm
(1.540 in.)
361.71 mm (14.241 in.)
2X 17.23 mm
(0.678 in.)
127.23 mm
(5.009 in.)
132.82 mm
(5.229 in.)
NI cDAQ-9135
NI CompactDAQ
 Loading...