1-14 | ni.com
Chapter 1 Getting Started with the cDAQ Controller
Note You can configure network settings using MAX on a host computer. Refer to
the LabVIEW Real-Time Target Configuration topic of the Measurement &
Automation Explorer Help for information.
Note You can configure the cDAQ controller to launch an embedded stand-alone
LabVIEW RT application each time you boot the controller. Refer to the Building and
Deploying a Stand-Alone Real-Time Application topic of the LabVIEW Real-Time
Module Help for more information about startup applications.
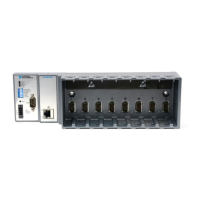
Connecting to the Network through the Ethernet Port
(NI cDAQ-9132/9133/9134/9135/9136/9137 for LabVIEW Real-Time) Use a shielded
straight through Category 5 Ethernet cable to connect the cDAQ chassis to an Ethernet network.
1
Connect one end to RJ-45 Ethernet port 1 on the controller, and the other end directly to your
computer or any network connection on the same subnet as your computer. Refer to the Ethernet
Cabling section for information about the Ethernet cable.
Caution To prevent data loss and to maintain the integrity of your Ethernet
installation, do not use a cable longer than 100 m.
The cDAQ controller attempts to initiate a DHCP network connection at powerup. If the cDAQ
controller is unable to obtain an IP address, it connects to the network with a link-local IP address
with the form
169.254.x.x. The host computer communicates with the cDAQ controller over
a standard Ethernet connection.
Troubleshooting Network Communication in the
LabVIEW Real-Time Controller
(NI cDAQ-9132/9133/9134/9135/9136/9137 for LabVIEW Real-Time) If the cDAQ
controller cannot communicate with the network, you can perform the following troubleshooting
steps.
Note Windows XP users may be required to manually install the USB driver on the
host computer. The USB driver is installed in the National Instruments\
CompactRIO\Staging\USBLAN
directory.
1. Use a USB A-to-B cable to connect the USB device port of the cDAQ controller shown in
Figure 1-1, to a USB port on the host computer.
When you connect the cDAQ controller to the host computer, the USB driver creates a
virtual network interface card and assigns an IP address to the cDAQ controller in the
format of 172.22.11.x.
1
You can either use a shielded straight through Category 5 Ethernet cable or an Ethernet crossover cable to
connect the cDAQ chassis directly to your computer.
 Loading...