Installation
A1-64
E 2000 Nordson Corporation
All rights reserved
41-3000V
Issued 5/00
A3EN-04-[3V-A-AAXP]-12
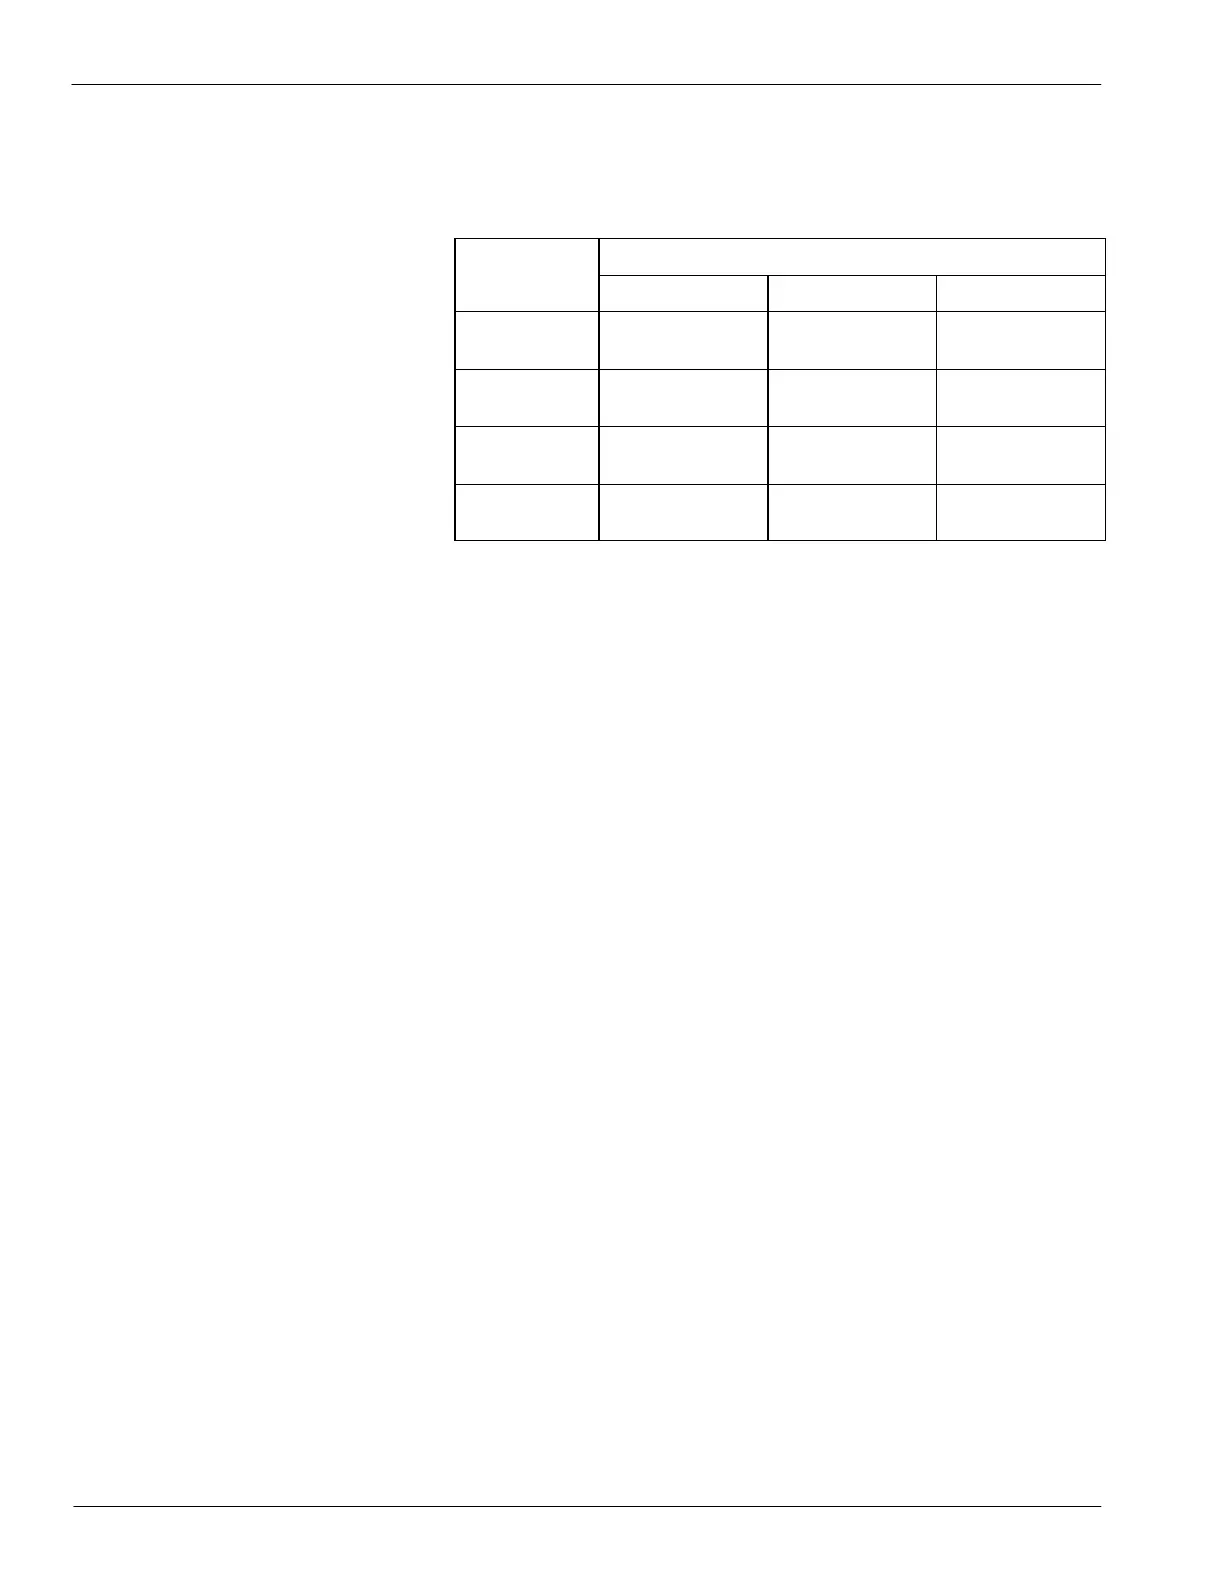
3. Check the Multipurpose display. The displays shows the default
setting for the bead start or end point. Refer to Table A 3-19.
Table A 1-19 Defaults for Bead Start and End Points
Start or End
Default Setting
Point Time (ms) Distance (mm) Distance (in.)
Start point for
first bead
50 ms 50 mm 5.0 in.
End point for
first bead
100 ms 100 mm 10.0 in.
Start point for
second bead
150 ms 150 mm 15.0 in.
End point for
second bead
200 ms 200 mm 20.0 in.
4. Press the Up or Down key below the Multipurpose display to change
the current setting. The display flashes.
5. Press the Enter key to save the new setting. The Multipurpose
display stops flashing.
6. Repeat steps 2--5 until you have programmed all bead start and end
points for the pattern.
7. If you have a second pattern to apply to your product, repeat
steps 1--6 to program the bead start and end points for the
second pattern.
8. Go to the next procedure, Storing a Pattern Set.
NOTE: Although the system will allow you to use a pattern set as
soon as you program it, it is best to define and store all the pattern
sets you will need. If you use a pattern set you have not stored and
then you later program a new pattern set, the system will replace the
pattern you were using with the new pattern as you program it into the
system.
og
a
ga
a
e
Se
(contd.)
 Loading...