3-7 Installing the Video Input Unit
3-7-3 Installation Method for Video Input Unit
This section describes the method for mounting the Video Input Unit to the PT.
Note • Do not touch the surface of the substrate or mounted devices with your bare hands. Also,
discharge static electricity from your body in advance.
• After mounting the Video Input Unit to the PT, all fittings must be tightened with the pro-
vided screws. Tighten the screws to a torque of 0.6 N·m.
• Always turn OFF the power to PT before mounting or removing the Unit. Follow the proce-
dures and install the Unit correctly.
• When the Video Input Unit is installed, the depth of the PT will increase by 24 mm.
To install the Video Input Unit, secure sufficient space inside the control panel beforehand.
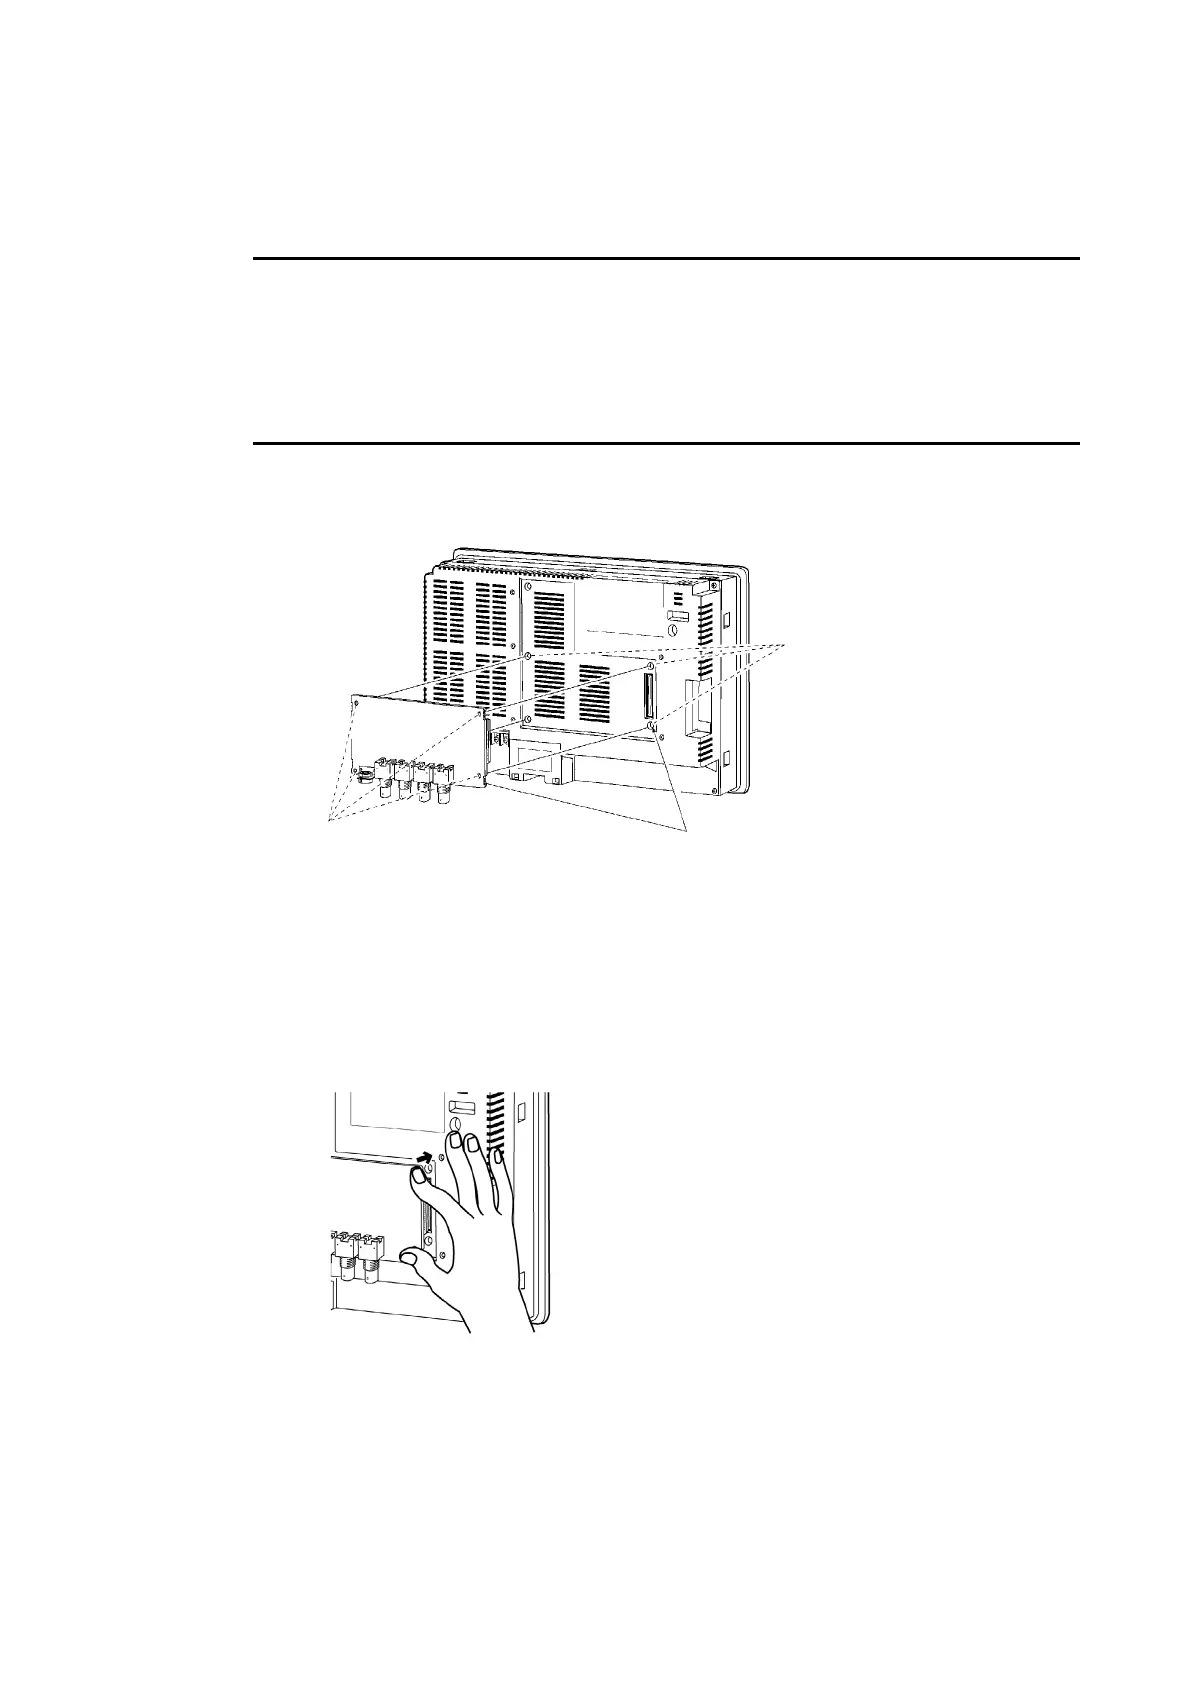
● Installing the Video Input Unit
Screw holes for
attaching expansion
boards
Position of screws for
attaching Board to PT
Align the positions of the holes.
1. Mount the Video Board onto the back of the PT so that its expansion interface connector
is inserted into the expansion interface connector on the back of the PT and the respec-
tive screw holes are aligned. Hold the Video Board by the corners keeping it parallel to
back of the PT.
Push firmly on the connector end of the board to ensure that it is inserted sufficiently.
Press here to insert the
Video Board.
3-29
 Loading...