Opticon ESL
ESL Server manual
v1.0.62.2
16
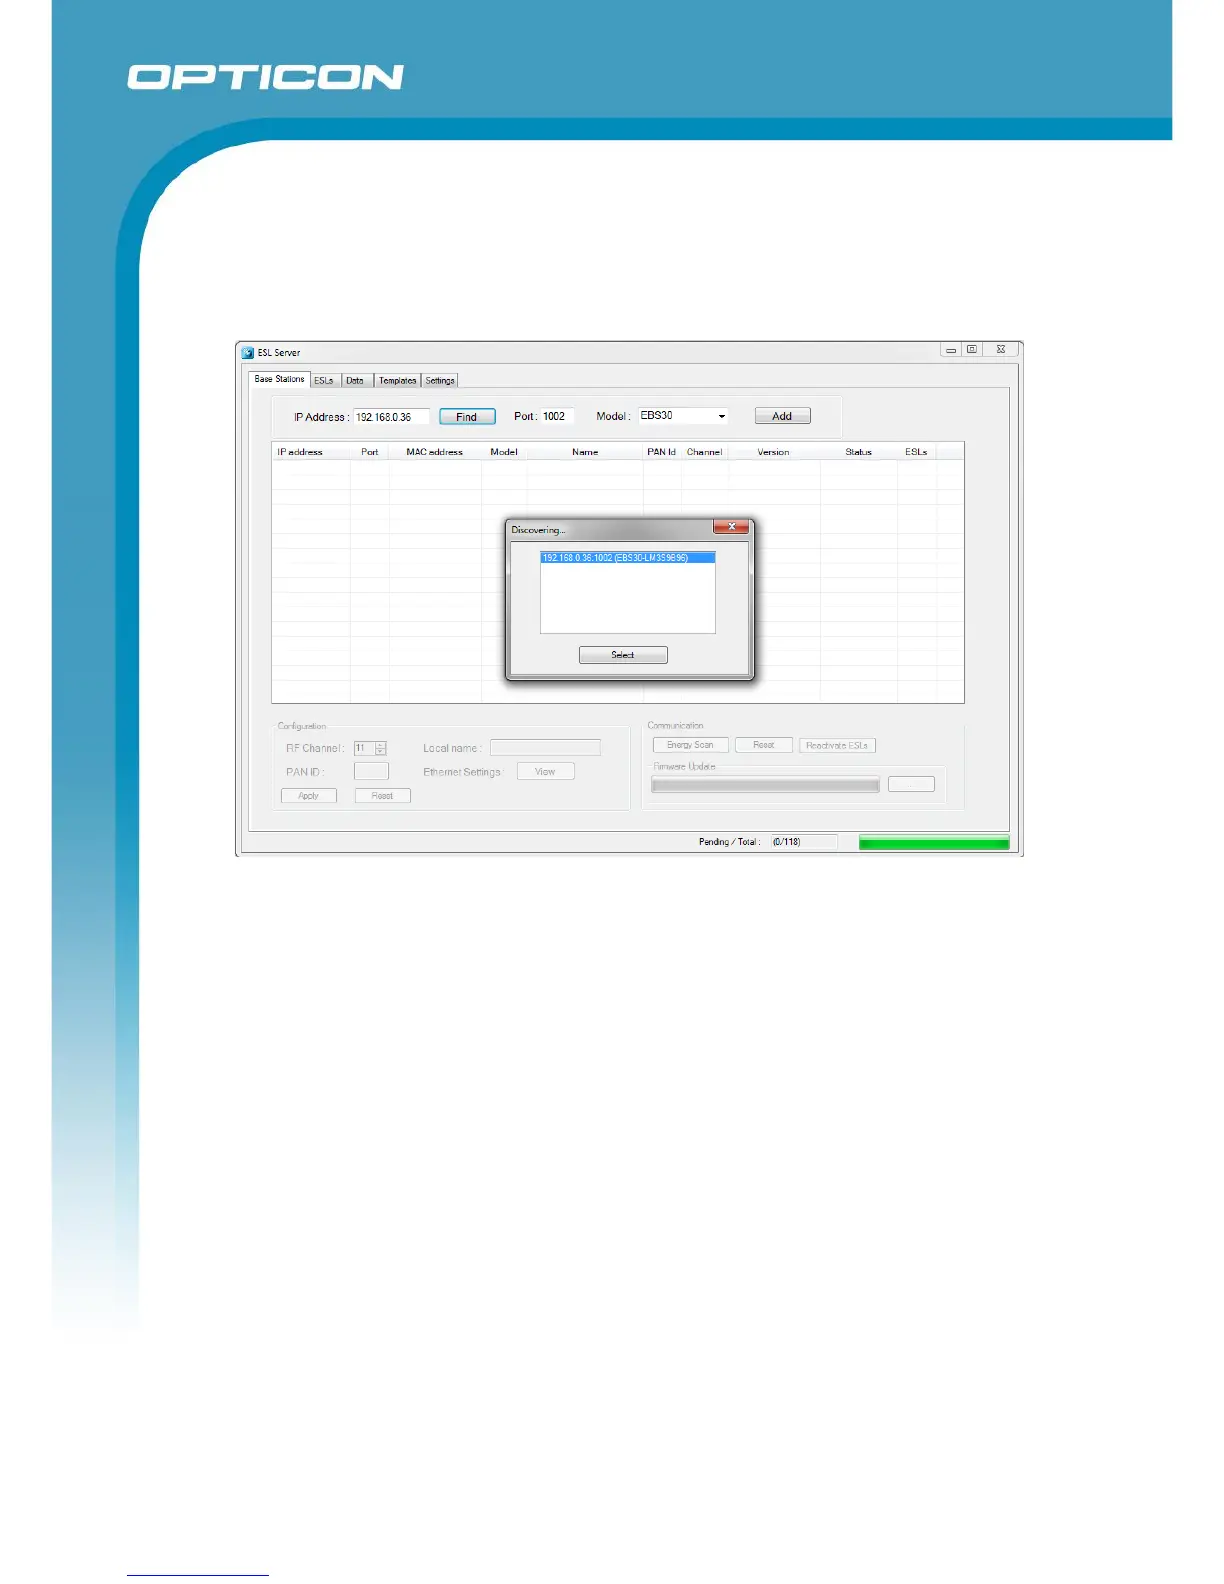
After starting the application for the first time, no base station will be available to communicate
with ESLs.
Press the ‘Find’ button on the ‘Base stations-tab to find the connected base station.
Select the discovered base station to add and connect your PC to the base station.*
If activated ESLs are nearby, then the ESL count will start incrementing as they start connecting
to the base station. However if the ESLs are still ‘deactivated’, they will first have to be
reactivated.
* Note 1: when the base station is connected to the LAN with DHCP the IP address can vary
over time, making it necessary to remove the old base station entry by pressing the ‘Delete’-key
of your keyboard and discovering the base station again using the ‘find' button. Using static IP
leases in the DHCP server can resolve this problem.
* Note 2: when the base station is connected to the LAN without DHCP, the default IP
address/subnet mask of the base station is 169.254.19.63 / 255.255.0.0. Configure a PC or
laptop on the same subnet to change this using a web browser.
3.3. Installing and activating the ESLs
On arrival the ESLs already have their batteries inserted.
However, to allow safe transport by airplane, it is likely that the ESLs will show a
‘DEACTIVATED’ message in their left top corner. This means the ESLs do not emit any radio
signals and won’t be searching for base stations at this point.
 Loading...