Section
(........:.1=-=-=ns=-=t=-al:...:..:la=-t=--io::....:.n-=--
______________
____...)
Gl
Installation
Notes
• Check
all connections and systems before
final installation.
•
Do
not use unauthorized parts
as
this may
cause malfunctions.
• Consult your dealer if installation requires
dril-
ling of holes or other modifications to the
vehi-
cle.
•
Do
not install this unit where:
- it may interfere with operation of the
vehi-
cle.
- it may cause injury
to
a passenger
as
are-
sult of a sudden stop.
•
Do
not install the display where it may
(i)
ob-
struct the driver's vision, (ii) impair the
perfor-
mance of any of
the
vehicle's operating
systems
or
safety features, including
air
bags,
hazard lamp buttons or (iii) impair the driver's
ability to safely operate the vehicle.
•
The
semiconductor laser will
be
damaged if it
overheats. Install this
unit
away from hot
places such
as
near the heater outlet.
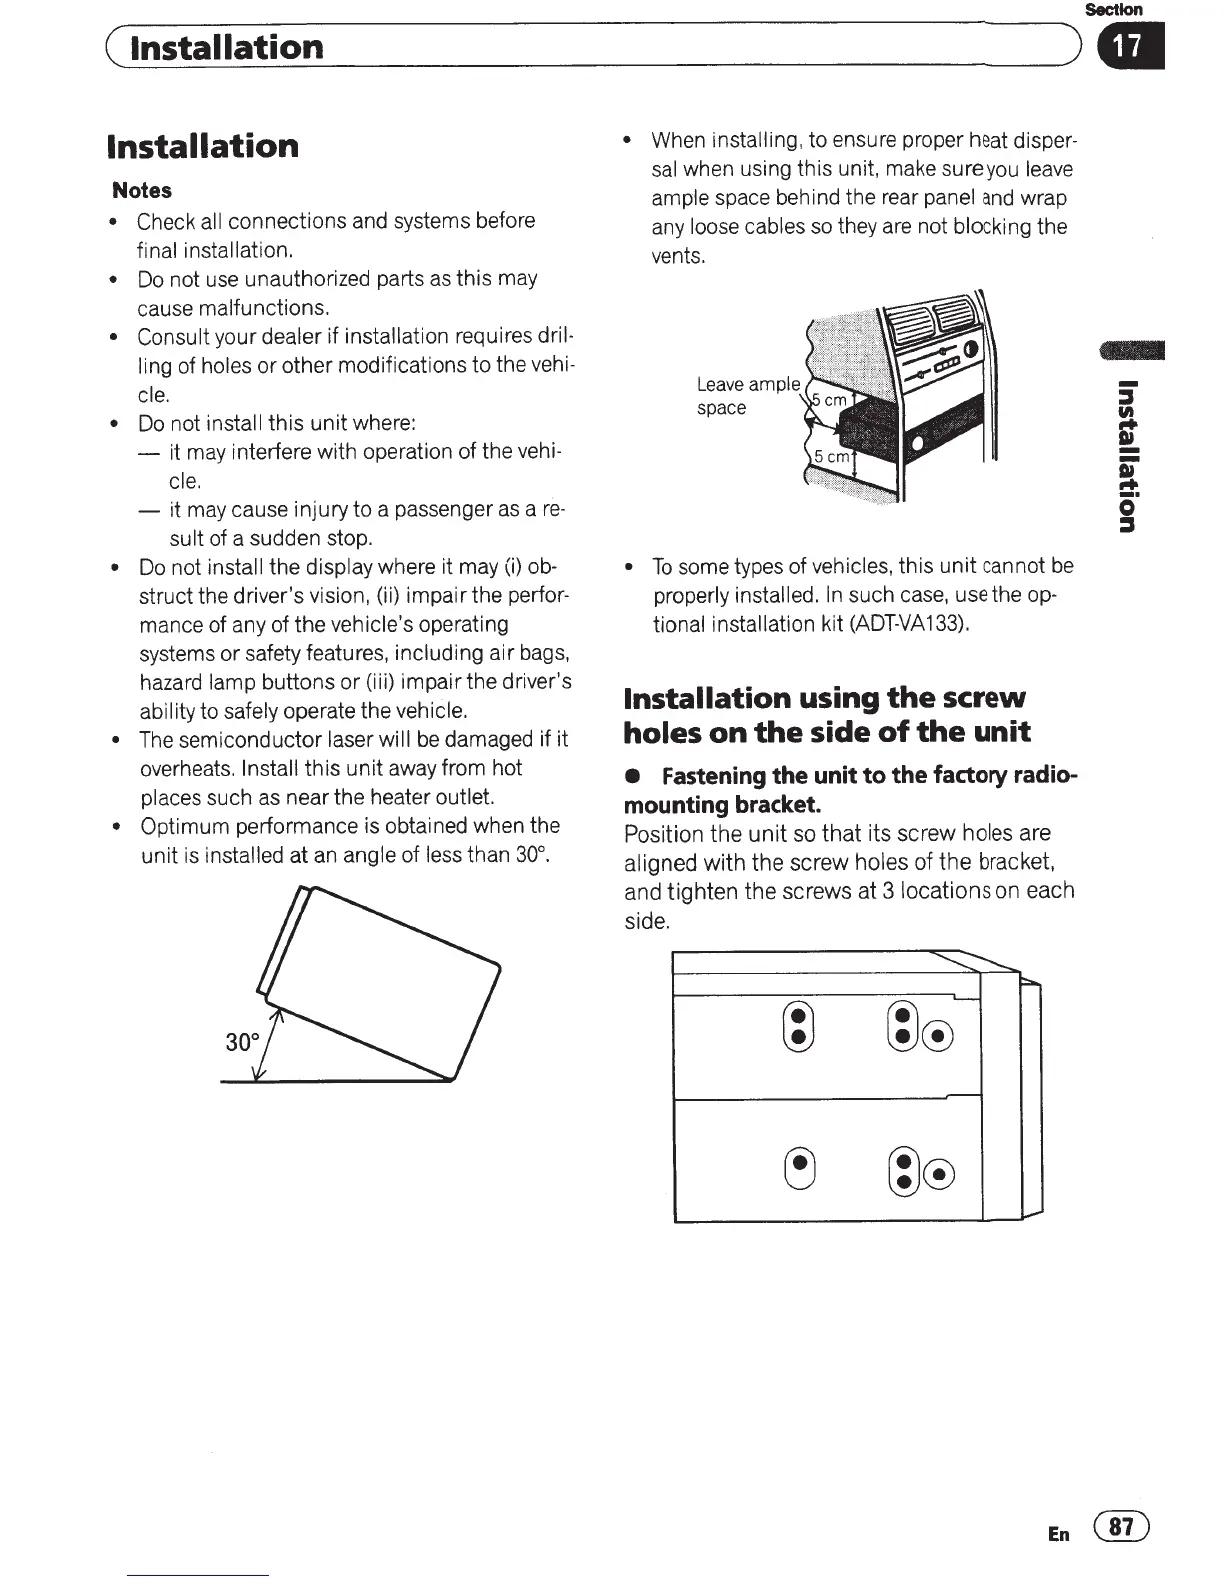
• Optimum
performance is obtained when the
unit
is
installed at an angle of less than
30°.
•
When installing, to ensure proper heat disper-
sal
when using this unit, make sure
you
leave
ample space behind the rear panel
and
wrap
any
loose cables so they are not blocking the
vents.
Leave
ample
space
•
To
some types of vehicles, this
unit
cannot
be
properly installed.
In
such case, use the
op-
tional installation kit
(ADT-VA
133).
Installation
using
the
screw
holes on
the
side
of
the
unit
•
Fastening the unit
to
the
factory
radio-
mounting bracket.
Position
the
unit
so
that
its
screw
holes are
aligned
with
the
screw
holes
of
the
bracket,
and
tighten
the
screws
at
3 locations on each
side.
.............._-......_
::::...
(;)
(;)(!)
L-
-
~
(;)®
_..
En@

 Loading...