seaaon
D (
Installation
CD
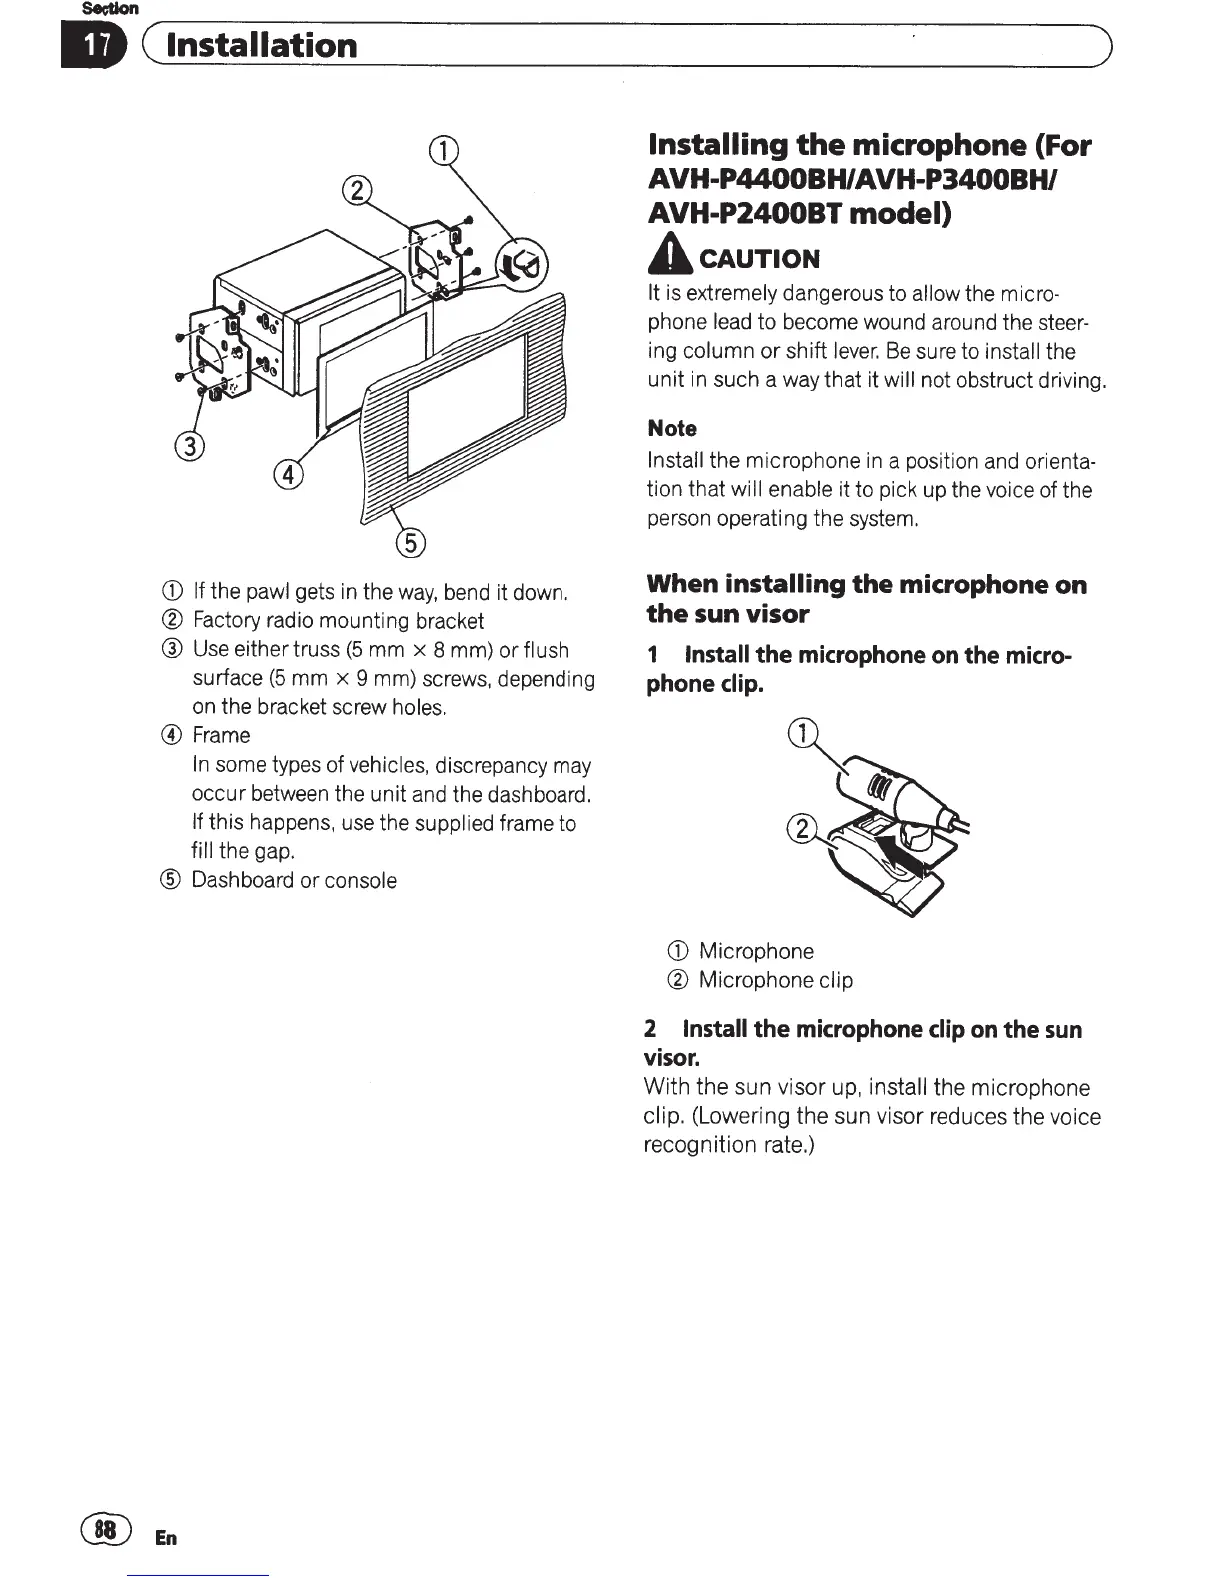
If
the pawl
gets
in
the
way,
bend it down.
®
Factory radio mounting bracket
®
Use either truss
(5
mm x 8 mm) or flush
surface
(5
mm
x 9 mm) screws, depending
on the bracket screw
holes.
®Frame
In
some types of
vehicles,
discrepancy may
occur between the unit and the dashboard.
If
this happens, use the
supplied frame to
fill
the gap.
®
Dashboard or console
@En
Installing
the
microphone (For
AVH-P4400BH/AVH-P3400BH/
AVH-P2400BT
model)
A cAUTION
)
It
is
extremely
dangerous to
allow the
micro-
phone
lead
to become wound around the steer-
ing column
or
shift
lever.
Be
sure to
install
the
unit
in
such a way that it
will
not obstruct driving.
Note
Install
the microphone
in
a position and orienta-
tion that
will enable
it to pick up the voice of the
person operating the system.
When
installing
the
microphone on
the
sun visor
1
Install
the
microphone on the micro-
phone
clip.
CD
Microphone
®
Microphone
clip
2
Install
the
microphone
clip
on the
sun
visor.
With
the
sun visor up,
install
the
microphone
clip.
(Lowering
the
sun visor reduces
the
voice
recognition rate.)
 Loading...