82
10
Controlling the rest of your system
About the Remote Setup menu
The Remote Setup mode is set by pressing the number button while pressing RCU SETUP. The different items
on the Remote Setup menu are described below. For their setting procedures, refer to the explanations for the
respective items.
Setting What it does
Preset recall
Preset codes can be set for the various input functions. The remote control codes of a number of other
devices (including products of other brands) are preset in the remote control to allow these devices to be
operated. See Selecting preset codes directly on page 82.
Code learning
If the desired operations cannot be performed even though you have set the preset codes, the remote control
signals of other devices can be learned directly. See Programming signals from other remote controls on
page 83.
Direct function
This is a setting for changing only the remote control unit’s operation screen, without changing the receiver’s
input, when the remote control unit’s input function buttons are pressed. This is convenient for using the
remote control unit for devices not connected to the receiver. See Direct function on page 84.
Erase learning
This function is used to erase remote control codes that have been learned. Codes learned for the different
input functions can be erased individually. See Erasing one of the remote control button settings on page 83.
Back light
The backlight lighting pattern can be selected from among four modes, in consideration of convenience and
battery service life. See Setting the backlight mode on page 84.
Reset function
This is a function for resetting preset codes that have been set. Key resetting can be done for individual input
functions. See Erasing all learnt settings that are in one input function on page 84.
All reset
This is a function for resetting all remote control unit settings you have made to the defaults set upon ship-
ment from the factory. See Resetting the remote control settings on page 85.
Change RC
mode
If you have multiple Pioneer receivers, amplifiers, etc., this setting can be used to prevent other units from
operating simultaneously when the remote control unit is operated. See Operating multiple receivers on page
82.
Note
! You can cancel or exit any of the steps by pressing RCU SETUP.
! After one minute of inactivity, the remote automatically exits the operation.
Operating multiple receivers
Up to four receivers can be operated discretely using this receiver’s remote control when using multiple receiv-
ers, provided they are of the same model as this receiver. The receiver to be operated is switched by inputting the
preset code to set the remote control setting.
! Set the remote modes on the receivers before using this function (see Remote Control Mode Setup on page
101).
1 Press and hold RCU SETUP, then press ‘4’ for three seconds.
Release the button after the LED flashes once. The LED continues to flash.
! To cancel the preset setup mode press RCU SETUP.
2 Press the number button for the receiver (“Receiver 1” to “Receiver 4”) you wish to
operate.
For example, to operate “Receiver 2”, press ‘2’.
If the LED lights for one second and continues to flash, the setting has been successfully completed.
When the preset code is input, the LED flashes three times to indicate that the setting has failed.
Setting the remote to control other components
Most components can be assigned to one of the input function buttons (such as DVD or CD) using the compo-
nent’s manufacturer preset code stored in the remote.
However, there are cases where only certain functions may be controllable after assigning the proper preset
code, or the codes for the manufacturer in the remote control will not work for the model that you are using.
If you can’t find a preset code that matches the component you want to control, you can still teach the remote
individual commands from another remote control (see Programming signals from other remote controls on
page 83).
! With the TV CONTROL buttons, the TV can be operated regardless of the input set for the remote control’s
operation mode. When using one TV set, we recommend assigning the same TV’s preset codes to the
TV CONTROL INPUT button and the TV button. When using two TV sets, for better convenience assign the TV
connected to the MONITOR OUT terminals to the TV CONTROL INPUT button, the other TV to the TV button.
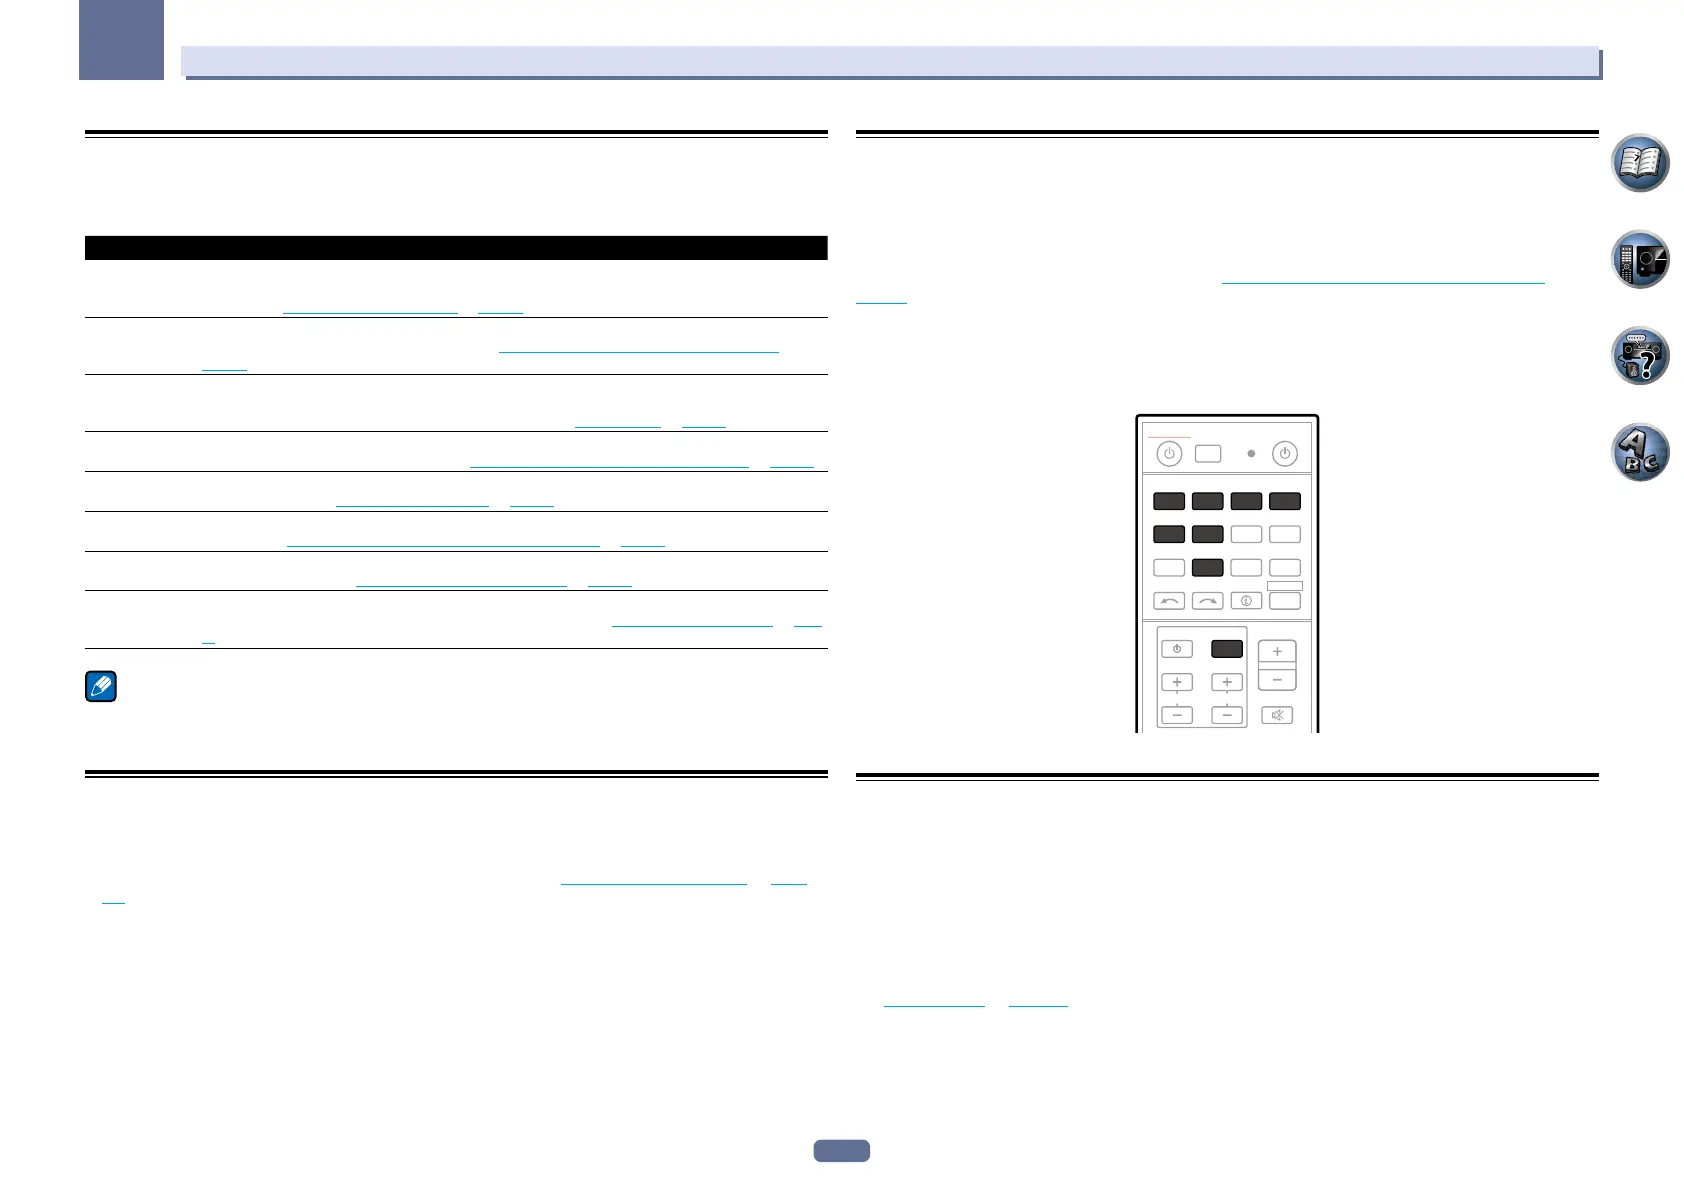
! Devices may be assigned to the following input function buttons.
CH
TV CONTROL
INPUT
INPUT
SELECT
iPod
USB CBL
SAT
MHL
TUNER
ADPT
CDTV
SOURCERECEIVER
BDR
BD DVDDVR
NET
HDMI
RECEIVER
MUTE
VOLUME
VOL
STATUS
RCU SETUP
ALL ZONE STBY
DISCRETE ON
Selecting preset codes directly
1 Press and hold RCU SETUP, then press ‘1’ for three seconds.
Release the button after the LED flashes once. The LED continues to flash.
! To cancel the preset setup mode press RCU SETUP.
2 Press the input function button for the component you want to control.
To assign the preset codes of the TV to be operated with the TV CONTROL function, press the TV CONTROL
INPUT button.
The LED blinks once and flashes continuously.
3 Use the number buttons to enter the 4-digit preset code.
See Preset code list on page 127.
If the LED lights for one second and continues to flash, the setting has been successfully completed.
When the preset code is fully input, the LED flashes three times to indicate that the setting has failed. If this hap-
pens, enter the 4-digit preset code again.
 Loading...