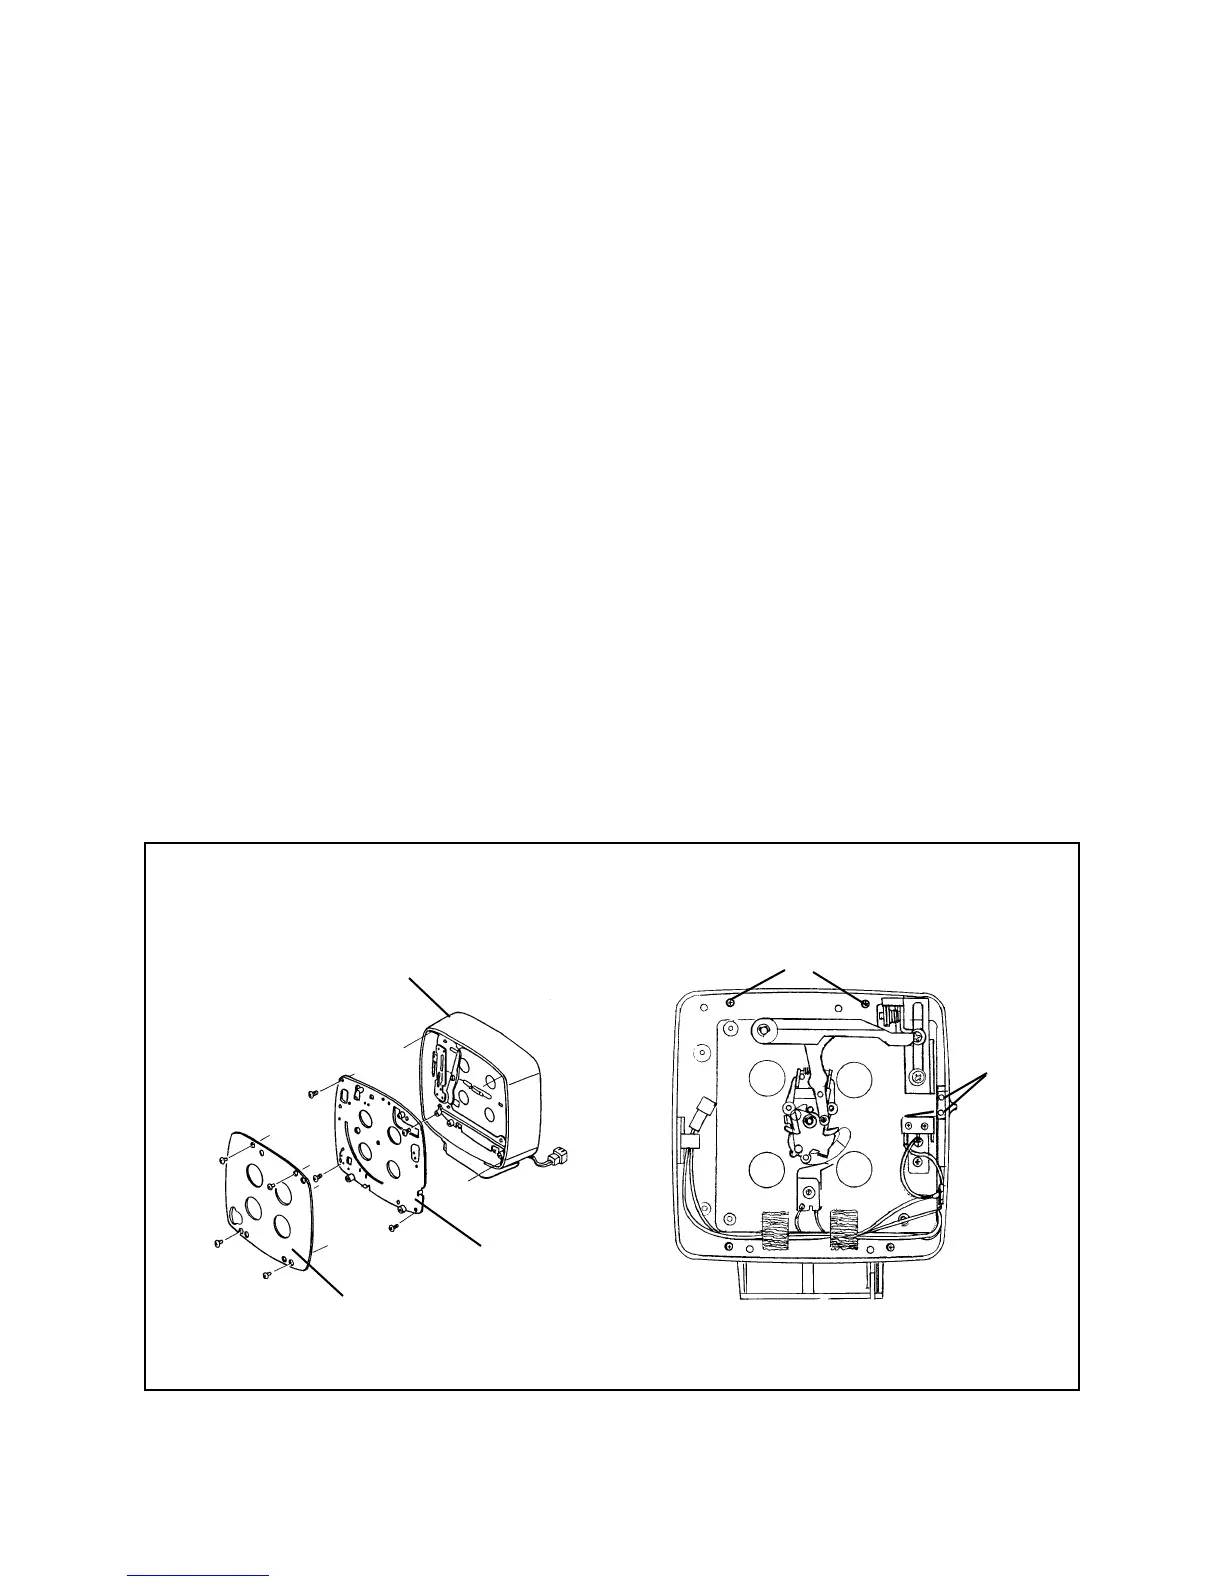
23
Aperture and Shutter Mechanisms from the Front Panel
1. Remove the Front Panel containing the Aperture and Shutter Mechanisms from
the Camera Body (See steps in preceding Removing and Replacing Lenses,
Tape Measure, Shutter and Aperture Assemblies procedure).
2. Remove the Lens Board by removing four screws A (Figure 3-11).
3. Remove the Selector Board by removing four screws B.
4. On the Shutter mechanism side, unsolder the two blue wires from the center
terminal of X (Sync) Socket (Figure 3-19). Remove hex nut and lug from
Connector (black wires can be left connected to lug).
5. Remove the Aperture Indicator Knob by removing two mounting screws C.
6. Remove the Aperture and Shutter Mechanisms from the Front Panel by removing
the four screws D from the Shutter Mechanisms side.
Note: To re-assemble, perform steps 1 through 6 in reverse order. Use Loctite
when re-installing screws D.
Figure 3-11. Removing aperture and shutter mechanism
Front Panel
A
B
Lens Board
Selector Board
D
Screws
C
Screws
 Loading...