Page 13
Cable Entry
There are 4 cable gland knock-outs on the base of the wall mount Ultra 3 (3
x 0.79" (20mm), 1 x 0.63" (16mm) and 4 on the rear (4 x 0.73" (18mm)).
Select which ones you wish to use, and remove them by using a circular
cutter, such as a tank cutter. Take care not to damage the circuit board inside
while undertaking this. Do not use a hammer, as this may cause damage to
the enclosure.
It is recommended that you use suitable cable glands to ensure that the
ingress rating is maintained and that they be tightened to the manufacturers
recommended settings.
Important Information
All cable glands should be tightened to the manufacturer’s specifications.
The terminal compartment cover screws should be tightened to 1.48lb
in.(2Nm)
Care should be taken not to over tighten the screws.
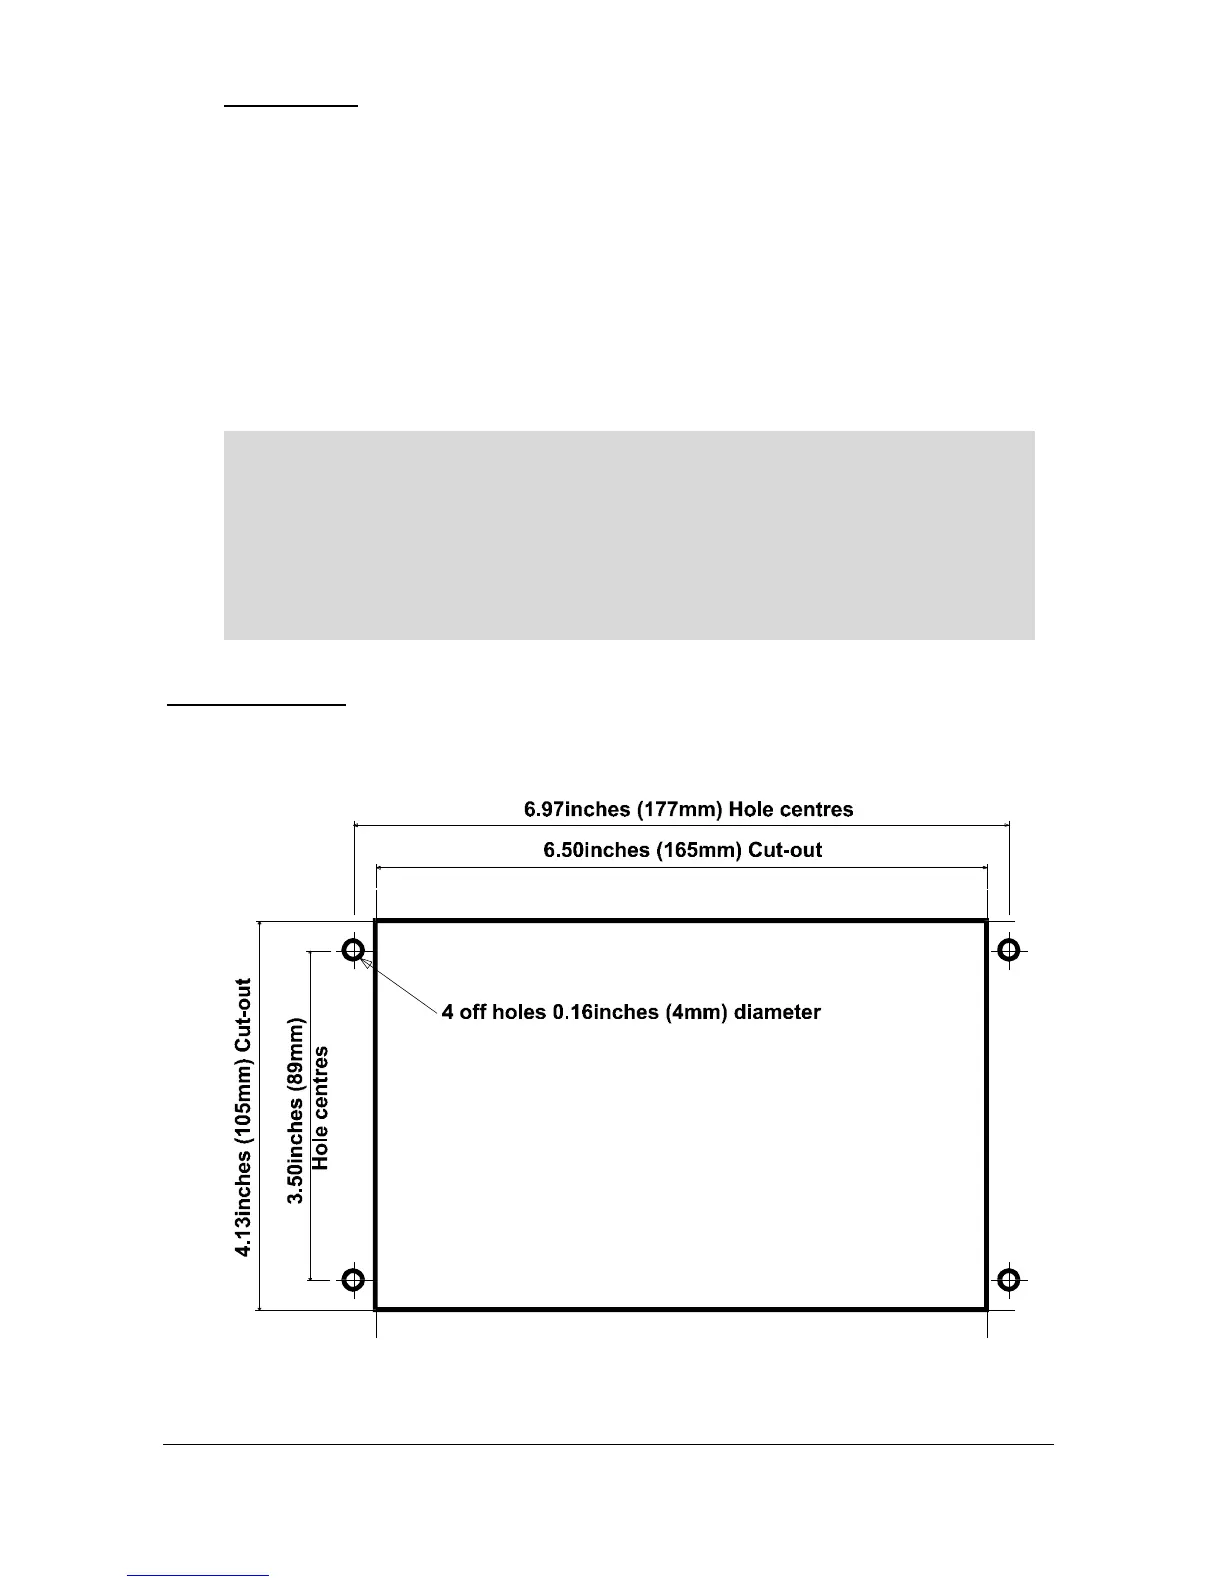
Fascia Mount
The Fascia Mount Ultra 3 should be installed by cutting a hole in the panel,
as detailed below, and securing the unit with the fixings supplied.

 Loading...