The Receiver Application
R&S
®
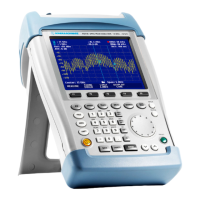
FPC
146User Manual 1178.4130.02 ─ 07
Remote commands to control marker:
●
Chapter 19.13.7, "Marker", on page 302
Note that markers are only available for frequency scans.
Marker settings in the receiver application described elsewhere:
●
"Mkr" > "Marker <x>": Chapter 14.9.1, "Marker Positioning", on page 120
●
"Mkr" > "Marker Type": "Selecting the marker type" on page 122
●
"Mkr" > "Marker Demodulation": Chapter 14.10.4, "Marker Demodulation",
on page 128
●
"Mkr" > "All Markers Off": "Removing markers or delta markers" on page 122
●
"Mkr→" > "Set to <x>": Chapter 14.9.2, "Automatic Marker Positioning",
on page 123
●
"Mkr→" > "Marker Tracking": Chapter 14.9.2, "Automatic Marker Positioning",
on page 123
●
"Mkr→" > "Search Ranges": Chapter 14.9.3, "Marker Search Ranges", on page 124
Synchronizing the bargraph frequency and marker position
You can synchronize the receiver frequency of the bargraph and the position of a
marker in the frequency scan.
1. Press the "Meas" key to open the measurement menu.
2. Select and start a "Frequency Scan".
3. Press the "Mkr" key to open the marker menu.
4. Select a marker and position it on one of the measurement frequencies.
5. Select the "Marker To Fixed Freq" menu item.
The R&S FPC changes the receiver frequency to the marker frequency. At the
same time, the R&S FPC turns on the fixed frequency measurement and measures
the level of the new receiver frequency.
Selecting the marker display mode
For frequency scans based on a channel table, you can select whether the marker
information is displayed in terms of frequency or in terms of a channel number.
1. Press the "Mkr" key to open the marker menu.
2. Select ▼ and the "Marker Display" menu item.
3. Select the marker display mode you prefer.
● "Frequency Display": Shows the marker position in terms of the channel fre-
quency.
● "Channel Display": Shows the marker position in terms of the channel number.
The selection has no effects on the displayed marker level.
Marker Configuration

 Loading...