Chapter 4: Installing the SportPilot 37
4 Installing the SportPilot
4.4 Providing power for the SportPilot
CAUTION:
To prevent the SportPilot draining the battery, always switch off
the power supply when you leave your boat for long periods.
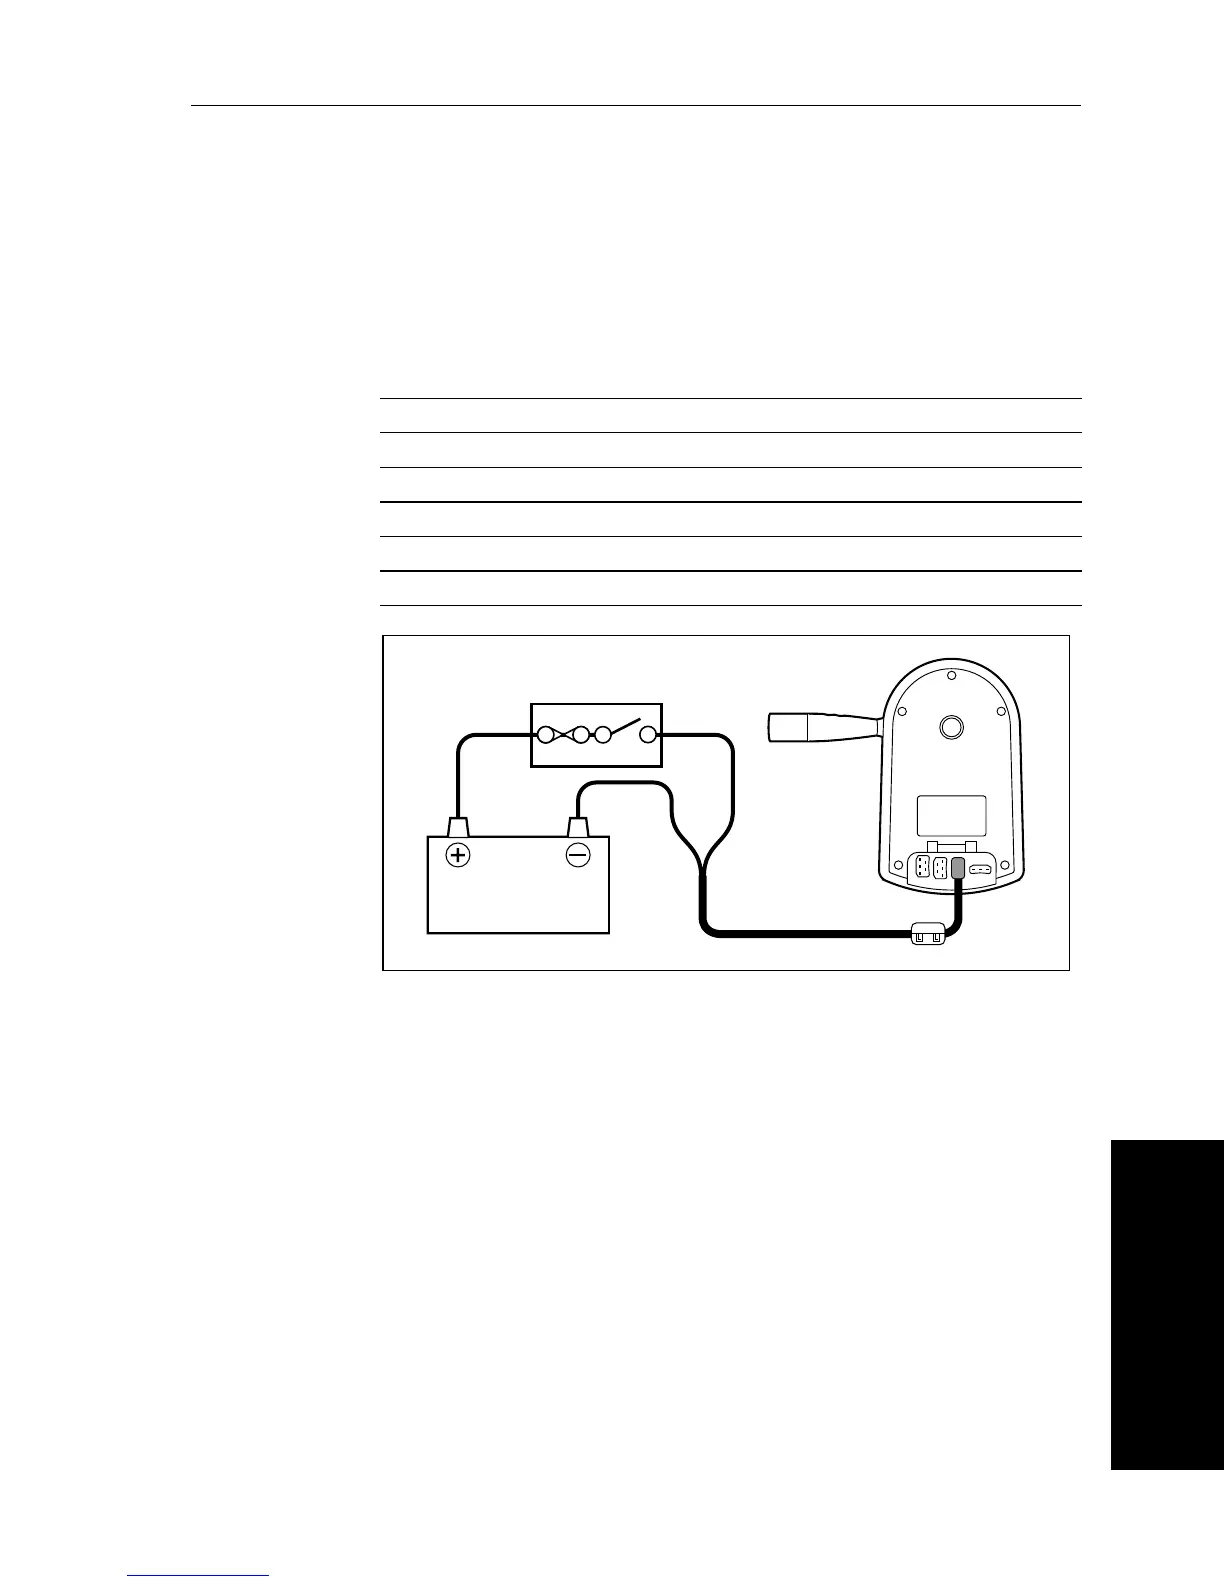
The SportPilot is supplied with a combined power/NMEA/SeaTalk
cable consisting of 6 cores:
1. Connect the brown wire to the positive (12 V) terminal and the
blue wire to the negative (0 V) terminal.
2. Protect the circuit with a 15 A fuse or 10 A thermal over-current
circuit breaker (not supplied).
3. Route the cable to the SportPilot. You will plug the moulded end
into the
POWER/NMEA socket when installing the SportPilot.
Notes:
1. The red and black cores allow you to connect other manufacturer’s
equipment via NMEA (see page 38).
2. The yellow and screen cores can be used as an alternative way of
connecting SeaTalk to the SportPilot (for example, if you have used
a 3-pin deck connector). A positive (+) connection from the power
source to the deck connector will be required.
3. Cut-back and insulate any unused cores.
Brown: 12 V
Blue: 0 V
Red: NMEA +ve
Black: NMEA -ve
Yellow: SeaTalk data +ve
Screen: SeaTalk data -ve
D1360-2
10 A fuse or
15 A circuit breaker
 Loading...