1. Press the [Standard Procedure] key.
2. Press [Drop Position Adjustment].
3. Press [Manual].
4. Select a print mode from [6 Pass / 8 Pass], [12 Pass], [16 Pass], or [32 Pass].
If the ink configuration used for the machine is 4C+W, you can select [12 Pass (White)].
5. Press [Execute].
The test pattern of the drop position adjustment is printed.
According to following steps 6 to 11, cut off the roll media the printed test pattern for adjusting the
drop position. If the paper is not attached to the roll-up unit, Steps 6 to 8 for cutting the leading
edge of the paper are unnecessary.
6. To cut the leading edge of the test pattern for adjusting the drop position, feed the media
by pressing [Feed] or [Rewind].
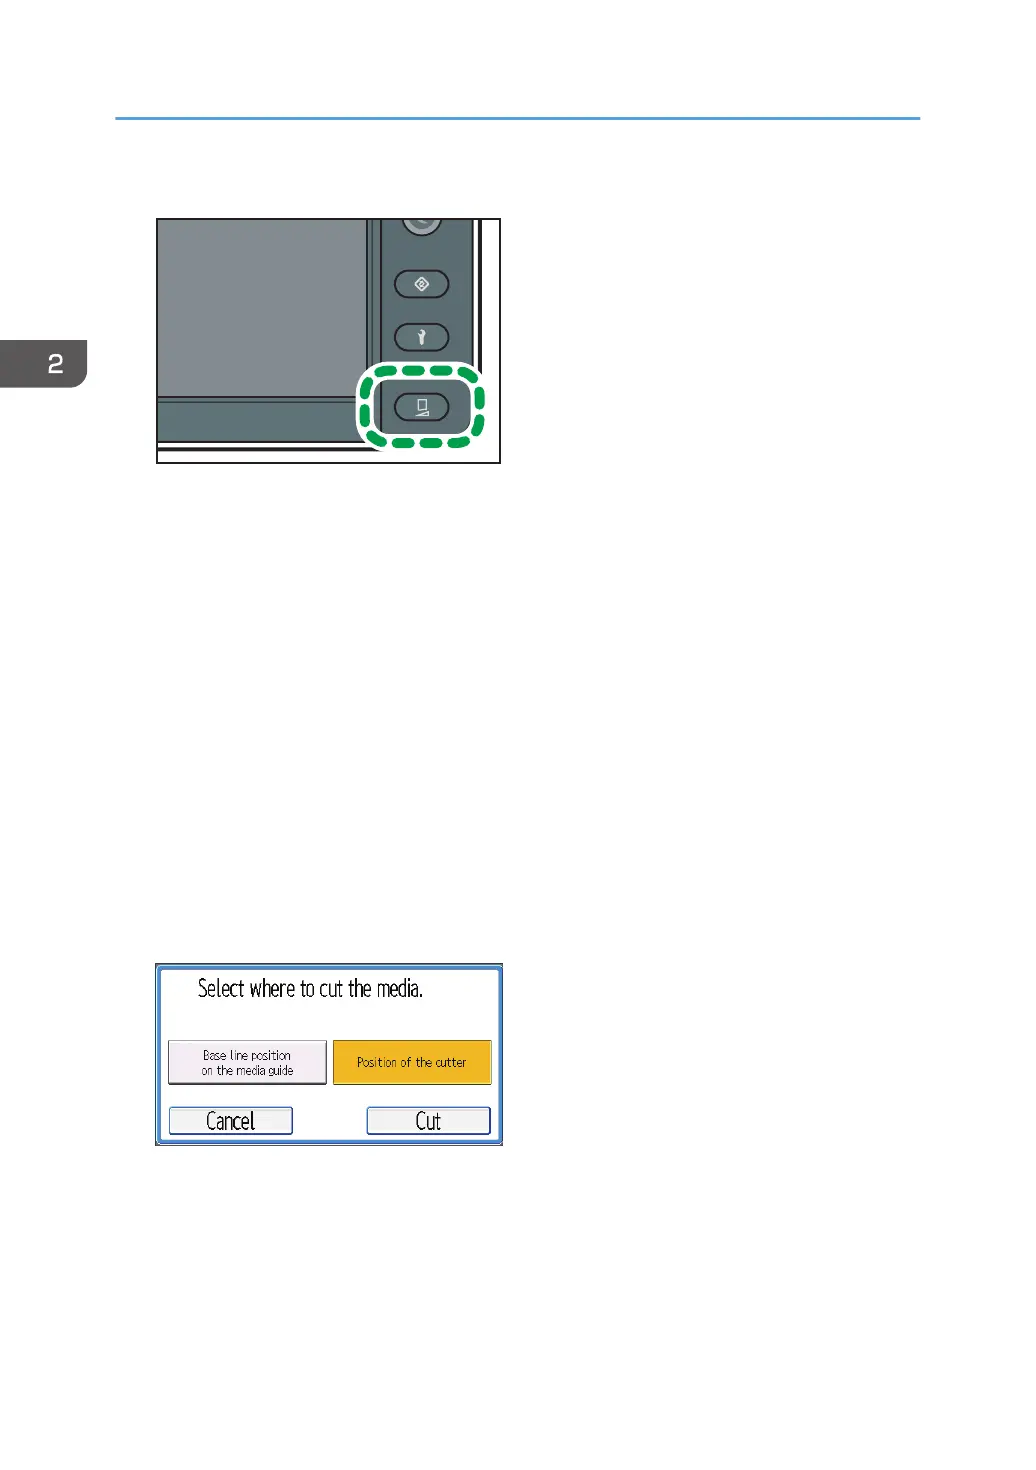
7. Press [Cut].
The selection screen for the cutting position is displayed.
8. Select [Position of the cutter], and press [Cut].
9. To cut the trailing edge of the test pattern for adjusting the drop position, feed the media
to [Base line position on the media guide] by pressing [Feed] or [Rewind].
10. Press [Cut].
The selection screen for the cutting position is displayed.
2. Basic Operations
98
 Loading...