79
Introduction Playing Sounds Editing Sounds
Other Convenient
Functions
Connecting Other
Equipment
Appendix
Settings and Convenient Functions
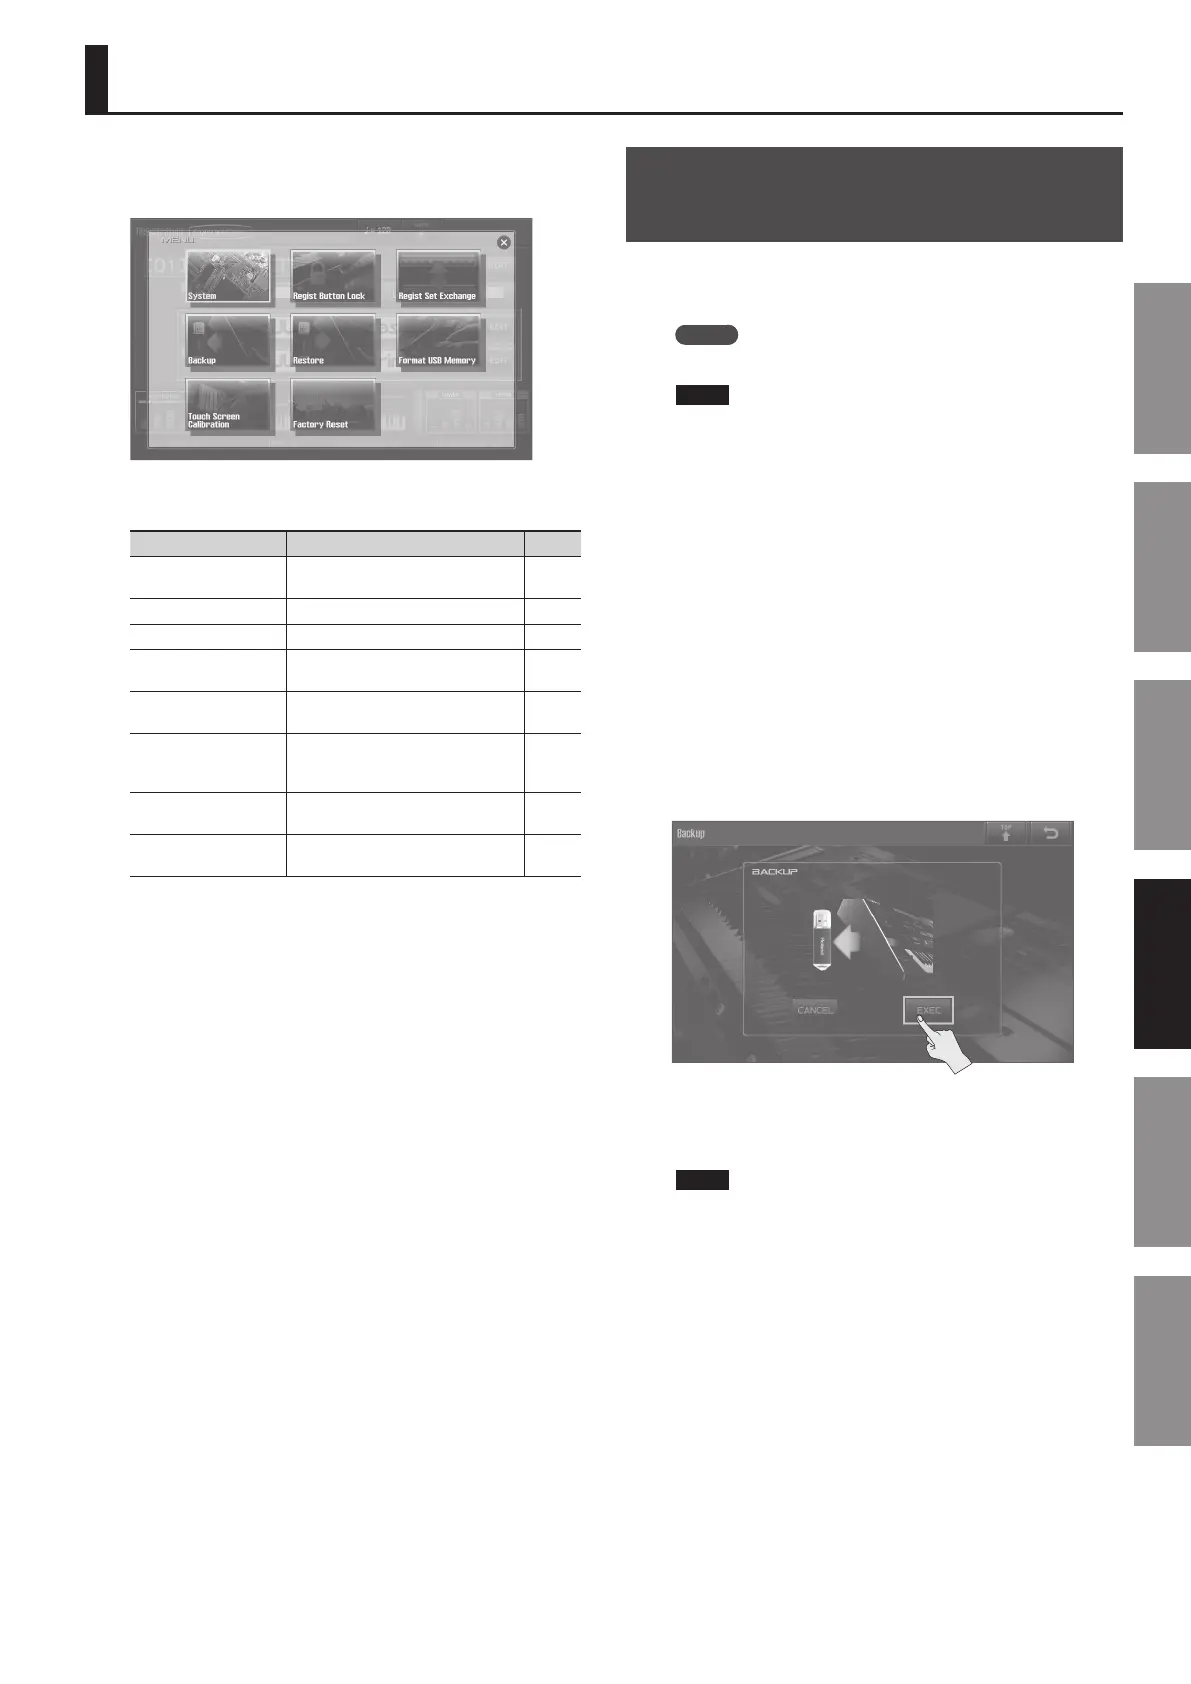
Access the MENU screen to select the desired setting or function.
1. In the MENU screen (p. 34), touch the desired function.
The settings and functions are listed below.
Menu Explanation Page
System
Make overall settings for the entire
JUPITER-80.
p. 83
Regist Button Lock Lock the Registration buttons. p. 81
Regist Set Exchange Exchanges Registration Sets. p. 82
Backup
Backs up the JUPITER-80’s settings to a
USB ash drive.
p. 79
Restore
Restores the JUPITER-80’s settings from
a USB ash drive.
p. 80
Format USB Memory
Format the USB ash drive that’s
connected to the USB MEMORY
connector.
p. 81
Touch Screen
Calibration
Calibrates the touch panel. p. 82
Factory Reset
Resets the JUPITER-80 to its factory
settings.
p. 87
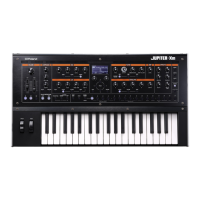
Backing Up All Settings to a USB
Flash Drive
You can back up all of settings in the JUPITER-80 to a USB ash drive
(sold separately), or restore those settings into the JUPITER-80’s
memory.
MEMO
One set of backup data can be saved on a USB ash drive.
NOTE
• When you execute the backup operation, the backup data that
is currently saved on the USB ash drive will be overwritten. If
you want to keep the backup data that’s on the USB ash drive,
copy it to your computer as described in “Backing Up USB Flash
Drive Data to a Computer” (p. 80).
• Never insert or remove a USB ash drive while this unit’s power
is on. Doing so may corrupt the unit’s data or the data on the
USB ash drive.
• Carefully insert the USB ash drive all the way in-until it is rmly
in place.
• Use USB ash drive available from Roland. Proper operation
cannot be guaranteed if other USB device is used.
• Don’t connect anything other than a USB ash drive to the USB
MEMORY connector.
1. In the MENU screen (p. 34), touch <Backup>.
The Backup screen will appear.
2. Touch <EXEC>.
A message will ask “Are you sure?”
3. To execute, touch <OK>.
NOTE
Never turn o the power while the backup operation is
occurring.