45
Performing Multi-track Recording
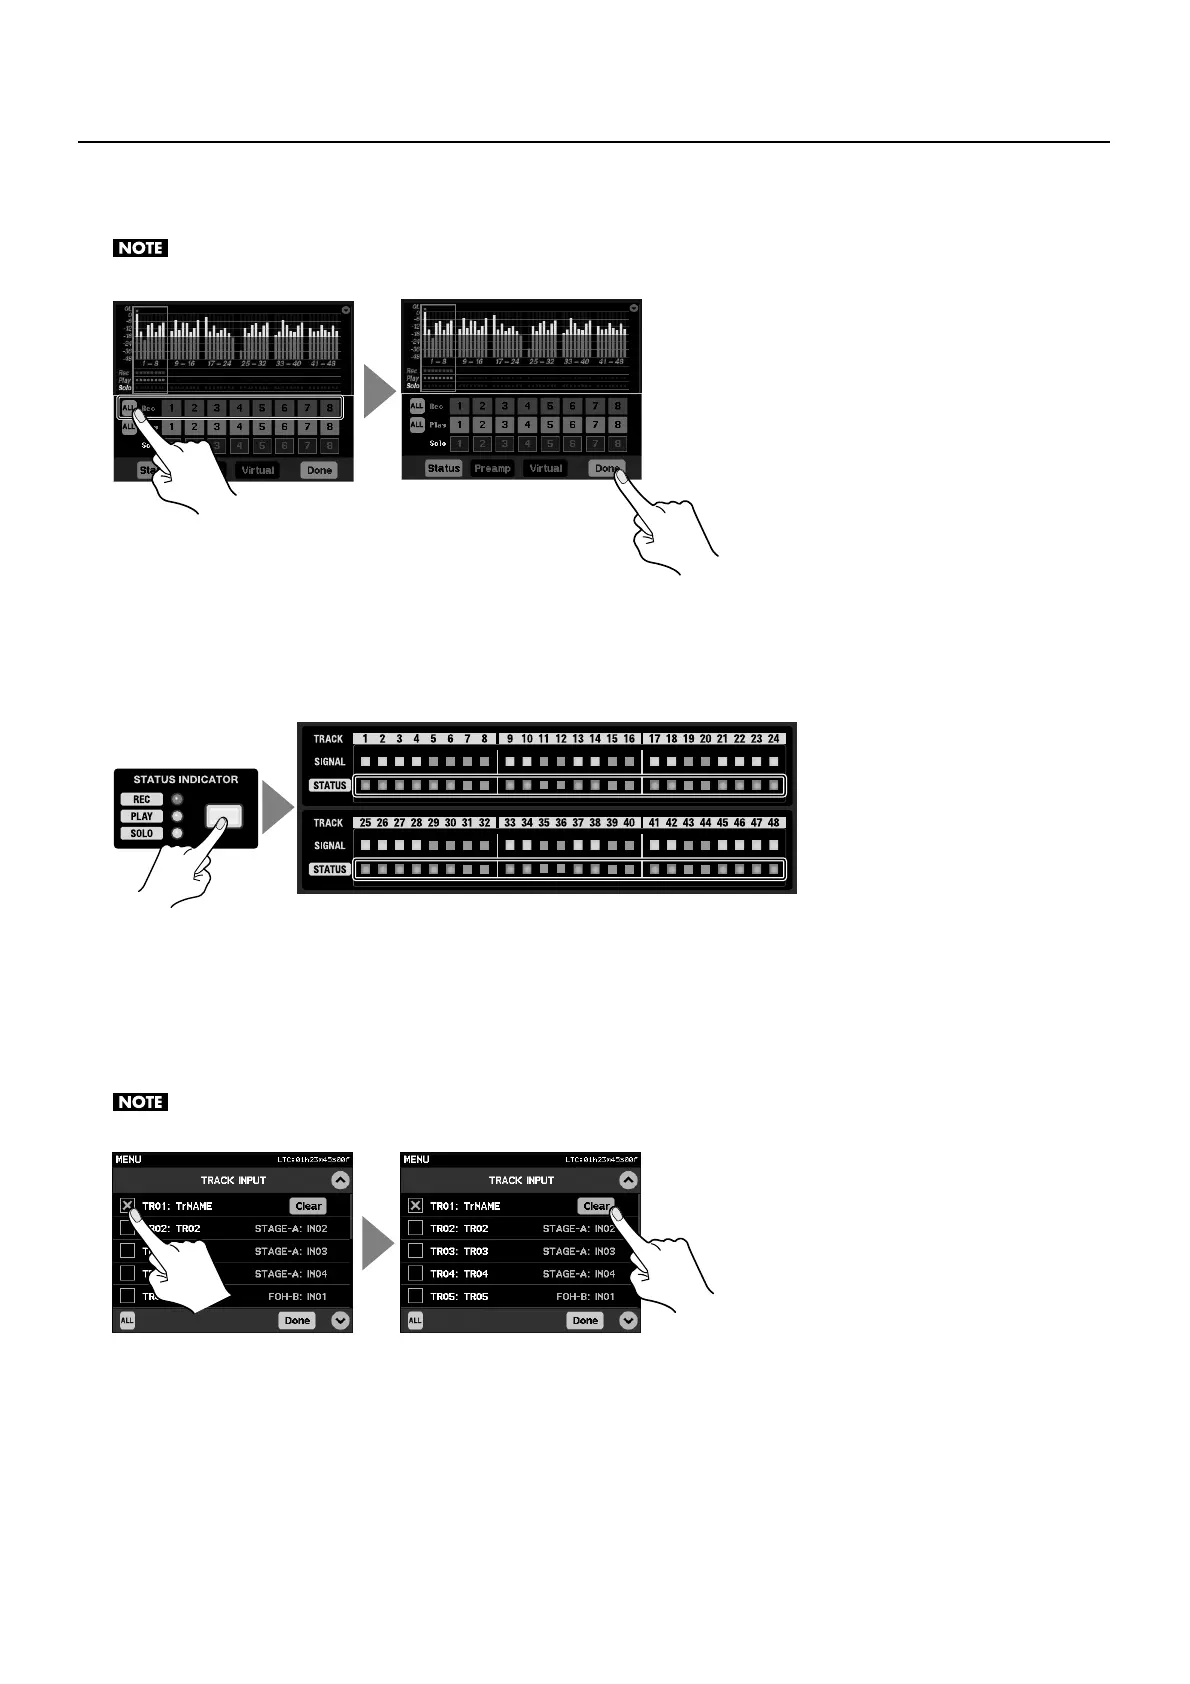
5. Choose the track to record.
Use the [Rec] area of the track status screen to select the track to record. Touching [All] lets you select all tracks as a group.
When you finish making the settings, be sure to touch the [Done] icon to apply the settings.
fig.select-rec-target.eps
6. Check the status.
You can use the [STATUS INDICATOR] button on the front panel to check the settings for tracks 1 through 48. To check recording
tracks, press the [STATUS INDICATOR] button to make the [REC] indicator light up red. The tracks that light up red at the [STATUS]
area for 1 through 48 have been armed for recording.
fig.show-rec-status.eps
Clearing the Assignment of a Channel to a Track
Touching [Clear] at the [TRACK INPUT] screen makes the display change to the screen shown below. Touching the box displayed
to the left of the track number makes [X] appear, and [Clear] is displayed to the right of the track name. Touching [Clear] makes
the display change to a screen for confirming the clear command.
* Touching [Clear] at the [TRACK OUTPUT] screen displays the screen for clearing assignments of the recorded data to the output channels.
When you finish making the settings, be sure to touch the [Done] icon to apply the settings.
fig.clear-ch-assign.eps
 Loading...