19
Installation
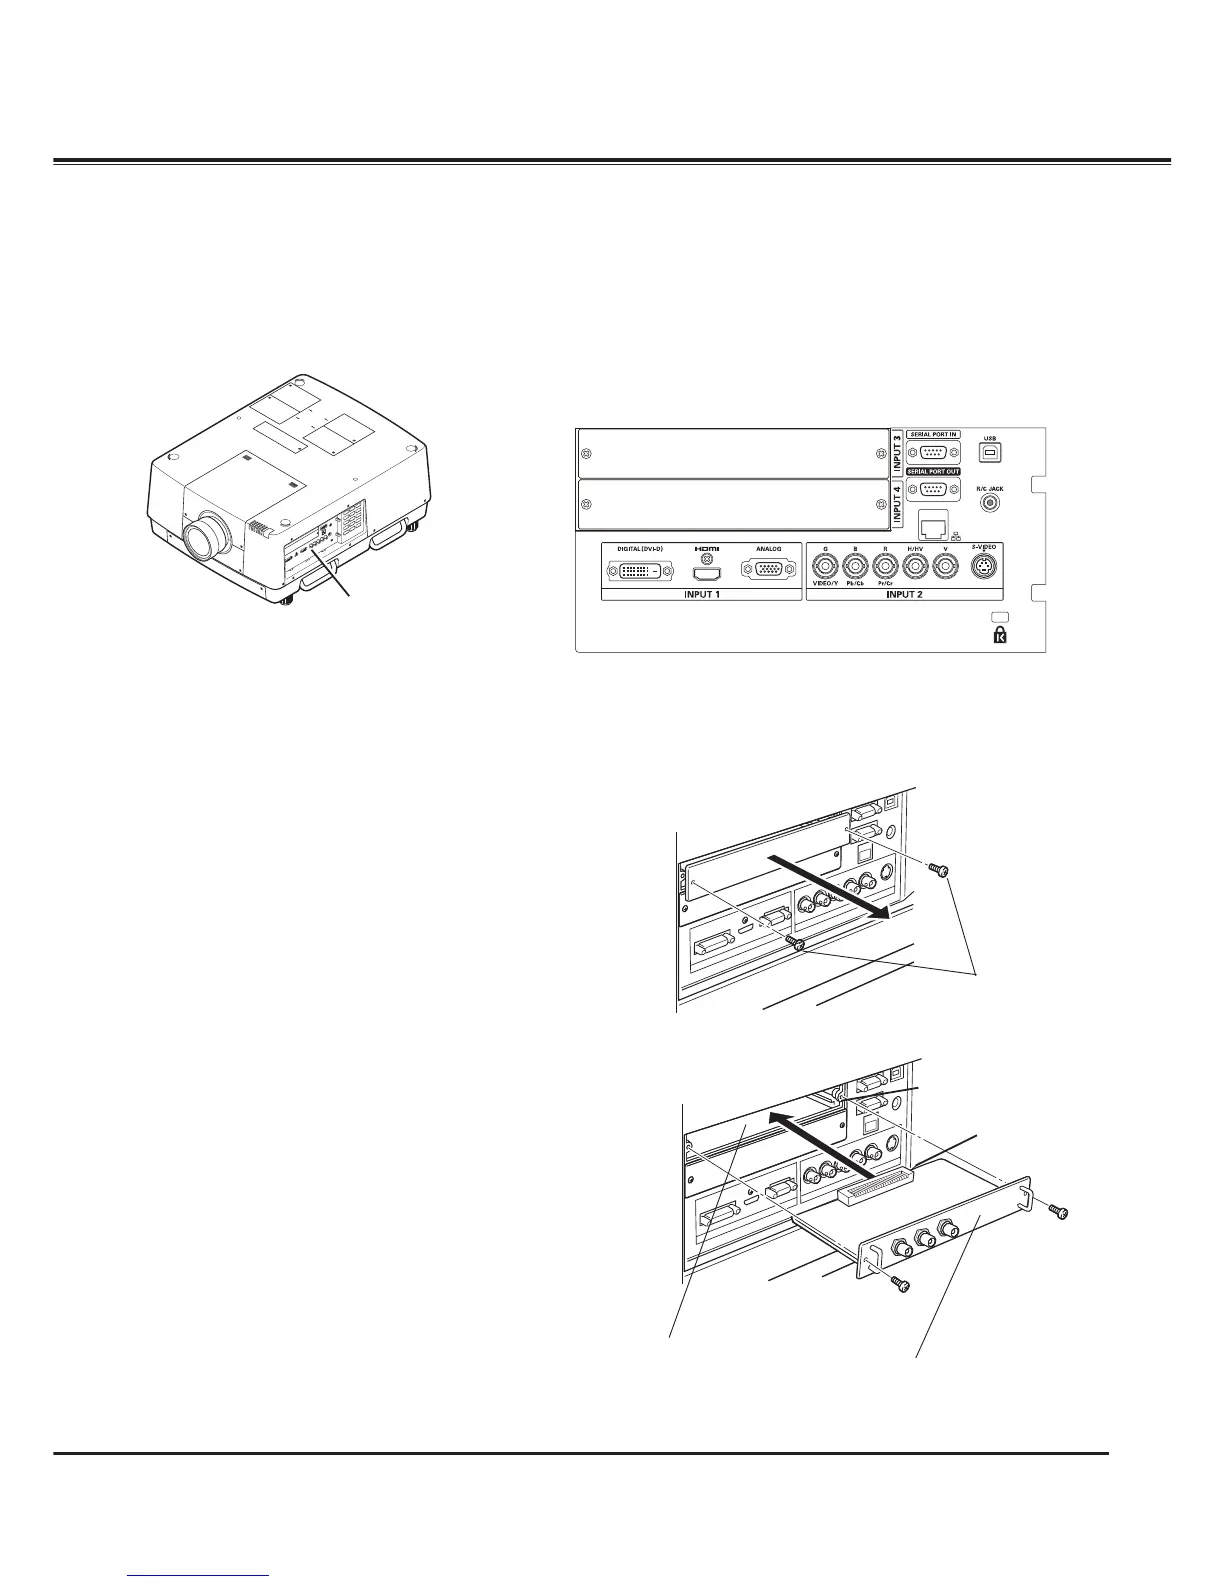
Terminals of Projector
The projector has two replaceable Interface board slots. The projector's functions can be extended by installing
the optional interface boards into the terminal slots. 2 vacant slots (Input 3 and 4) are provided in your
purchasing the projector. For the Optional Interface Boards, contact sales dealer where you purchased the
projector.
Pull out the interface board.
Remove 2 screws from an interface board.
Tighten screws to secure the interface board.
Replace the interface board. Insert a new interface
board along Guide to fit Socket to inside Plug.
INPUT/OUTPUT
TERMINALS
Guide
Socket
Plug
As an example, this figure shows how to
install a Dual-SDI Board.
2 TERMINAL SLOTS (Factory set)
NOTES ON ORDERING OR USING
OPTIONAL INTERFACE BOARD
When ordering or using Optional Interface Board, contact
your sales dealer. When contacting the sales dealer, tell the
Option Control Number (Op.cont.No.) in the menu that is
located on the bottom of the information menu.
(See page 29)
Note:
• In the replacement of interface board, turn off the
projector, press the Main On/Off Switch to Off and
unplug the AC power cord from the AC outlet.
Replacement of Terminal
Screws
1
2
3
4
 Loading...