Chapter 2 Location and Function of Parts
2-8 Chapter 2 Location and Function of Parts
2-1 Control Panels
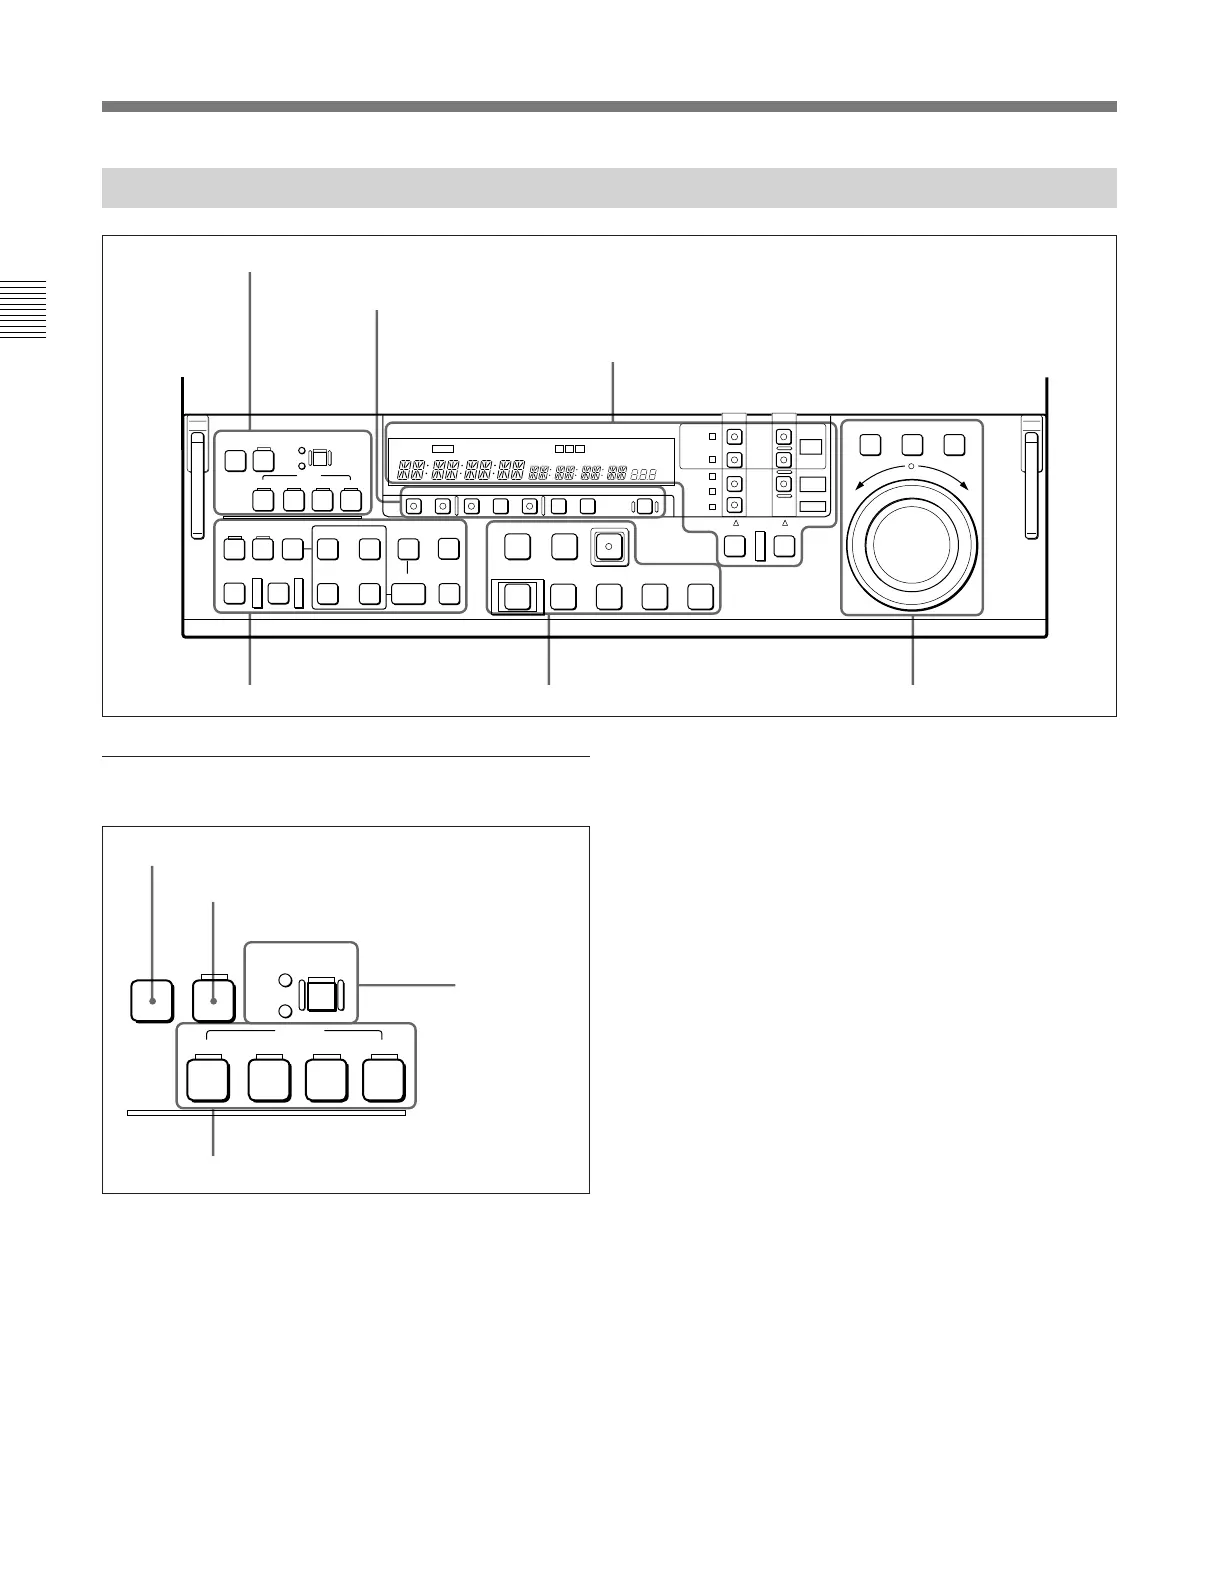
2-1-2 Lower Control Panel
ASSEMBLE/
ALL
CH-1
VIDEO
AUDIO
CH-2 CH-3 CH-4
INDEX
INS
OVL
UNDO RECALL DELETE
PREVIEW/
REVIEW
AUDIO
IN OUT
IN OUT
PB EE PB MENU SET HOLD RESET
CTL/TC/UB TOTAL/REMAIN
EVENT
ENTRY
STANDBY PREROLL
REC
EJECT REW PLAY F FWD STOP
9
)
0
6
p
PLAYER RECORDER
SHUTTLE JOG VAR
REVERSE FORWARD
BETACAM
SX
ALARM
DISK
BUSY
EXT
DISK
MASTER
DISK
SERVO
REC
INHIBIT
KEY
INHIBIT
FULL
EDIT
SIMPLE
EDIT
VI TC UB
INTRP A IN DF LTC VITC 8F 4F 2F
CONFI ON
CAPSTAN
LOCK
TCG TOTAL REMAIN 525 625
DOLBY
NR
EVENT
CH
CONDITION
A OUT
%
FEED
EDITING
MODE
AUTO EDIT
PROGRAM
TAPE
1) Assemble editing: Editing in which new video/audio is
added in sequence to the end of existing recorded video/
audio.
2) Insert editing: Editing in which new video/audio is
added into the middle of existing recorded video/audio.
..........................................................................................................................................................................................................
3 Device specification and display section
2 Monitor/menu/display setting section
6 Search control section
5 Tape/disk transport control section4 Editing control section
1 Editing mode setting section
1 Editing mode setting section
1 ASSEMBLE/ALL button
Press this button, turning it on, in the following cases:
•To carry out assemble editing
1)
using tape.
•To carry out all-channel insert editing
2)
using the hard
disk.
In both of these cases, all signals (video signals, audio
signals, time code signals, and so forth) are recorded
together.
2 VIDEO button
For insert editing on the hard disk, to select the video
signal, press this button, turning it on.
3 EDITING MODE button and indicators
This button switches the mode used for nonlinear
editing insertion between insert mode (INS indicator
lit) and overlay mode (OVL indicator lit).
For details of nonlinear editing, see Chapter5, “Editing
Using the Built-in Hard Disk”.
4 AUDIO CH-1 to CH-4 (channel 1 to channel 4)
buttons
For insert editing on the hard disk, to select audio
channels 1 to 4, press these buttons, turning them on.
You can select any number of the channels.
ASSEMBLE/
ALL
CH-1
VIDEO
AUDIO
CH-2 CH-3 CH-4
INS
OVL
EDITING
MODE
1 ASSEMBLE/ALL button
3 EDITING
MODE button
and indicators
2 VIDEO button
4 AUDIO CH-1 to CH-4 buttons
 Loading...