Chapter 5 Editing Using the Built-in Hard Disk 5-21
Chapter 5 Editing Using the Built-in Hard Disk
5-6 Points to Remember About Editing
5-6-1 Automatic Previews in Tape
Editing
When editing with TAPE selected as the recorder, a
preview is conducted automatically when you press the
AUTO EDIT button and edit execution begins after the
preview.
Tracking information about the IN points on the tape is
required in automatic editing. This information is
collected during the preview.
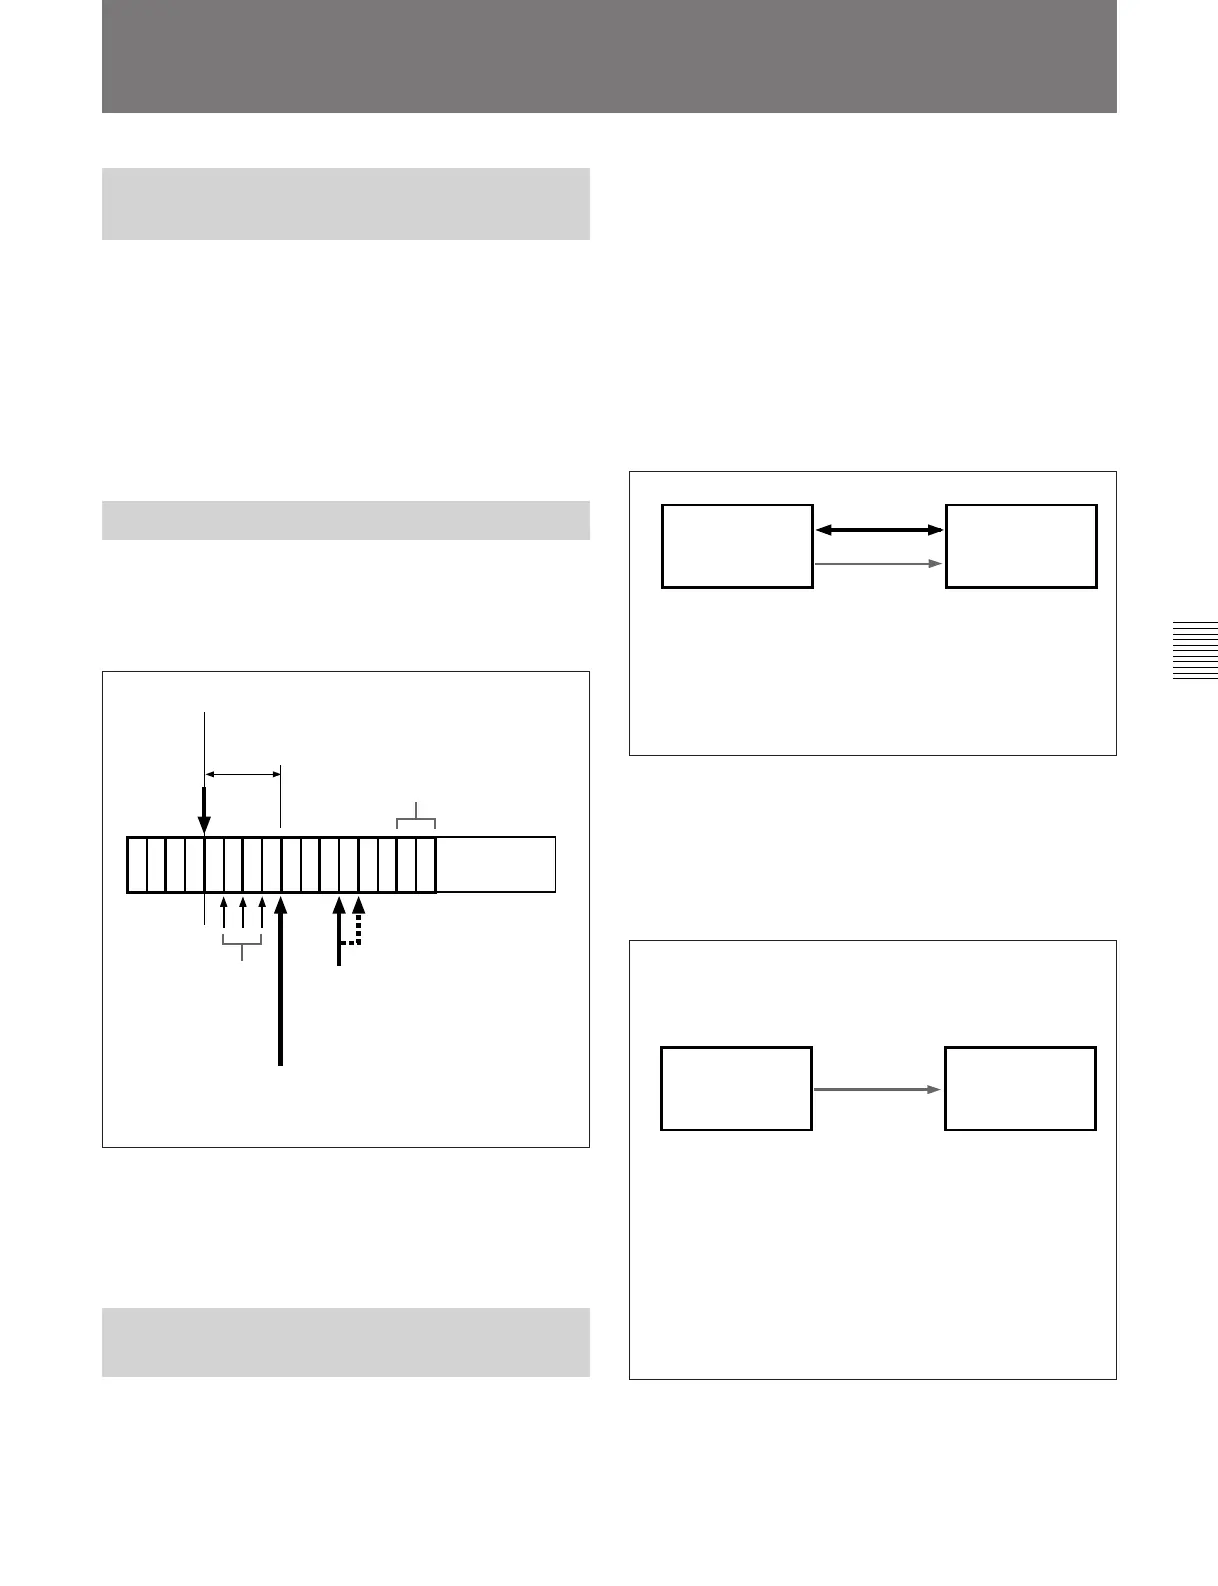
5-6-2 Tape Editing Precision
Tape editing is carried out as assemble editing in units
of GOPs (Group of Picture = 2 frames). Tape editing
precision is ±1 frame. The smallest editing segment
that can be set is 2 GOPs (4 frames).
There is no fixed relationship between odd-numbered
or even-numbered frames and GOP divisions. The
relationship depends on current conditions.
5-6-3 Preroll In Editing From
Hard Disk to Tape
When you select TAPE as the recorder and MASTER
or PROGRAM as the player, preroll is required for
both the recorder and player.
Current editing point
Minimum editing
segment (4 frames)
GOP = 2 frames
Unrecorded
section
No new edit points
can be set here.
You can execute an
edit after setting an
IN point here.
If you set an IN point here, the unit
executes the edit after automatically
shifting the IN point by 1 frame.
Tape
Therefore, when editing to tape from the start of your
program, you should insert about 30 seconds of
throwaway cuts in the preroll segment at the start of
the program.
You can use either of the following two methods to
insert throwaway cuts into a program that has already
been created.
Inserting cuts by insert editing with an
external player
Use insert editing to insert throwaway cuts from an
external player at the start of your program.
Recording signals from an external signal
generator
Manually record signals from an external signal
generator to this unit’s hard disk (MASTER), then
insert them as throwaway cuts at the start of your
program.
External player
9-pin remote
control
Audio and
video signals
This unit (recorder)
Input
Play back the tape
containing the
throwaway cuts.
Settings on this unit
Player: EXT
Recorder: PROGRAM
Edit channel: Assemble
(ASSEMBLE/ALL button lit)
Edit mode: Insert (INS indicator lit)
Output
Step 1: Manually record signals from an external signal
generator to this unit’s hard disk (MASTER) as throwaway
cuts.
External signal
generator
Signals
This unit (recorder)
Audio and video
input
Generate the signals
to be used as
throwaway cuts.
Settings on this unit
Player: EXT
Recorder: MASTER
Step 2: Set up the unit as described below and use insert
editing to insert the throwaway cut signals recorded to the
hard disk (MASTER) in step 1 at the start of your program.
Settings on this unit
Player: MASTER
Recorder: PROGRAM
Edit channel: Assemble (Assemble/ALL button lit)
Edit mode: Insert (INS indicator lit)
 Loading...