29
Connections
Installation and Connection
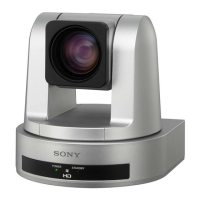
LAN connection
• In case of LAN connection, make sure that
the BOTTOM switch of the camera is set
for LAN connection (page 10).
• Use a LAN cable that is compatible with
10BASE-T/100BASE-TX (category 5 or
higher, shielded twisted pair) for this
connection.
• Use the crossover cable if you want to
connect directly to the LAN connector of
one camera and one IP remote controller
without using a switching hub.
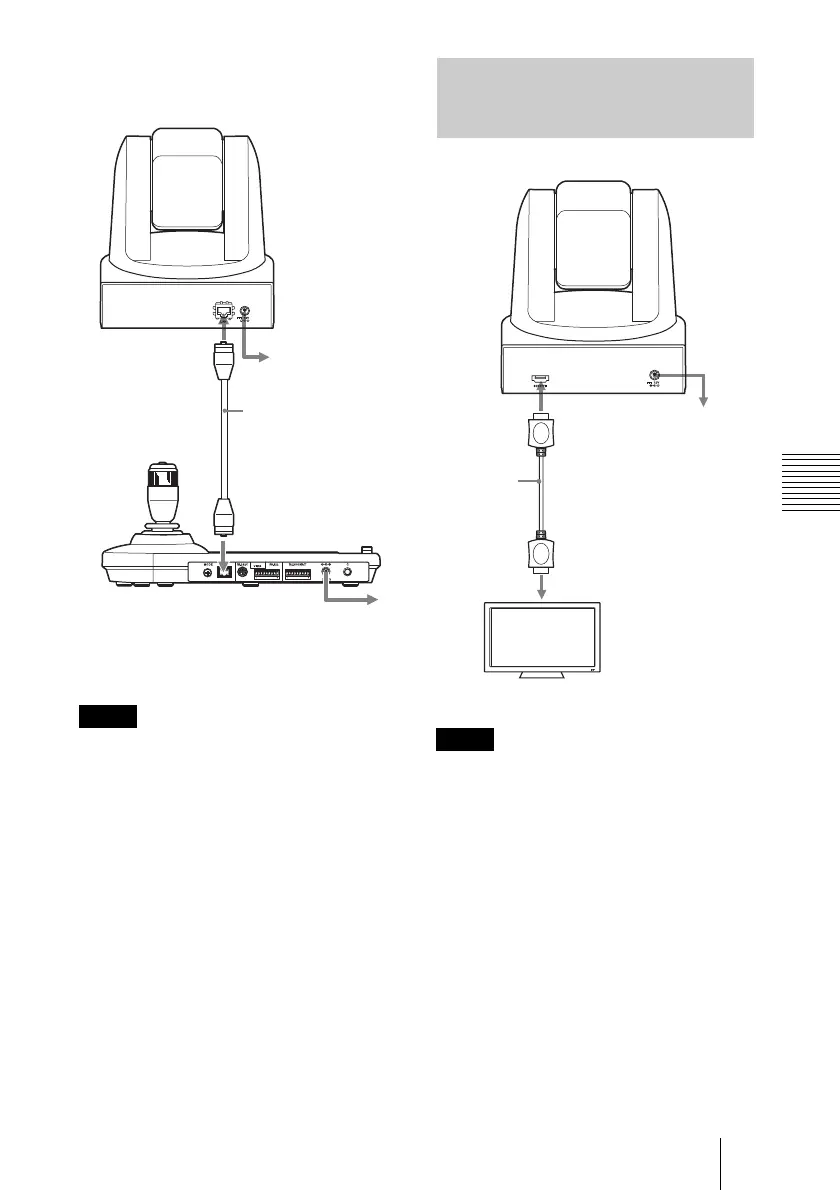
• Configure the, VIDEO FORMAT, based
on the specifications of the HD monitor.
• Depending on the performance
capabilities of the HDMI cable, some
picture noise may occur. For the HDMI
cable, a Sony high-speed cable is
recommended.
• If the volume of the monitor is set to
maximum, a sound may emit for a moment
when activated, depending on the product.
This is not a malfunction.
• It takes about 15 to 30 seconds to display
the image.
• To prevent the HDMI cable disconnecting
from the camera (either by its own weight
or an external force), it is recommended to
secure it with commercially available
retaining parts, etc.
Notes
RM-IP10 IP Remote
Controller
to the AC
adaptor
(supplied with
the RM-IP10)
SRG-120DH
to the AC
adaptor
(supplied)
LAN cable
(not supplied)
Connecting a Video Monitor,
etc., Equipped with HDMI
Input Connector
Notes
to HDMI input
connector
to the AC
adaptor
(supplied)
HDMI video
connector
HDMI cable
(not supplied)
HD video monitor, etc.
SRG-120DH
 Loading...