280
Combinations of Ch2, Ch3, and Ch4
Upper side: Ch2 image
Side V: Ch3 image
Side H: Ch4 image
You can adjust the height of the brick, the overlap between
the three images, and the way to insert the side images.
Creating a Brick
1
Open the Global Effect >Ch1-Ch4 >Brick menu
(4212).
2
Press [Brick], turning it on.
The Brick effect is enabled, and a cuboid (brick)
showing the images of three channels appears.
Adjust parameters for the height of the brick and the
overlap between the three images.
• When Brick is enabled, the Z-axis position of the
Front image in source space is shifted by 1/2 the
height, magnifying the image slightly.
• The flex shadow function cannot be enabled when
Brick is enabled.
3
Set the following parameters.
4
Select how to insert the image for the side view with
changed value for Height in <Side V> for Side V and
in <Side H> for Side H.
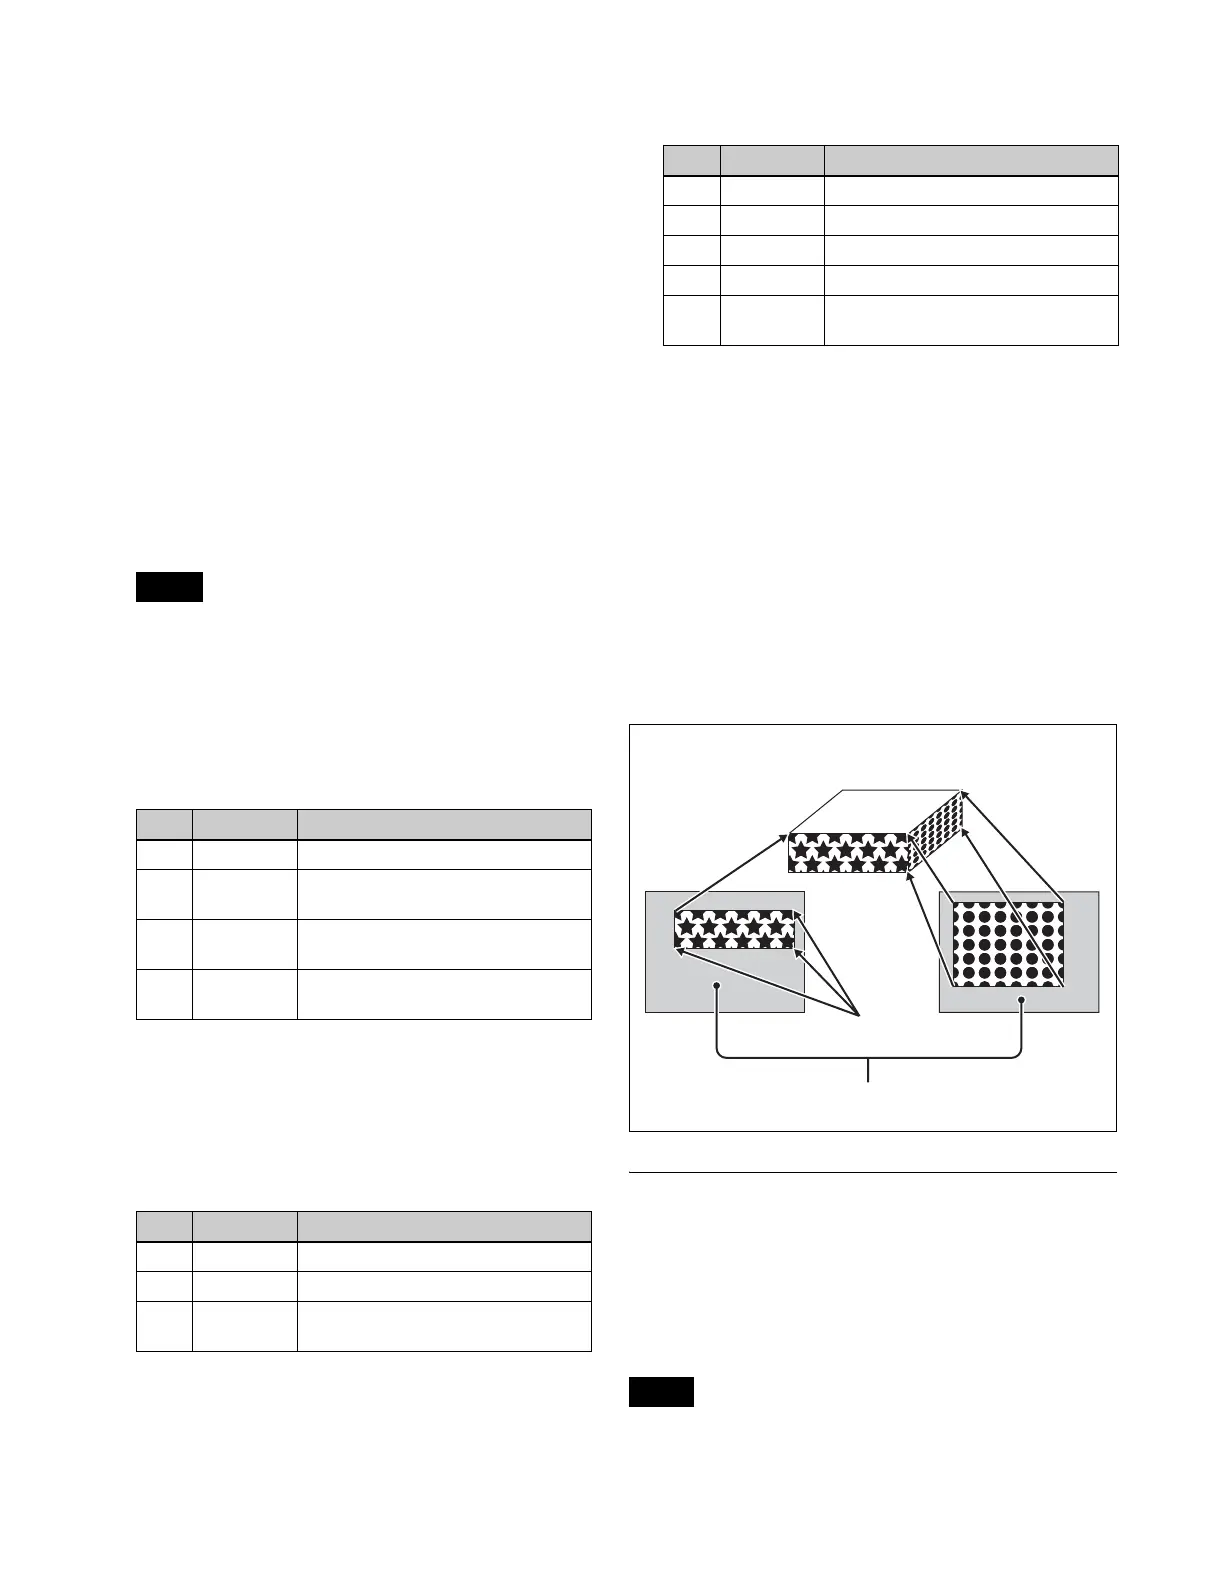
Crop: Crop the parts that do not fit into the side
without shrinking the picture. You can set the
following parameters.
The set position becomes the upper left corner of Side
V or Side H. The right and bottom sides of the inserted
image are set automatically.
Compress: Images are inserted after being reduced.
You can set the following parameters.
The parts of the image defined by Top, Left, Right, and
Bottom are magnified or shrunk to fit into Side V or
Side H.
To invert the image in a side view
For example, to invert the image on the front of Side H,
press the following buttons in the <Side H Front> group,
turning them on.
Invert H: Invert horizontally.
Invert V: Invert vertically.
For the images on the other sides, use a similar operation
in the following groups:
• Back image of Side H: <Side H Back> group
• Front image of Side V: <Side V Front> group
• Back image of Side V: <Side V Back> group
Shadow Settings
This effect uses two successive channels (Ch).
You can adjust the position and density of the shadow with
respect to the image, and the color of the shadow.
The channel with the largest number (for example, Ch2 in
the case of Ch1 and Ch2) becomes the shadow.
When the combiner function is disabled, the shadow
function cannot be used.
Notes
No. Parameter Adjustment
1 Height Height of brick
2 Front
Overlap
Front overlap
3Side H
Overlap
Side H overlap
4Side V
Overlap
Side V overlap
No. Parameter Adjustment
1 H Position of left crop
2 V Position of top crop
3 Rotation Angle of rotation, when rotated
around the Z-axis of source space
No. Parameter Adjustment
1 Top Position of top crop
2 Left Position of left crop
3 Right Position of right crop
4 Bottom Position of bottom crop
5 Rotation Angle of rotation, when rotated
around the Z-axis in source space
Note
Top side
Side V
Magnified or
shrunk to fit
Actual size,
upper left
corner
Set automatically
Cropped region
Compress
Crop
Side H
 Loading...