Inspection and Cleaning
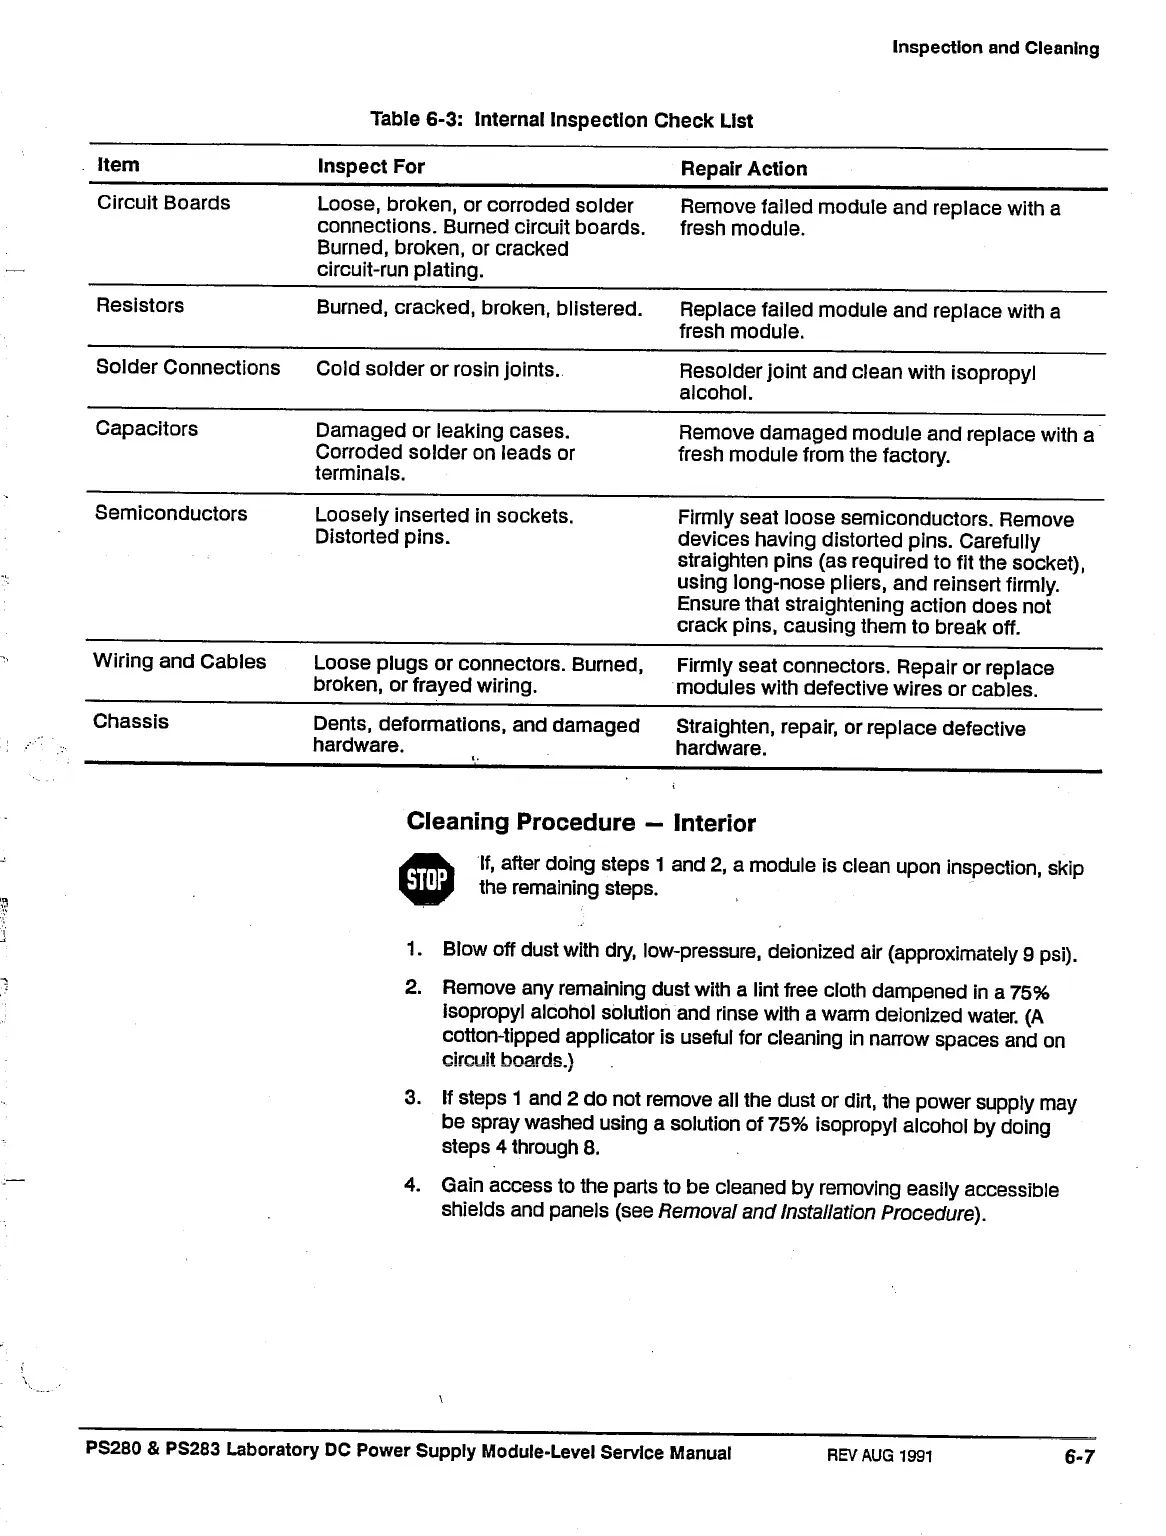
Table 6-3: Internal Inspection Check List
Inspect For
Repair Action
Circuit Boards
Loose,
broken, or corroded solder
connections. Burned circuit boards.
Burned,
broken, or cracked
circuit-run plating.
Remove failed module and replace with a
fresh module.
Resistors
Burned,
cracked, broken, blistered.
Replace failed module and replace with a
fresh module.
Solder Connections Cold solder or rosin joints.
Resolder joint and clean with isopropyl
alcohol.
Capacitors Damaged or leaking cases.
Corroded solder on leads or
terminals.
Remove damaged module and replace with a
fresh module from the factory.
Semiconductors Loosely inserted in sockets.
Distorted pins.
Firmly seat loose semiconductors. Remove
devices having distorted pins. Carefully
straighten pins (as required to fit the socket),
using long-nose pliers, and reinsert firmly.
Ensure that straightening action does not
crack pins, causing them to break off.
Wiring and Cables
Loose plugs or connectors. Burned,
broken,
or frayed wiring.
Firmly seat connectors. Repair or replace
modules with defective wires or cables.
Chassis
Dents, deformations, and damaged
hardware.
Straighten,
repair,
or replace defective
hardware.
Cleaning Procedure - Interior
If, after doing steps
1
and 2, a module is clean upon inspection, skip
I|J
the remaining steps.
1.
Blow off dust with dry, low-pressure, deionized air (approximately 9 psi).
2.
Remove any remaining dust with a lint free cloth dampened in a 75%
isopropyl alcohol solution and rinse with a warm deionized
water.
(A
cotton-tipped applicator is useful for cleaning in narrow spaces and on
circuit boards.)
3. If steps
1
and 2 do not remove all the dust or dirt, the power supply may
be spray washed using a solution of 75% isopropyl alcohol by doing
steps 4 through 8.
4.
Gain access to the parts to be cleaned by removing easily accessible
shields and panels (see Removal and Installation Procedure).
PS280 & PS283 Laboratory DC Power Supply Module-Level Service Manual
REV AUG
1991
6-7

 Loading...


