35
Drain and Refill
Drain and rell the spa at least every 4 months. It is recommended that the plumbing lines be
ushed and cleaned each time the spa is drained, page 36.
Note: This is also an excellent time to change and clean the spa’s lter(s).
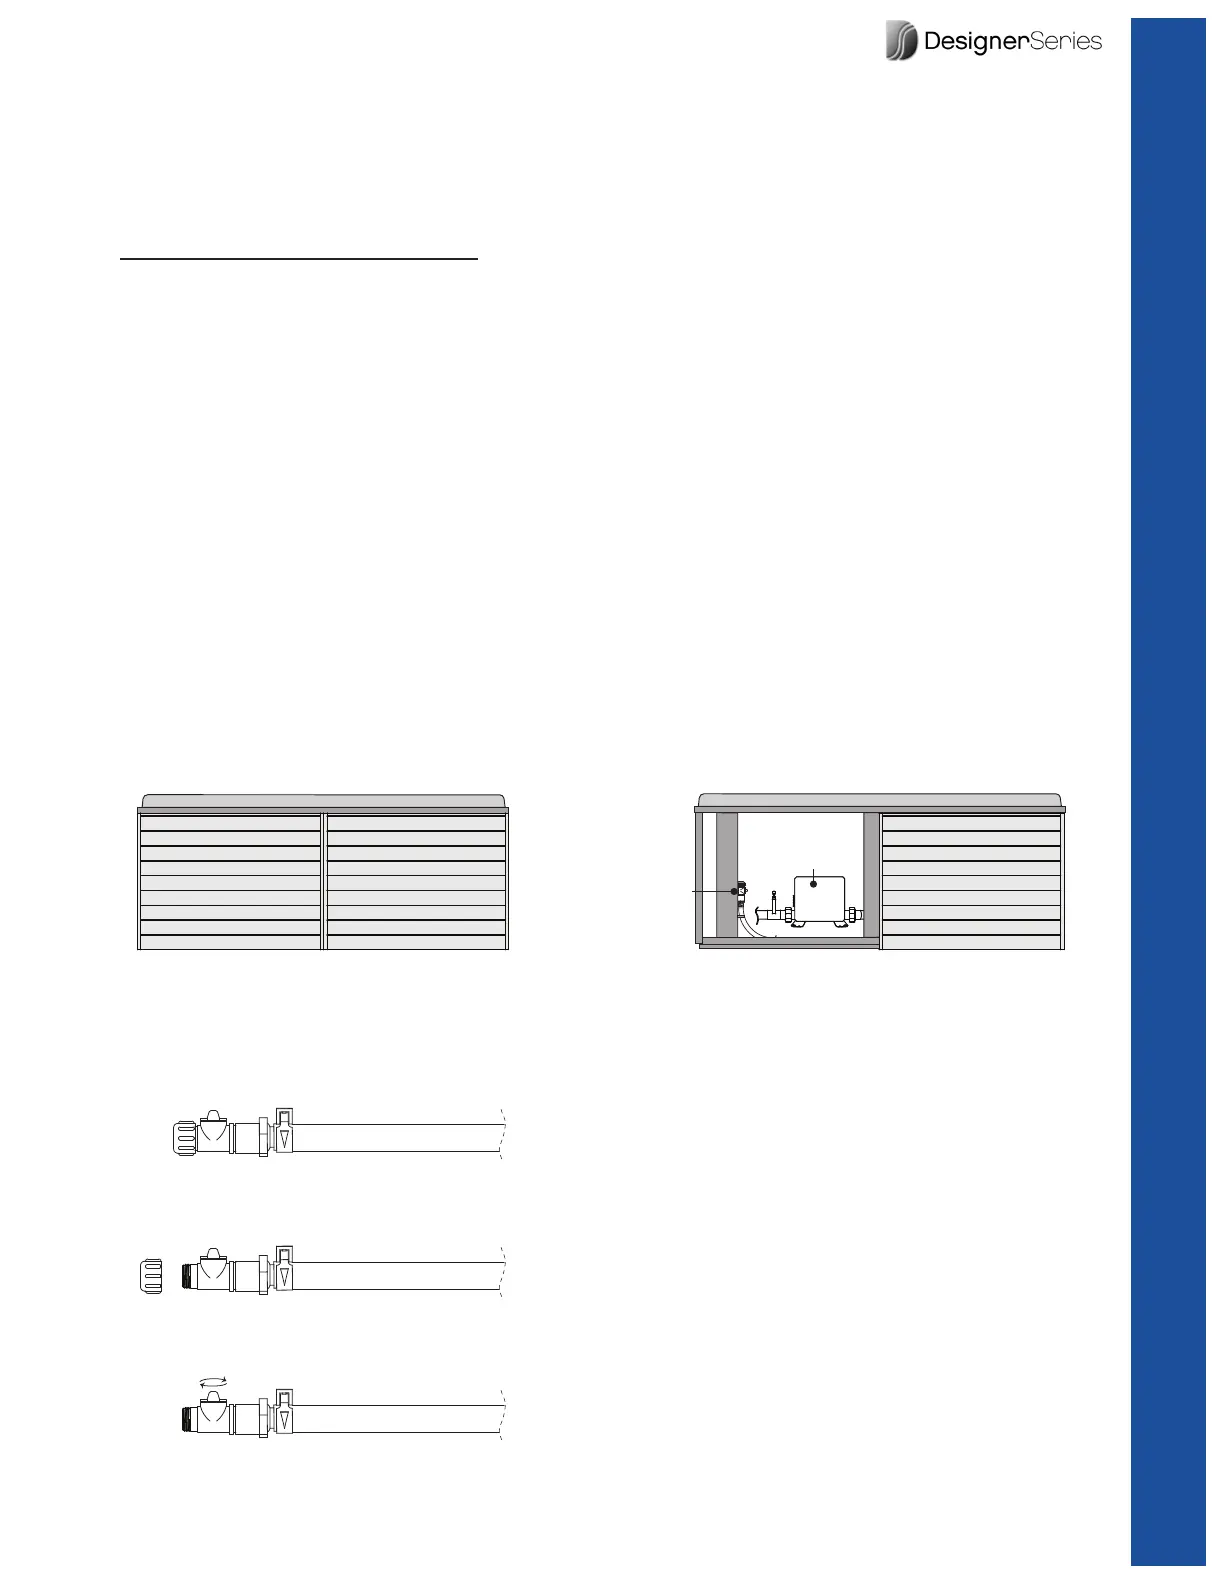
1. Turn the spa circuit breaker off.
2. Remove the skirt panel(s) and screws. Normally the panel you need to remove is located
below the topside control, Figure 1.
3. Locate the drain valve, Figure 2. Normally the drain valve will be attached to a 2 x 6 wood
slat with tie wraps. Cut the wraps and gently pull the drain valve from the equipment bay.
4. Hold the drain hose above the water line, then unthread the drain cap from the hose, Figure
3. Place the drain valve and hose on the ground to direct the water away from the spa.
5. Turn the ow valve to the open position to allow the spa to start draining, Figure 3. Use a
foam sponge, mop, or wet/dry vacuum to remove any remaining water left in the bottom of
the spa footwell or in seating areas.
Note: You can use a submersible pump.
6. Completely dry the shell surface with a soft, clean cloth.
7. Clean the shell surface of any debris or mildew using ThermoGloss and ThermoSpas’ All
Purpose Cleaner.
8. Once you have completed all task above, make sure the drain valve is in the “OFF” position
and reinstall the drain cap. Place the drain valve back in the equipment bay. Reinstall the
skirt panel and screws.
9. You are now ready to rell the spa.
10. Periodic visual inspection must be made to detect any leaks within the cabinet.
RED
BLK
WHT
TB1
CONTROL BOX
Figure 1: Front skirt panel directly be-
low the topside control (location vary
from model to model and one shown).
RED
BLK
WHT
TB1
CONTROL BOX
DRAIN
VALVE
Figure 2: General equipment bay
(location vary from model to model
and one shown).
Figure 3
Drain and Refill
 Loading...