ReplacingtheGrassDeector
WARNING
Anuncovereddischargeopeningcouldallowthe
machinetothrowobjectsintheoperator'sor
bystander'sdirectionandresultinseriousinjury.
Also,contactwiththebladecouldoccur.
Donotoperatethemachineunlessyouinstall
acoverplate,amulchplate,grassdeector,or
bagger.
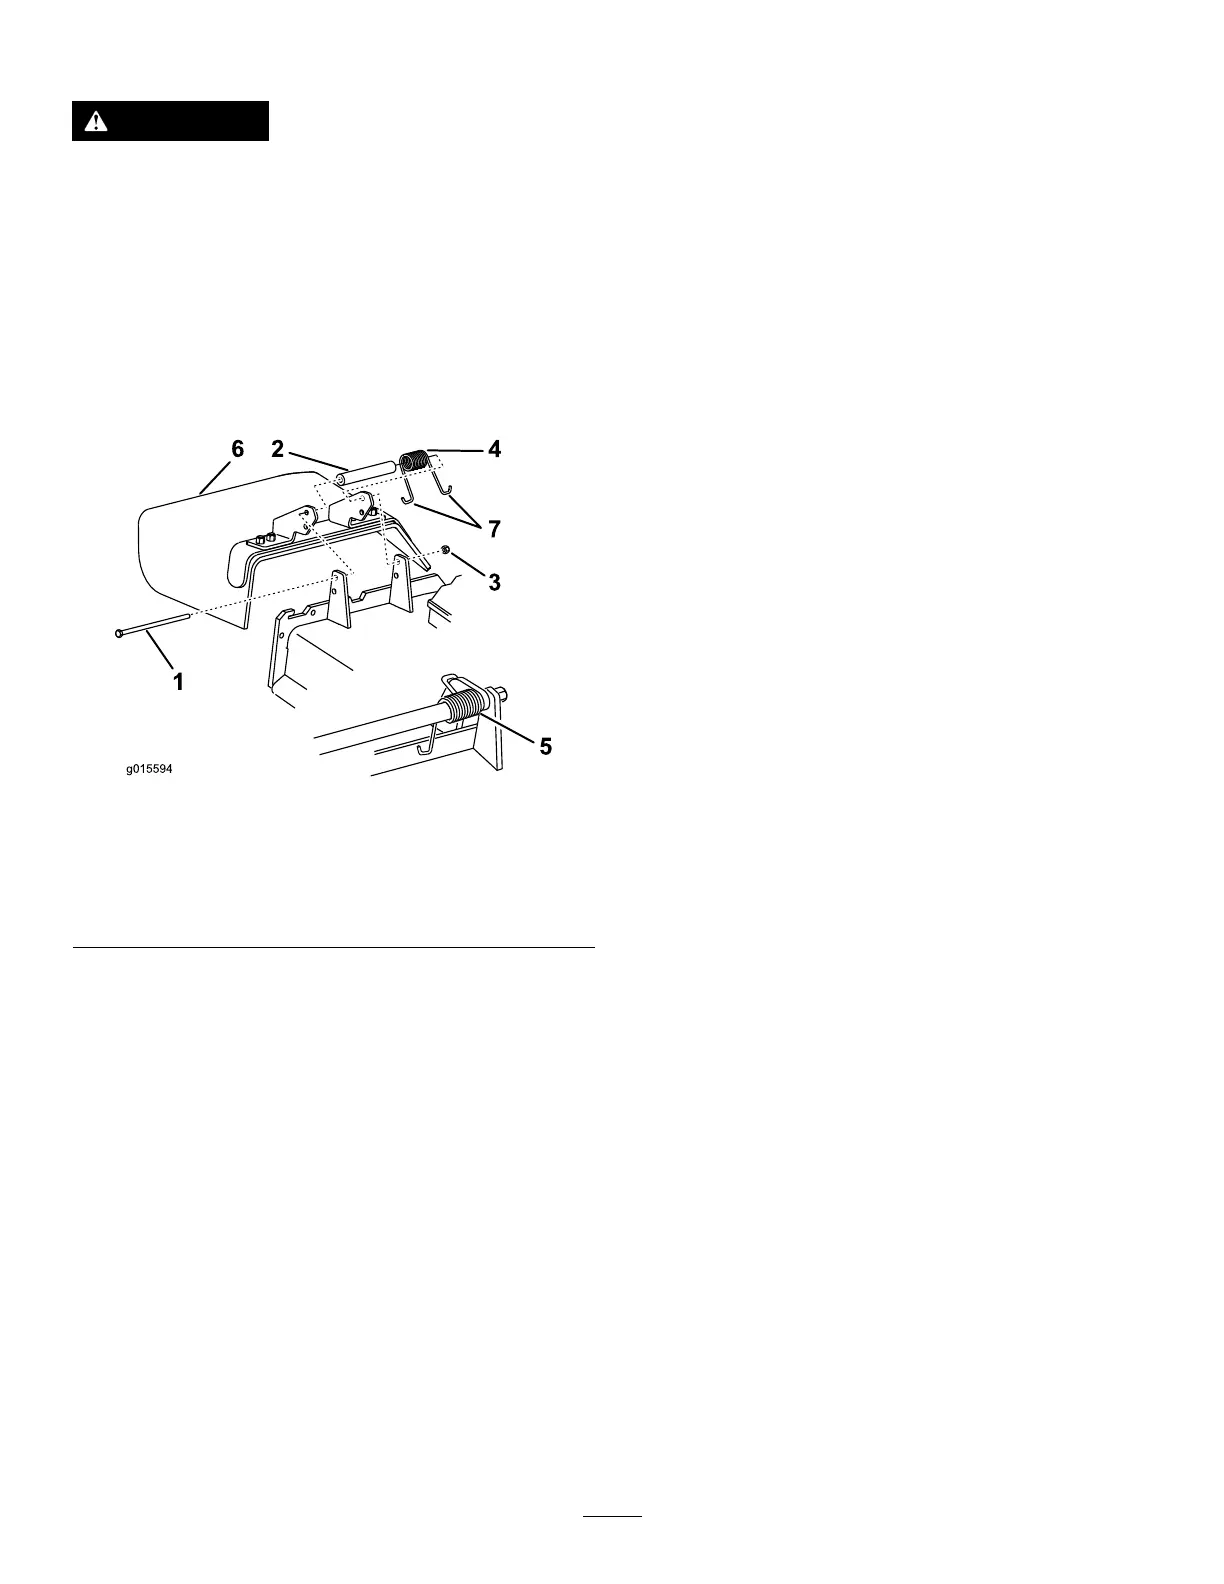
1.Removethelocknut,bolt,spring,andspacerholding
thedeectortothepivotbrackets(Figure89).
Figure89
1.Bolt
5.Spring(installed)
2.Spacer6.Grassdeector
3.Locknut
7.J-hookendofthespring
4.Spring
2.Removethedamagedorworngrassdeector.
3.Placethespacerandthespringontothegrassdeector.
4.Place1J-hookendofthespringbehindthedeckedge.
Note:Makesurethat1J-hookendofspringis
installedbehinddeckedgebeforeinstallingtheboltas
showninFigure89.
5.Installtheboltandthenut.
6.Place1J-hookendofthespringaroundthegrass
deector(Figure89).
Important:Thegrassdeectormustbeable
torotate.Liftthedeectoruptothefullopen
position,andensurethatitrotatesintothefull
downposition.
Cleaning
CleaningundertheMower
ServiceInterval:Beforeeachuseordaily
Removethegrassbuildupunderthemowerdaily.
1.DisengagethePTO,movethemotion-controlleversto
theNEUTRAL-LOCKpositionandsettheparkingbrake.
2.Shutofftheengine,removethekey,andwaitforall
movingpartstostopbeforeleavingtheoperating
position.
3.Raisethefrontofthemachineandusejackstandsto
supportthemower.
DisposingofWaste
Engineoil,batteries,hydraulicuid,andenginecoolantare
pollutantstotheenvironment.Disposeoftheseaccordingto
yourstateandlocalregulations.
60
 Loading...