Using Attachments
Important: If y ou ar e using an attachment
with a serial n umber of 200999999 or ear lier ,
the man ual f or the attachment may contain
inf or mation specific to the use of the
attachment with other Dingo models, such as
settings f or the flo w di vider contr ol and speed
selector lev er and the use of a counterw eight
on the traction unit. T hese systems ar e built
into the Dingo TX, and y ou should ignor e an y
r efer ences to them.
Installing an Attachment
Important: Use onl y T or o-appr o v ed
attachments. Attachments can change the
sta bility and the operating characteristics of
the traction unit. T he w ar ranty of the traction
unit may be v oided if used with unappr o v ed
attachments.
Important: Bef or e installing the
attachment, ensur e that the mount plates ar e
fr ee of an y dir t or de bris and that the pins
r otate fr eel y . If the pins do not r otate fr eel y ,
g r ease them.
1. P osition the attac hment on a lev el surface with
enough space behind it to accommodate the
traction unit.
2. Star t the engine .
3. Tilt the attac hment mount plate forw ard.
4. P osition mount plate into the upper lip of the
attac hment recei v er plate ( Figure 14 ).
Figure 14
1. Mount plate 2. Receiver plate
5. Raise the loader ar ms while tilting bac k the
mount plate at the same time .
Important: T he attachment should be
raised enough to clear the g r ound, and the
mount plate should be tilted all the w ay
back.
6. Stop the engine .
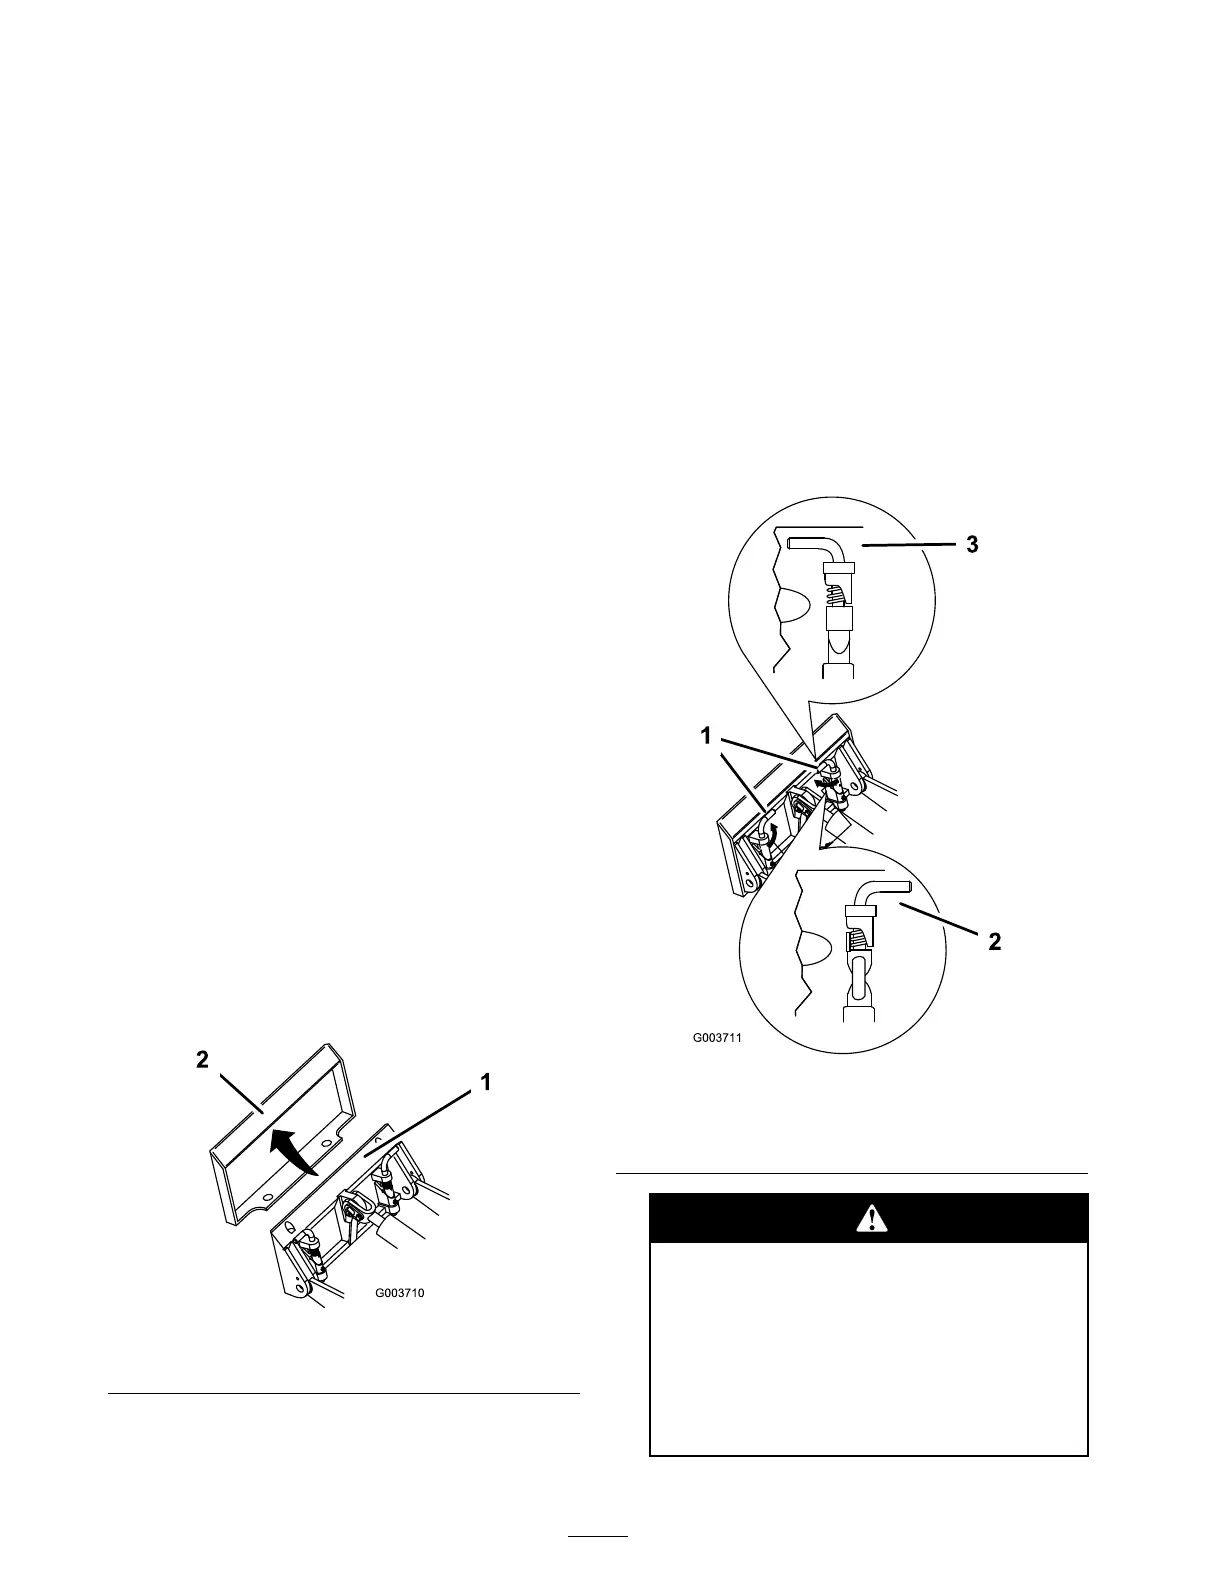
7. Eng ag e the quic k attac h pins , ensuring that
they are fully seated in the mount plate
( Figure 15 ).
Important: If the pins do not r otate to
the enga ged position, the mount plate
is not full y aligned with the holes in the
attachment r ecei v er plate. Check the
r ecei v er plate and clean it if necessar y .
Figure 15
1. Quick attach pins (shown
in engaged position)
3. Engaged position
2. Disengaged position
If y ou do not full y seat the quick attach
pins thr ough the attachment mount
plate, the attachment could f all of f of the
traction unit, cr ushing y ou or bystander s.
Ensur e that y our quick attach pins ar e
full y seated in the attachment mount
plate.
22
 Loading...


