16. T or que the n ut to 300 ft-lb (407 N ⋅ m).
17. T ur n the tensioning screw counter -cloc kwise
until the distance betw een the tension n ut and
the bac k of the tension tube ( Figure 37 ) is
2-3/4 inc hes (7 cm).
18. Align the closest notc h in the tension screw to
the loc king bolt hole and secure the screw with
the loc king bolt and n ut.
19. R e peat ste ps 2 through 18 to re place the other
trac k.
20. Lo w er the traction unit to the g round.
Maintaining the Road Wheels
Chec k and g rease the road wheels ev er y 250
operating hours or yearly .
1. R emo v e the trac ks; refer to R e placing the
T rac ks .
2. R emo v e the 4 bolts securing eac h lo w er trac k
guide whic h contains the road wheels , and
remo v e them ( Figure 41 ).
Figure 41
1. Road wheels
3. Track guide bolts (only two
shown)
2. Lower track guide
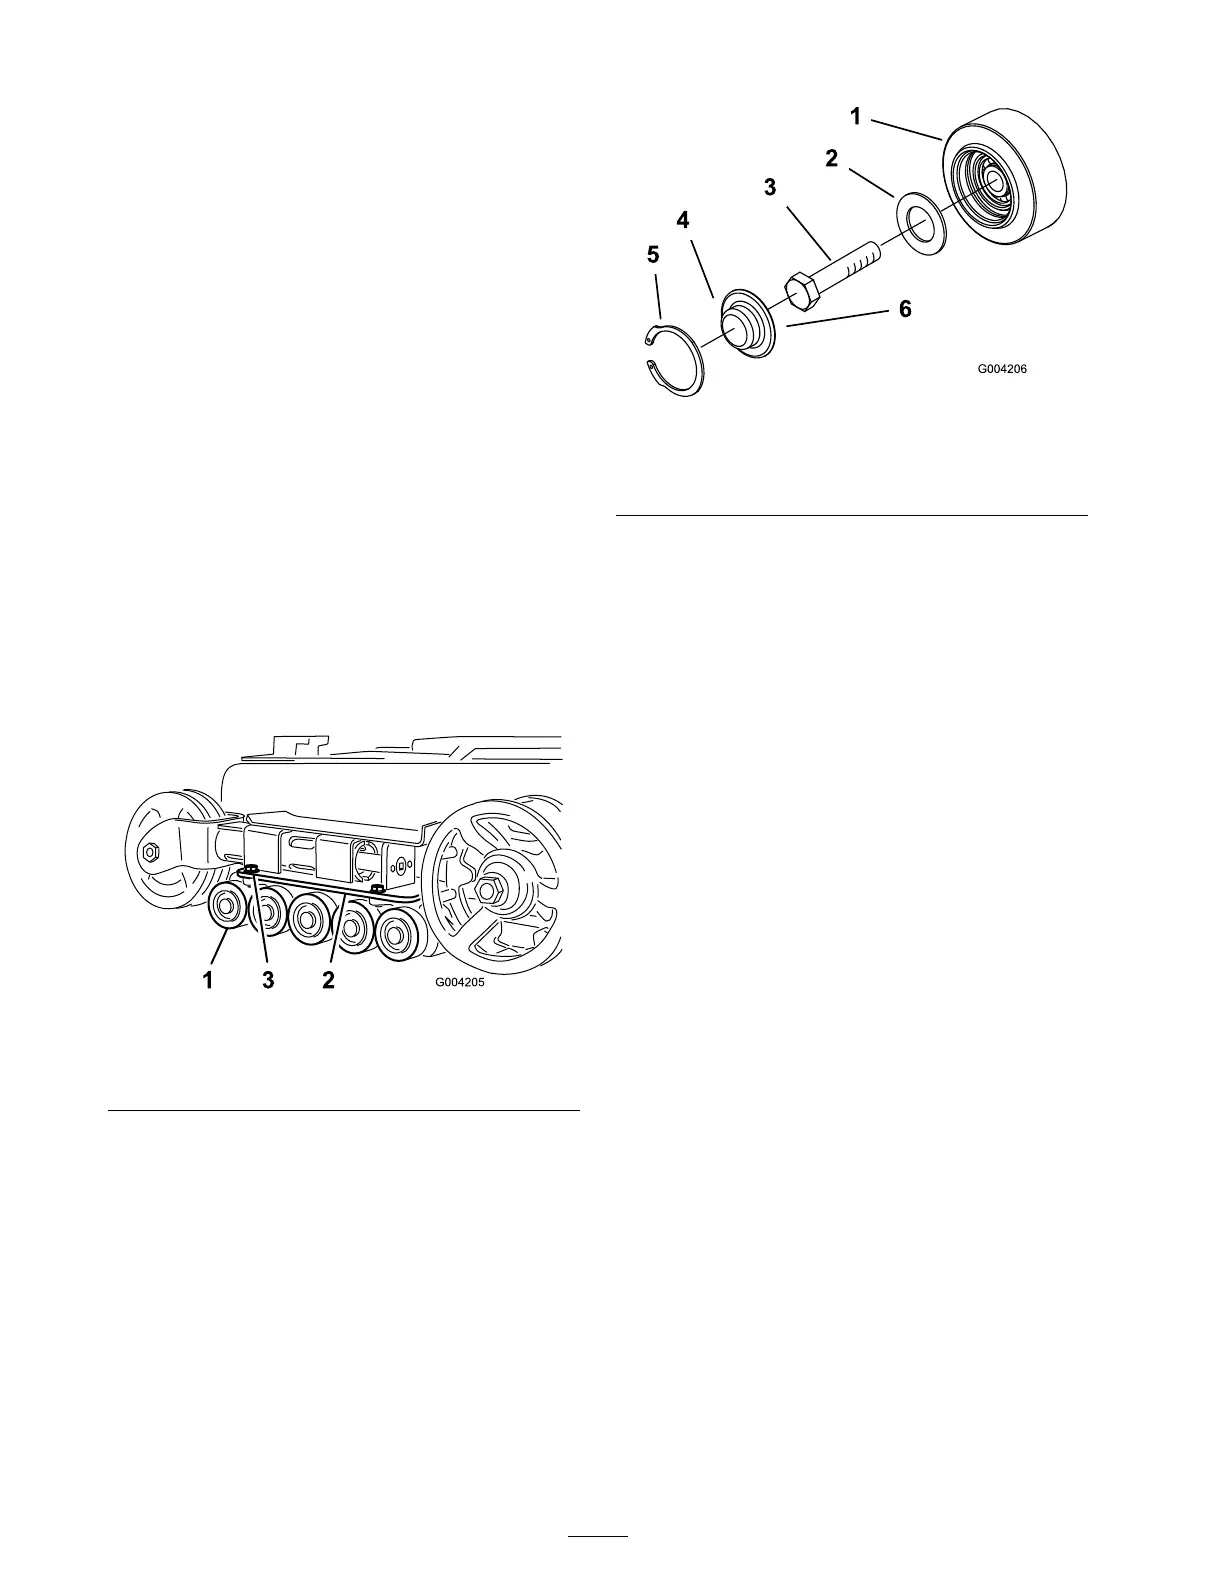
3. R emo v e the snap ring and cap from a road
wheel ( Figure 42 ).
Figure 42
1. Road wheel 4. Road wheel cap
2. Gasket
5. Snap ring
3. Bolt 6. Add grease under the cap
4. Chec k the g rease under the cap and around
the g ask et ( Figure 42 ). If it is dir ty , g ritty , or
de pleted, clean out all of the g rease , re place
the g ask et, and add new g rease .
5. Ensure that the road wheel tur ns smoothly
on the bearing . If it is frozen, re place the
road wheel as described in the Road W heel
Kit Installation Instr uctions or contact y our
A uthorized Ser vice Dealer for re pair .
6. Place the g reased road wheel cap o v er the bolt
head ( Figure 42 ).
7. Secure the road wheel cap with the snap ring
( Figure 42 ).
8. R e peat ste ps 3 through 7 for the other road
wheels .
9. Install eac h trac k guide to the traction unit
frame using the fasteners y ou remo v ed
previously . T or que the bolts to 67 to 83 ft-lb
(91 to 112 N ⋅ m).
10. Install the trac ks; refer to R e placing the T rac ks .
Controls System
Maintenance
T he factor y adjusts the controls before shipping
the traction unit. Ho w ev er , after many hours of
use , y ou ma y need to adjust the traction control
alignment, the neutral position of the traction
control, and the trac king of the traction control in
the full forw ard position.
Important: T o adjust the contr ols pr oper l y ,
complete each pr ocedur e in the order listed.
36
 Loading...


