Cleaning the Chassis
Ov er time , the c hassis under the engine collects
dir t and debris that m ust be remo v ed. Using a
flashlight, open the hood and inspect the area
under the engine on a regular basis . W hen the
debris is 1 to 2 inc hes dee p , complete the follo wing
procedure (refer to Figure 51 throughout this
procedure):
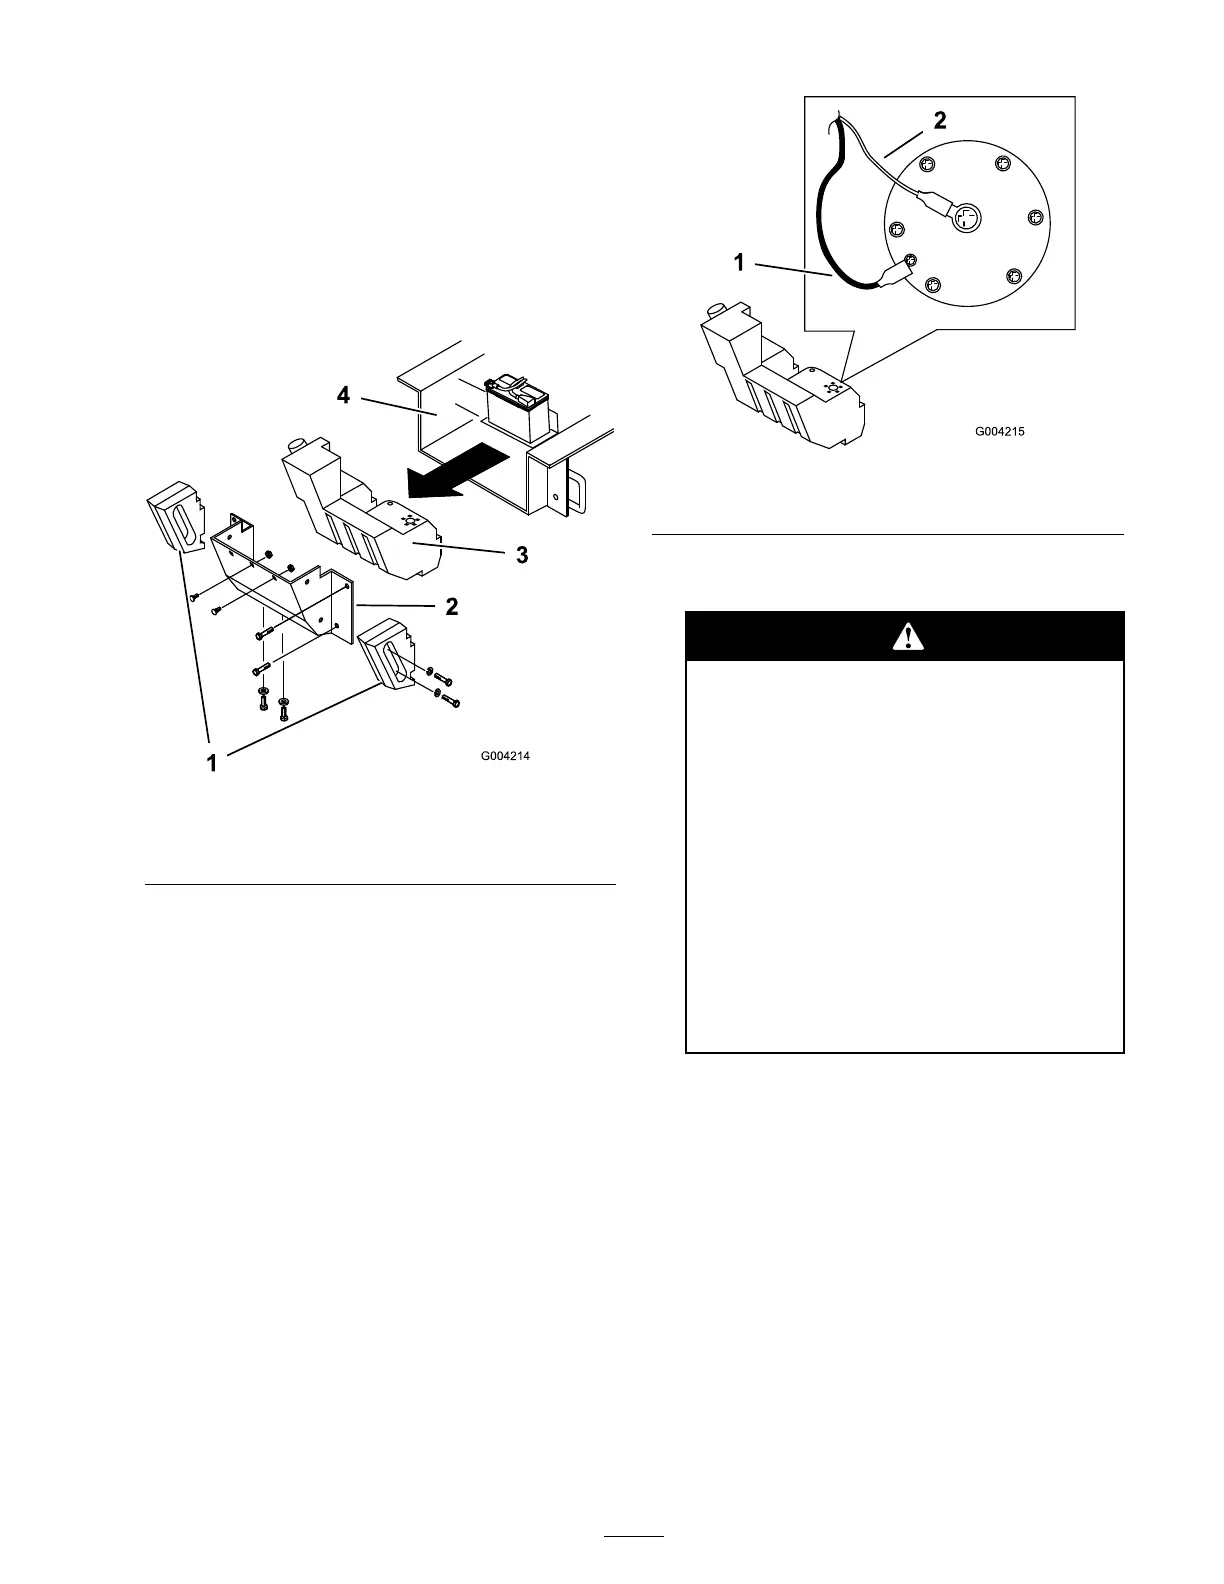
Figure 51
1. Side weights 3. Fuel tank
2. Rear panel 4. Chassis
1. Lift and suppor t the front of the traction unit.
2. Stop the engine and remo v e the k ey .
3. Disconnect the neg ati v e batter y cable .
4. R emo v e the bolts , w ashers , and loc k w ashers
securing the tw o side w eights , remo ving the
w eights ( Figure 51 ).
5. Open the rear access co v er .
6. R emo v e the 2 car riag e bolts and w ashers from
the batter y base .
7. R emo v e the six n uts and bolts securing the rear
panel, remo ving the panel ( Figure 51 ).
8. Loosen the tank cap to reliev e pressure .
9. Place a clamp on the fuel line , 2 inc hes from
where it comes out of the fuel tank.
10. Slide the fuel tank to the rear ( Figure 51 ).
11. Disconnect the fuel line .
12. Disconnect the tw o wires leading to the right
side of the tank ( Figure 52 ).
Figure 52
1. Black wire
2. Orange wire
13. Carefully remo v e the tank and set it upright to
k ee p from spilling the g asoline .
In cer tain conditions, gasoline is
extr emel y flamma ble and highl y
explosi v e. A fir e or explosion fr om
gasoline can bur n y ou and other s and
can dama ge pr oper ty .
• R emo v e the fuel tank outdoor s in an
open ar ea. W ipe up an y gasoline that
spills.
• Do not r emo v e the fuel tank near an
open flame or wher e gasoline fumes
may be ignited by a spar k.
• Do not smok e while handling the fuel
tank.
14. R emo v e any larg e de posits of debris .
15. W ash out the c hassis with w ater until the w ater
r unning out the bac k of the unit is clear .
Important: T ak e car e not to get w ater
into the engine or electrical components.
16. Slide the fuel tank par t w a y into the c hassis
( Figure 51 ).
17. Connect the fuel line and remo v e the clamp .
18. Secure the tank cap .
19. On the right side of the tank, connect the
orang e wire to the center post and the blac k
wire to the outside post ( Figure 52 ).
20. Slide the tank all the w a y into the traction unit.
41
 Loading...


