Figure 18
1. Hand knob
2. Tilt the rear access co v er do wn and remo v e to
access the inter nal components ( Figure 18 ).
Closing the Rear Access
Cover
1. Mo v e the rear access co v er in place o v er the
bac k of the traction unit making sure the tabs
line up in the slots .
2. Push the access co v er forw ard, lining up the
hand knob screws with the threaded holes in
the mac hine .
3. Screw the hand knobs tight to secure the rear
access co v er in place .
Removing the Side Screens
1. Open the hood.
2. Slide the side screens ( Figure 19 ) up and out of
the slots in the front screen and frame .
Figure 19
1. Side screen
Installing the Side Screens
Slide the side screens into place in the slots in the
front screen and frame .
Removing the Front Screen
If the engine has been r unning the heat
shield will be v er y hot and could bur n y ou.
Allo w the traction unit cool completel y
bef or e touching the heat shield.
1. Open the hood and remo v e both side screens .
2. Loosen the bolts securing the front w eight
( Figure 20 ).
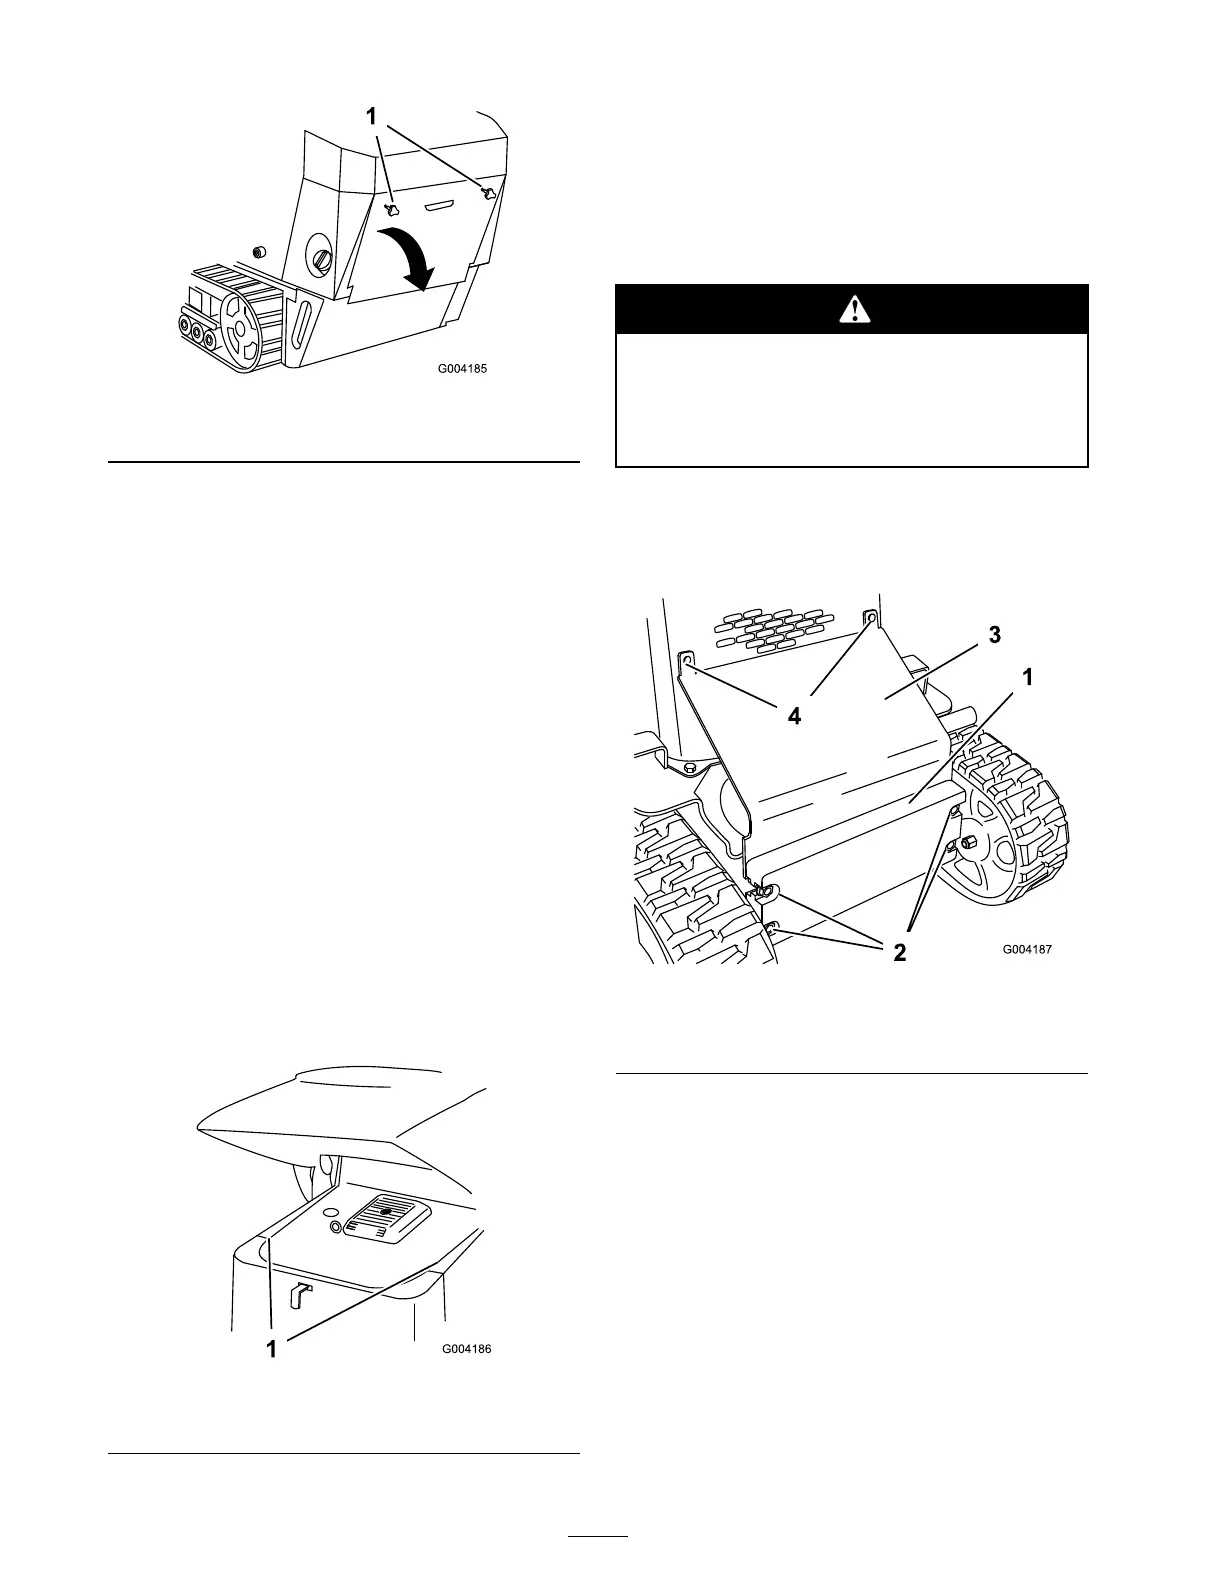
Figure 20
1. Front weight 3. Heat shield
2. Bolts 4. Carriage bolts
3. R emo v e the car riag e bolts and n uts securing
the heat shield ( Figure 20 ).
4. Lift the heat shield up and off of the traction
unit.
5. R emo v e the 4 bolts securing the front screen
to the traction unit frame ( Figure 21 ).
26
 Loading...


