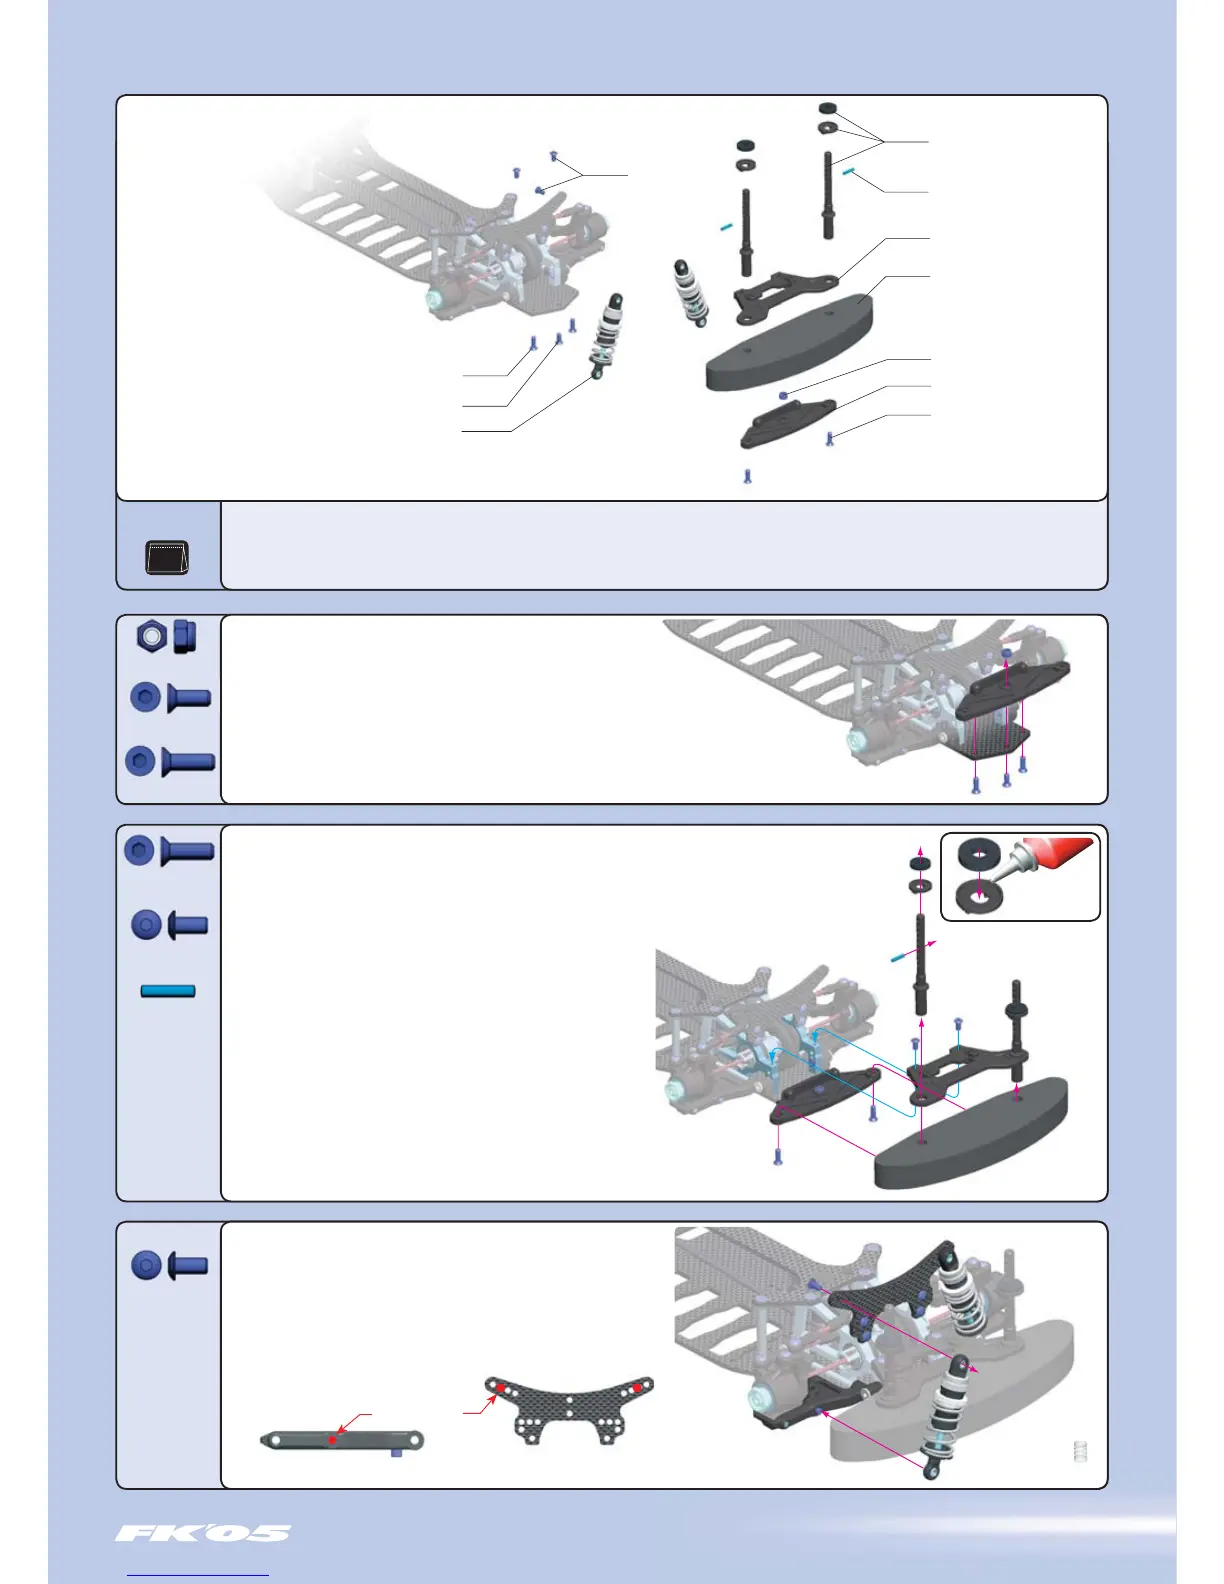
1. Place a #960030 (N M3) nut into the hex recess atop the #301200
lower bumper.
2. Place the lower bumper onto the front of the chassis.
3. Thread a #904308 (SFH M3x8) screw up through the bottom of the
chassis, through the bumper, and into the M3 nut.
4. Thread two #904310 (SFH M3x10) screws up through the bottom of the
chassis and into the lower bumper.
30 1217 COMPOSITE UPPER BUMPER SUPPORT
30 1320 FRONT BODY MOUNTS ( SET )
90 2306 HEX SCREW SH M3x6 (10)
90 4310 HEX SCREW SFH M3x10 - SILVER (10)
98 1210 PIN 2x10 (10)
30 1200 COMPOSITE BUMPER
30 1220 FOAM BUMPER
90 4308 HEX SCREW SFH M3x8 - SILVER (10)
96 0030 NUT M3 (10)
30 8300 XRAY SHOCK ABSORBER-SET 4-STEP (2)
904308
SFH M3x8
904310
SFH M3x10
904310
SFH M3x10
960030
N M3
Attach TWO front shocks by performing the following steps.
1. Mount the top pivot ball of the assembled front shock to the graphite
shock tower using #902306 (SH M3x6) screw. Use the indicated hole as
shown.
2. Thread the lower pivot ball of the assembled front shock onto the
protruding screw at the front of the front lower arm.
902306
SH M3x6
1. Insert the front body posts into the holes of the #301217 upper
bumper support.
2. Slide the #301220 foam bumper up onto the body posts; the posts
should extend down through the foam bumper.
3. Position the bumper assembly onto the lower bumper.
4. Secure the body posts to the lower bumper by threading two
#904310 (SFH M3x10) screws upward through lower bumper into the
bodyposts.
5. Secure the upper bumper support to the front bulkheads with
two #902306 (SH M3x6) screws.
6. Glue rubber washers to the tops of the plastic body supports.
7. Insert a #981210 (P 2x10) pin into a hole in a front body post.
Insert the other pin into the same hole in the other body post.
8. Slide the body supports into the body posts, and snap onto the pins.
902306
SH M3x6
981210
P 2x10
FRONT SHOCK TOWER
FRONT LOWER ARM
INITIAL POSITION
CA GLUE
FRONT SHOCK
(White spring)
BAG
08
 Loading...