01V96
26
[165]: Bind Head Tapping Screw-B
3.0X8 MFZN2BL (EP600190)
Photo.7
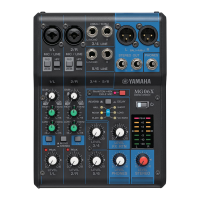
8. AC Circuit Board
(Time required: About 5 minutes)
8-1. Fasten the control panel assembly. (See procedure 1.)
8-2. Remove the AC shield plate. (See procedure 6.)
8-3. Remove the cord holder fastened the AC circuit
board and the ferrite core.(Photo.5)
8-4. Remove the two (2) screws marked [145]. The AC
circuit board can then be removed from the two (2)
locking card spacers. (Photo.5)
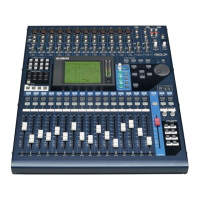
The power switch knob is not part of the AC
circuit board. When you replace the AC circuit
board, you should remove the power switch
knob from the AC circuit board, and install in
the new AC circuit board. (Photo.6)
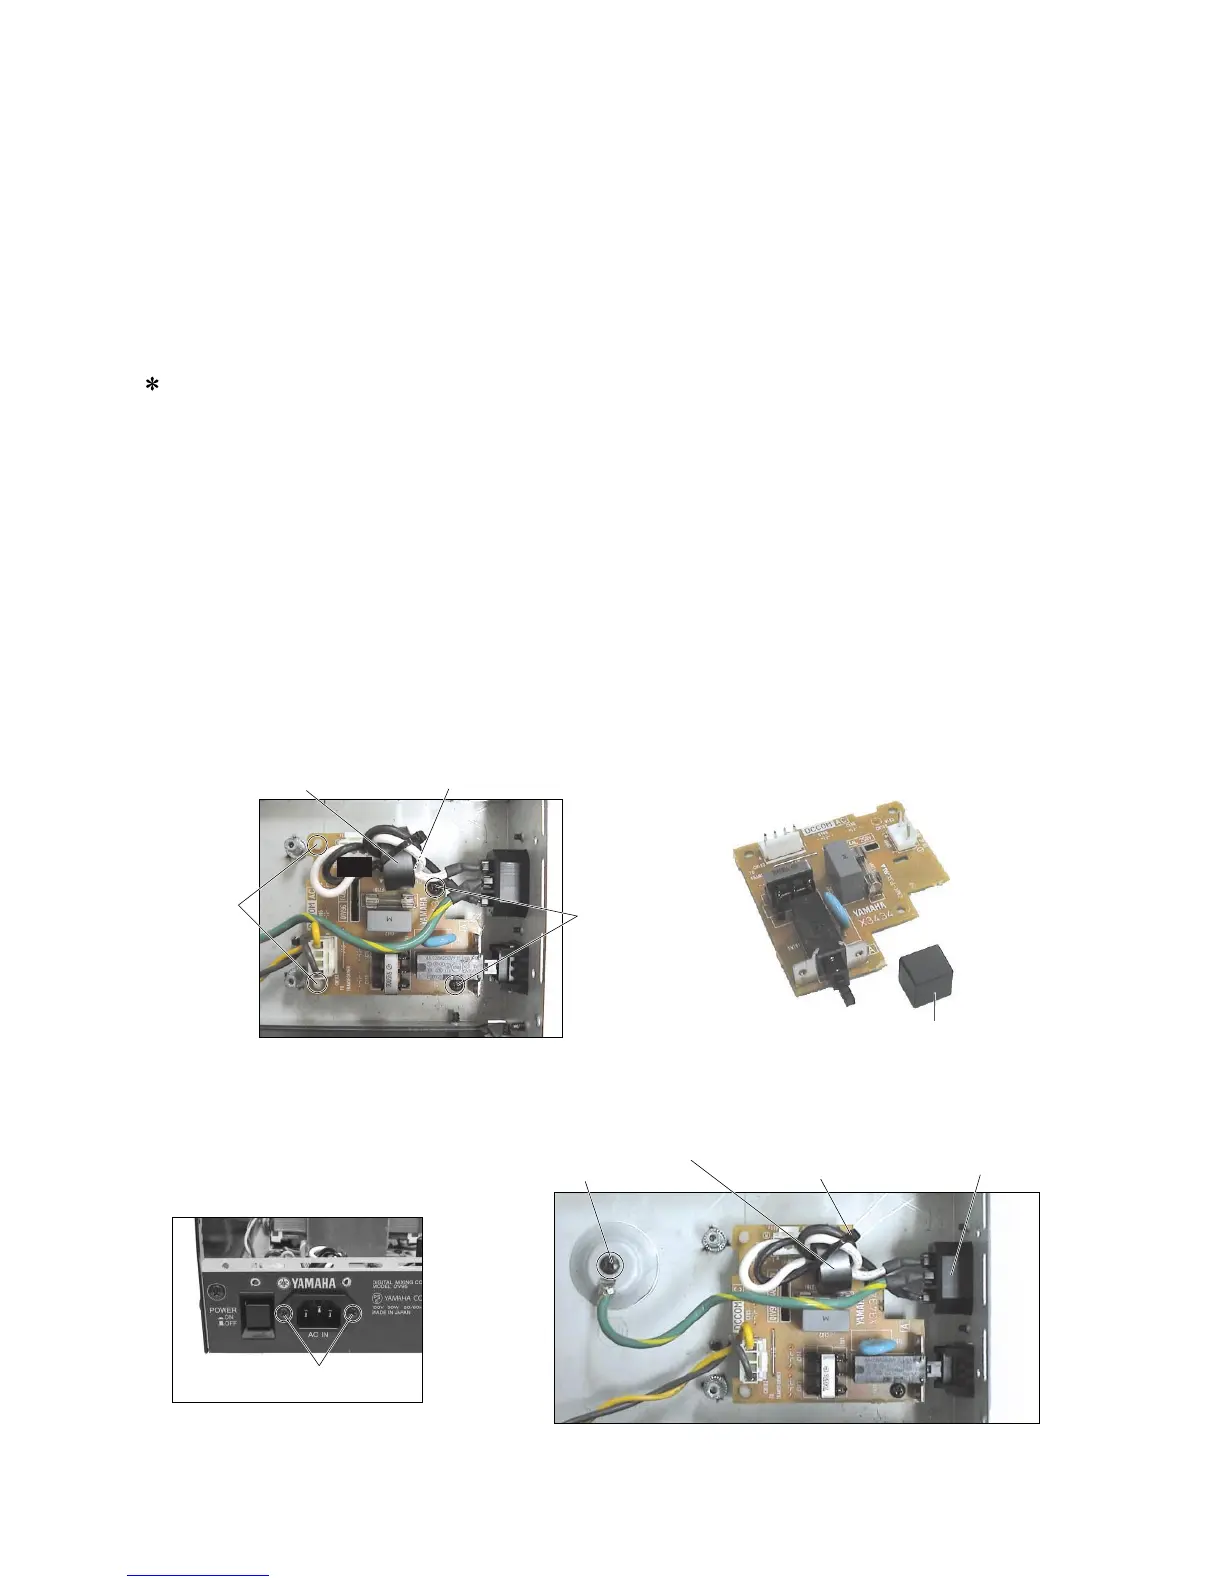
9. AC Inlet Assembly
(Time required: About 5 minutes)
9-1. Fasten the control panel assembly. (See procedure 1.)
9-2. Remove the AC shield plate. (See procedure 6.)
9-3. Remove the cord holder fastened the AC inlet
assembly and the ferrite core.(Photo.8)
9-4. Remove the two (2) screws marked [165] and the
screw marked [175]. The AC inlet assembly can then
be removed. (Photo.7, 8)
Locking card spacer
[145]
Power switch knob
(PSWノブ)
AC
(ロッキングカード
スペーサ)
Ferrite core
(フェライトコア)
Cord holder (underneath the ferrite core)
(インシュロックタイ(フェライトコアの下側))
AC inlet assembly
(ACインレットAss'y
Ferrite core
(フェライトコア)
Cord holder
(インシュロックタイ)
[175]
[165]
8. AC シート(所要時間:約 5 分)
8-1. コンパネ Ass'y を固定します。(1 項参照)
8-2. AC シールド金具を外します。(6 項参照)
8-3. ACシートとフェライトコアを止めているインシュ
ロックタイを外します。(写真 5)
8-4. [145]のネジ2本を外し、ロッキングカードスペーサ
2 本から AC シートを外します。(写真 5)
※ PSW ノブは、AC シートの構成部品ではありま
せん。AC シートを交換する際には、AC シート
から PSW ノブを取り外して、新しい AC シート
に取り付けてください。(写真 6)
9. AC インレット Ass'y(所要時間:約 5 分)
9-1. コンパネ Ass'y を固定します。(1 項参照)
9-2. AC シールド金具を外します。(6 項参照)
9-3. AC インレット Ass'y とフェライトコアを止めてい
るインシュロックタイを外します。(写真 8)
9-4. [165]のネジ2本と[175]のネジ 1本を外して、ACイ
ンレット Ass'y を外します。(写真 7,8)
[145]: Bind Head Tapping Screw-B
3.0X6 MFZN2BL (EP600230)
Photo.5 (写真5)
(+バインド B タイト)
(写真7)
(+バインド B タイト)
Photo.6 (写真6)
[175]: Bind Head Tapping Screw-S
4.0X8 MFZN2BL (VI693100)
(+バインド S タイト)
Photo.8 (写真8)
 Loading...