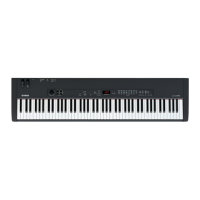
CP33
26
■ TEST PROGRAM
1. PREPARATION
1) To check the unit using the test program, the following measuring instruments and jigs are required.
(The input impedance of the measuring instruments must be 1MΩ or above.)
• Level meter (with JIS-C filter used)
• Frequency counter
• MIDI cable
• USB cable (A-B type)
• PC (Personal Computer)
• Foot pedal (FC3)
• AC adapter (PA-3C)
2) Unit settings:
[MASTER VOLUME] . . . . . . . . . . . . . . MAX.
[PEDAL] . . . . . . . . . . . . . . . . . . . . . . . . . . OFF
[REVERB] . . . . . . . . . . . . . . . . . . . . . . . . OFF
[MODULATION] . . . . . . . . . . . . . . . . . . . MIN.
[ZONE CONTROL] . . . . . . . . . . . . . CENTER
3) Use the stereo plug and take measurements.
[PHONES] jack: 33 Ω load (both L and R channels)
[OUTPUT] jack: 10 kΩ load (both L/MONO and R channels)
* Unless otherwise specified, take measurement at the [PHONES] jack.
4) To connect the PC and CP33, it is necessary to install the USB-MIDI driver.
Download the USB-MIDI driver from the following URL.
http://www.global.yamaha.com/download/usb_midi/
5) Executing Factory Set (Test No.49) or Flash ROM check 2 (Test No.47) will erase the user data.
Be sure to make a backup of the data in advance. (See page 40)
2. HOW TO ENTER THE TEST PROGRAM
Method 1) While pressing the [C#2], [F2] and [G#2] keys simultaneously, turn on the [STANDBY/ON] switch.
Method 2) While pressing the [VOICE 1], [VOICE 3] and [VOICE 5] buttons simultaneously, turn on the [STANDBY/ON]
switch.
Method 3) Send the MIDI code “F0 43 73 01 60 00 F7” to CP33 to enter the TEST mode. (See page 31)
3. PROCEEDING THROUGH THE TEST PROGRAM
1) Once inside the test program, the 7-seg. LED will display “(s(”.
2) To select the test number, use the [ + ] and [ – ] buttons of the [TEMPO/FUNCTION] switch.
3) To execute the test, press the [CLICK ON/OFF] button.
When the test result is satisfactory, the 7-seg. LED will display “
pAs”.
Press the [CLICK ON/OFF] button to return to the test number display.
([DEMO] button, [MIDI] button, lowest sound key can also be used.)
When testing is completed, “
(.0.1. (dot)” will appear for that test number for identification that testing is over.
Press the [ + ] or [ – ] button of the [TEMPO/FUNCTION] switch, to select the next test number.
When the test result is no good, the 7-seg. LED will display “
nG”.
Press the [DEMO] button to return to the test number display. ([MIDI]button, lowest sound key can also be used.)
Press the [ + ] or [ – ] button of the [TEMPO/FUNCTION] switch, to select the next test number.
C
#
2
F2
G
#
2

 Loading...