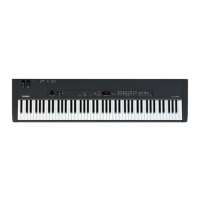
CP33
7
■ DISASSEMBLY PROCEDURE(分解手順)
1. Upper Case Assembly
(Time required: About 2 minutes)
Remove the five (5) screws marked [50] and the six
(6) screws marked [60] located under the keybed. Move
the upper case assembly rearward, and it can then be
remove by lifting up. (Fig. 1)
1. 上ケースAssy(所要時間:約 2 分 )
棚板下より[50]のネジ5本と[60]のネジ6本を外し
て、上ケースAssyを後方にスライドした後、持ち上
げて外します。(図1)
Circuit board and Assembly Ref. No. Screw QTY Fig.
DM 270A Bind Head Tapping Screw-B (Bタイト+BIND) 3.0X6 MFZN2W3 (WE936300) 3 2
420 PW Head Tapping Screw-B (Bタイト+PWH) 3.0X8 MFZN2W3 (WF002600) 1 2
DJACK *
1
320 Bind Head Tapping Screw-B (Bタイト+BIND) 3.0X8 MFZN2B3 (WE774400) 2 2
330A Bind Head Tapping Screw-S (Sタイト+BIND) 3.0X5 MFZN2B3 (WF304200) 2 2
AJACK 410A Bind Head Tapping Screw-B (Bタイト+BIND) 3.0X8 MFZN2W3 (WE774300) 5 2
330B Bind Head Tapping Screw-S (Sタイト+BIND) 3.0X5 MFZN2B3 (WF304200) 2 2
PNL *
1
410B Bind Head Tapping Screw-B (Bタイト+BIND) 3.0X8 MFZN2W3 (WE774300) 10 2
PNR *
1
410C Bind Head Tapping Screw-B (Bタイト+BIND) 3.0X8 MFZN2W3 (WE774300) 8 2
SVR *
1
410D Bind Head Tapping Screw-B (Bタイト+BIND) 3.0X8 MFZN2W3 (WE774300) 4 2
– Slide Knob (スライドツマミ) 21
MVR *
1
410E Bind Head Tapping Screw-B (Bタイト+BIND) 3.0X8 MFZN2W3 (WE774300) 2 2
– Volume Knob (Vツマミ) 11
Wheel Assembly (PITCH BEND) 270B Bind Head Tapping Screw-B (Bタイト+BIND) 3.0X6 MFZN2W3 (WE936300) 2 2
Wheel Assembly
(MODULATION)
270C Bind Head Tapping Screw-B (Bタイト+BIND) 3.0X6 MFZN2W3 (WE936300) 2 2
2. Circuit Boards & Assemblies
(Time required: About 4–5 minutes each)
2-1 Remove the upper case assembly. (See procedure 1)
2-2 Each circuit board and assembly can be removed by
removing its fixing screws as listed below.
2. 基板とアッセンブリ
(所要時間:各約4〜5分)
2-1 上ケースAssyを外します。(1項参照)
2-2 次のネジを外すことにより、基板・アッセンブリを外
すことができます。
*
1
When mounting the DJACK, PNL, PNR, SVR and MVR circuit boards, always start by tightening screws
q
,
w
in sequence.
*
1
DJACK,PNL,PNR,SVR,MVRシートを取り付ける際、まず最初にq、wのネジを順に締めます。
Fig. 1(図1)
[50]: BindHeadScrew(小ネジ+BIND)4.0X14MFZN2W3(WE968700)
[60]: BindHeadScrew(小ネジ+BIND)4.0X20MFZN2B3SP(WF002300)
[120]: BindHeadTappingScrew-1(TP#1+BIND)3.5X12MFZN2W3(WE970900)
<Bottom view>(底面)
[50]
Front
Rear
[50]
[50]
Keybed(棚板)
[60]
[60]
[120][120] [120]
Upper case assembly(上ケースAss'y)
Volume knob
(Vツマミ)
Slide knob
(スライドツマミ)
1
2
<Top view>(上面)
 Loading...