PERIODIC MAINTENANCE AND ADJUSTMENT
6-27
6
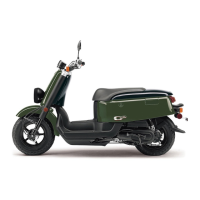
5. Remove the burnt out bulb by
pushing it in and turning it counter-
clockwise.
6. Insert a new bulb into the socket,
push it in, and then turn it clock-
wise until it stops.
7. Install the socket (together with the
bulb) by turning it clockwise.
8. Install the screws and the
tail/brake light unit.
9. Install the panel.
EAUM2201
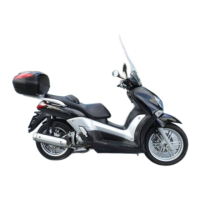
Replacing the license plate
light bulb
1. Remove the socket (together with
the bulb) by pulling it out.
2. Remove the burnt out bulb by pull-
ing it out.
3. Insert a new bulb into the socket.
4. Install the socket (together with the
bulb) by pushing it in.
EAUM2212
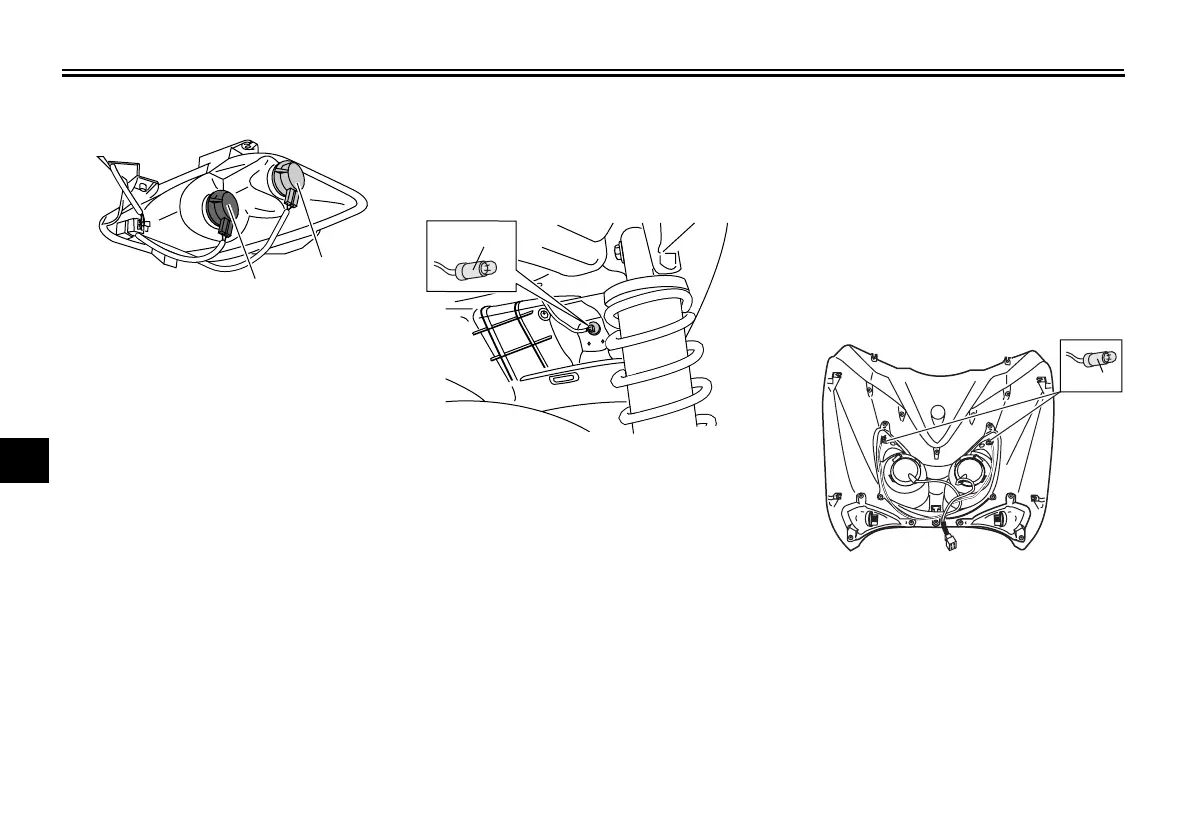
Replacing an auxiliary light
bulb
This model is equipped with two auxil-
iary lights. If an auxiliary light bulb burns
out, replace it as follows.
1. Remove cowling A. (See page
6-6.)
2. Remove the socket (together with
the bulb) by pulling it out.
3. Remove the burnt out bulb by pull-
ing it out.
4. Insert a new bulb into the socket.
5. Install the socket (together with the
bulb) by pushing it in.
6. Install the cowling.
1. Tail/brake light bulb socket
2. Turn signal light bulb socket
ZAUM0680
1
2
1. License plate light bulb socket
ZAUM0681
1
1. Auxiliary light bulb socket
ZAUM0682
1
U5B2E1E0.book Page 27 Tuesday, July 22, 2008 2:49 PM
 Loading...