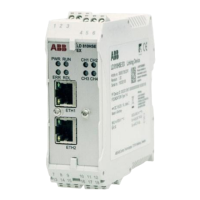
In a redundant set of Linking Devices, removing the power supply, the Ethernet cable
or a H1 link cable from the primary device causes a redundancy change-over. Before
doing so, make sure that the secondary device is operational (and not still booting
due to a prior change-over) and the redundancy link interface cable is intact and
connected. Otherwise the system breaks down or the configuration information might
get lost. Therefore, wait at least one minute between such checks.
2.7 Replacing a Defective Linking Device in a
Redundant Set of Linking Devices
For replacing a defective Linking Device in a redundant set of Linking Devices, perform
the following steps:
1. Identify the defective Linking Device, refer to Status Indicators - LEDs on page 37.
2. Remove the power terminal block from the Linking Device.
3. Remove the redundancy link wiring and the Ethernet cable.
4. If not indicated on the cable, make a note to which channel each H1 link is connected.
Then remove the H1 terminal blocks.
5. Make sure that the new Linking Device has the same IP configuration (IP address
and subnet mask) as the defective Linking Device, see Network Configuration on
page 62.
6. Replace the defective Linking Device.
7. Plug in the H1 terminal blocks. Make sure to use the same allocation as before.
Make sure not to permute the H1 terminal blocks! An accidental permutation of the
H1 link connections at the secondary Linking Device will not be detected right away.
On application level, detection will not be possible before a redundancy switch-over
takes place or the live lists of primary and secondary Linking Device are being
compared manually.
2PAA114135-610 46
2 Hardware Installation
2.7 Replacing a Defective Linking Device in a Redundant Set of Linking Devices

 Loading...