6.6.5 Transceiver Check
6.6.5.1 Instructions
1) If available, use a wattmeter to check the transceiver output power. Refer
to the manufacturer’s documentation for measuring instructions.
2) If available, use two (2) hand-held transceivers and verify the communication
path between the master and remote sites. Voice-activated interface can be
used, if available.
3) Verify that the transceiver is set to the correct frequency. Refer to the
manufacturer’s documentation for checking frequency instructions.
4) If a directional antenna is used, verify the orientation of the antenna to the master
site.
If a communication problem still exists, and the unit has
passed the transceiver check test, contact Totalflow
customer service for additional help.
6.6.6 RS-232 Communication Test
The following RS-232 serial communication test procedure is directed from
Figure
6-4 and will assist with what may be the possible cause for the indicated error
message.
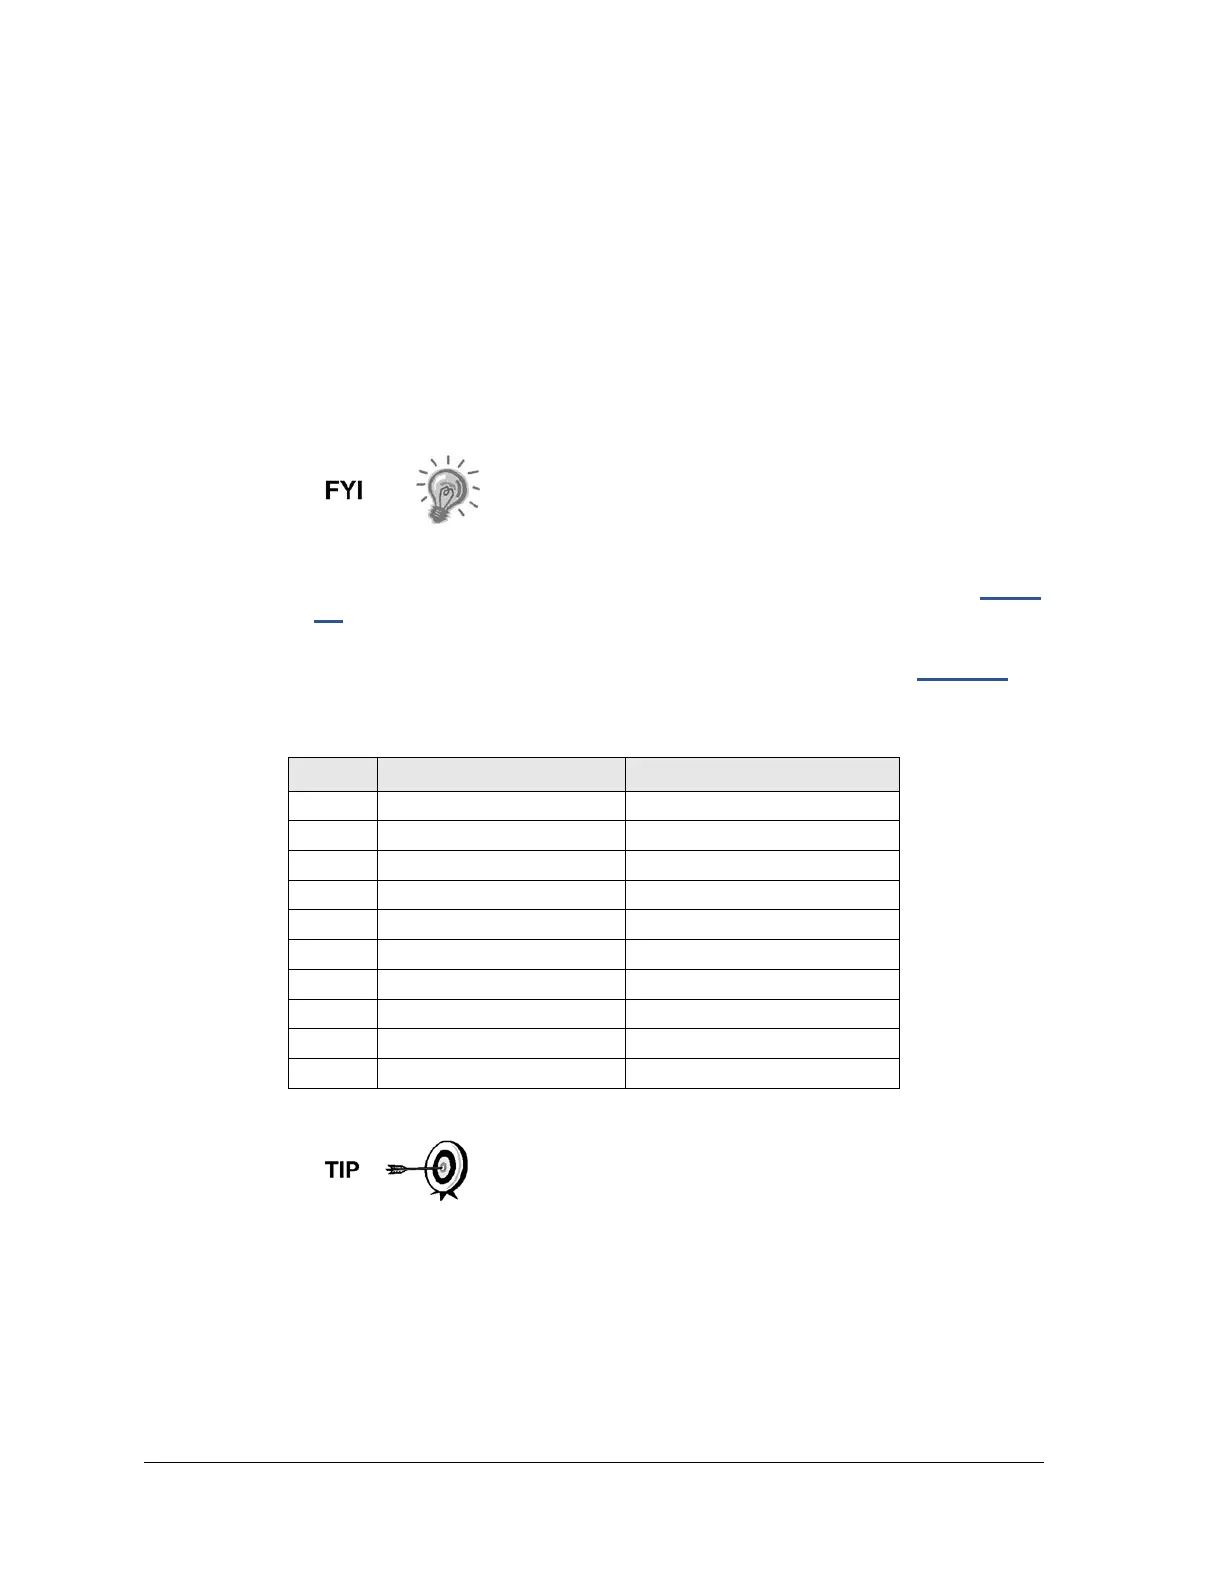
Before performing this test, verify that the field wiring is correct (see Table 6–4).
Table 6–4 RS-232 Field Wiring on NGC Termination Panel
Description Description
PIN Jack 8–Port 1 Jack 10–Port 2
1 Power Out Power Out
2 Ground Ground
3 Switched Power Out Switched Power Out
4 Operate Operate
5 Not Used Not Used
6 Request to Send Request to Send
7 Transmit Data Transmit Data
8 Receive Data Receive Data
9 Clear to Send Clear to Send
When troubleshooting RS-232 mode, verify that the
termination settings of the serial port 1 J9 and serial port 2
J11 on the termination panel have pins 2 and 3 jumpered.

 Loading...