40 Rockwell Automation Publication 1756-UM001M-EN-P - February 2012
Chapter 2 Install the 1756-L6x Controller
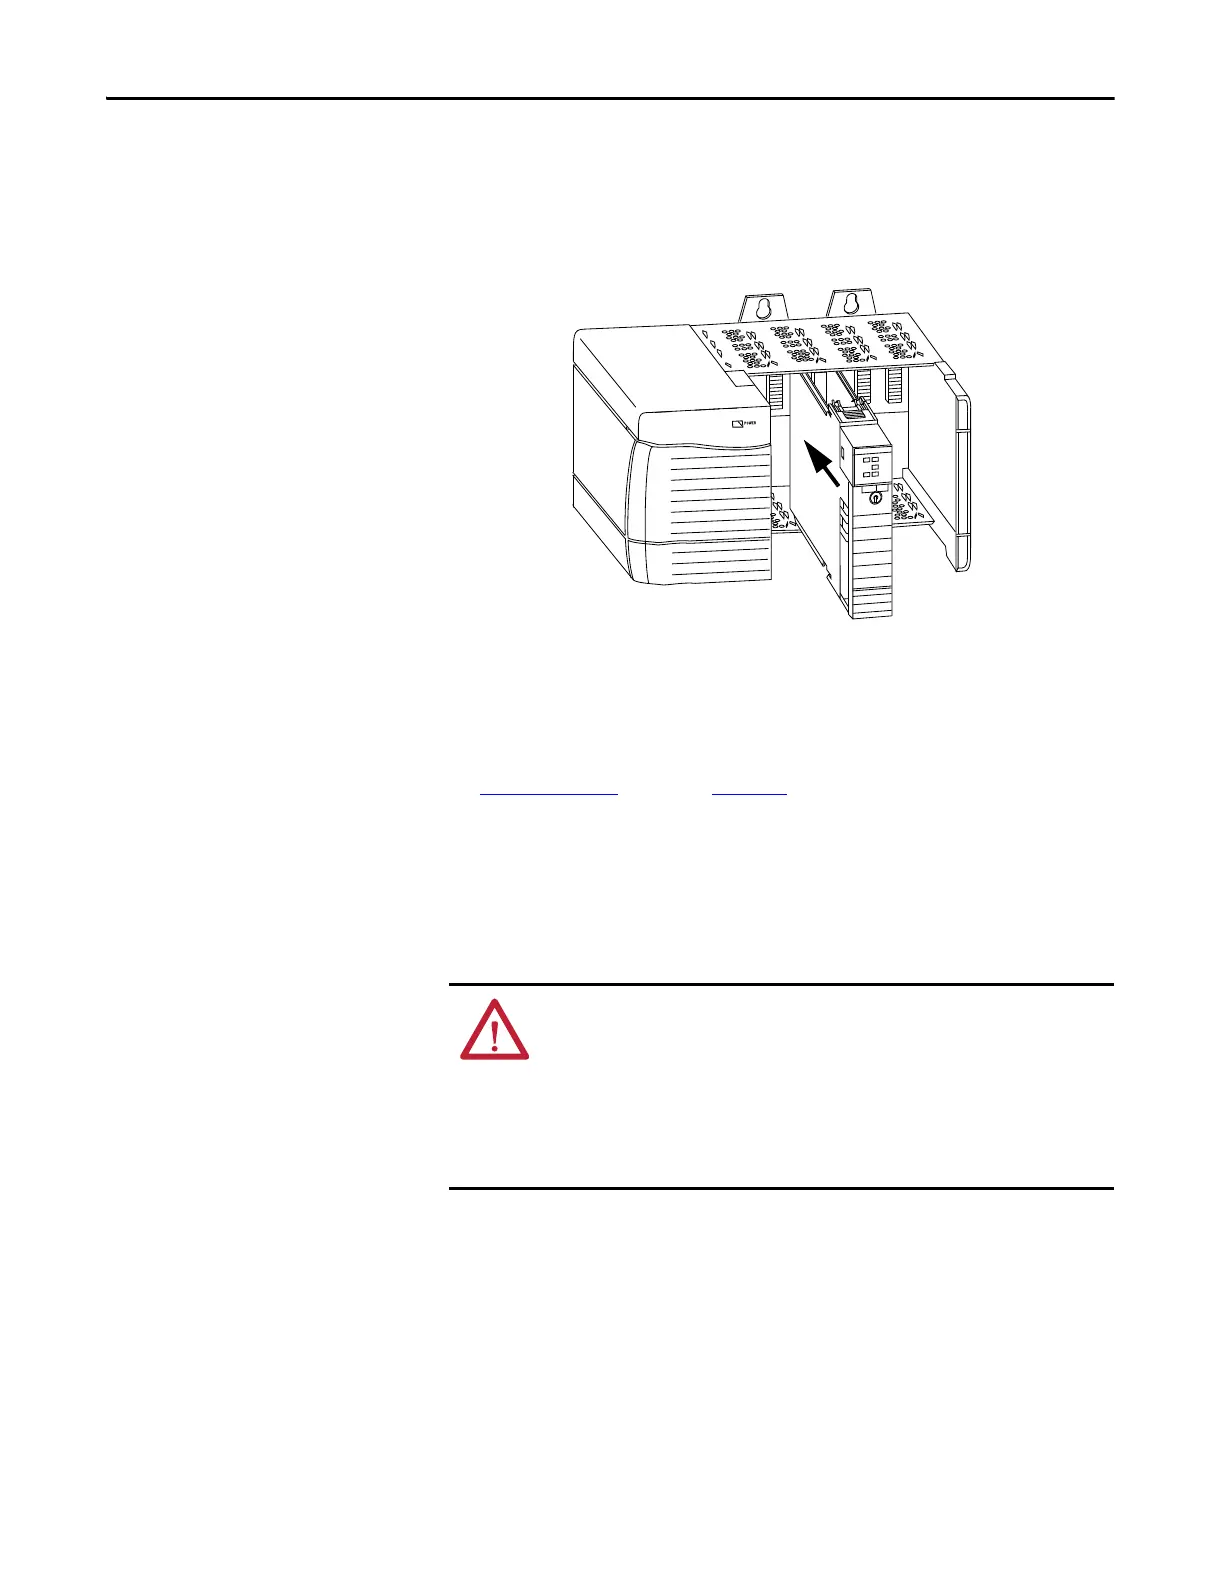
1. Insert the key into the controller.
2. Turn the key to the PROG position.
3. Align the circuit board with the top and bottom guides in the chassis.
4. Slide the module into the chassis.
5. Verify that the controller is flush with the power supply or other installed
modules.
6. Verify that the top and bottom latches are engaged.
After you have inserted the controller into the chassis, you may need to reference
the Status Indicators
section on page 199 for more information related to the
state of the controller.
Remove the Controller from
the Chassis
You can install or remove a controller while chassis power is on and the system is
operating. If you remove the controller, all of the devices owned by the controller
go to their configured fault state.
WARNING: When you insert or remove the module while backplane power is
on, an electrical arc can occur. This could cause an explosion in hazardous
location installations. Be sure that power is removed or the area is
nonhazardous before proceeding.
Repeated electrical arcing causes excessive wear to contacts on both the controller
and its mating connector in the chassis. Worn contacts may create electrical
resistance that can affect controller operation.

 Loading...