Rockwell Automation Publication 1756-UM001M-EN-P - February 2012 39
Install the 1756-L6x Controller Chapter 2
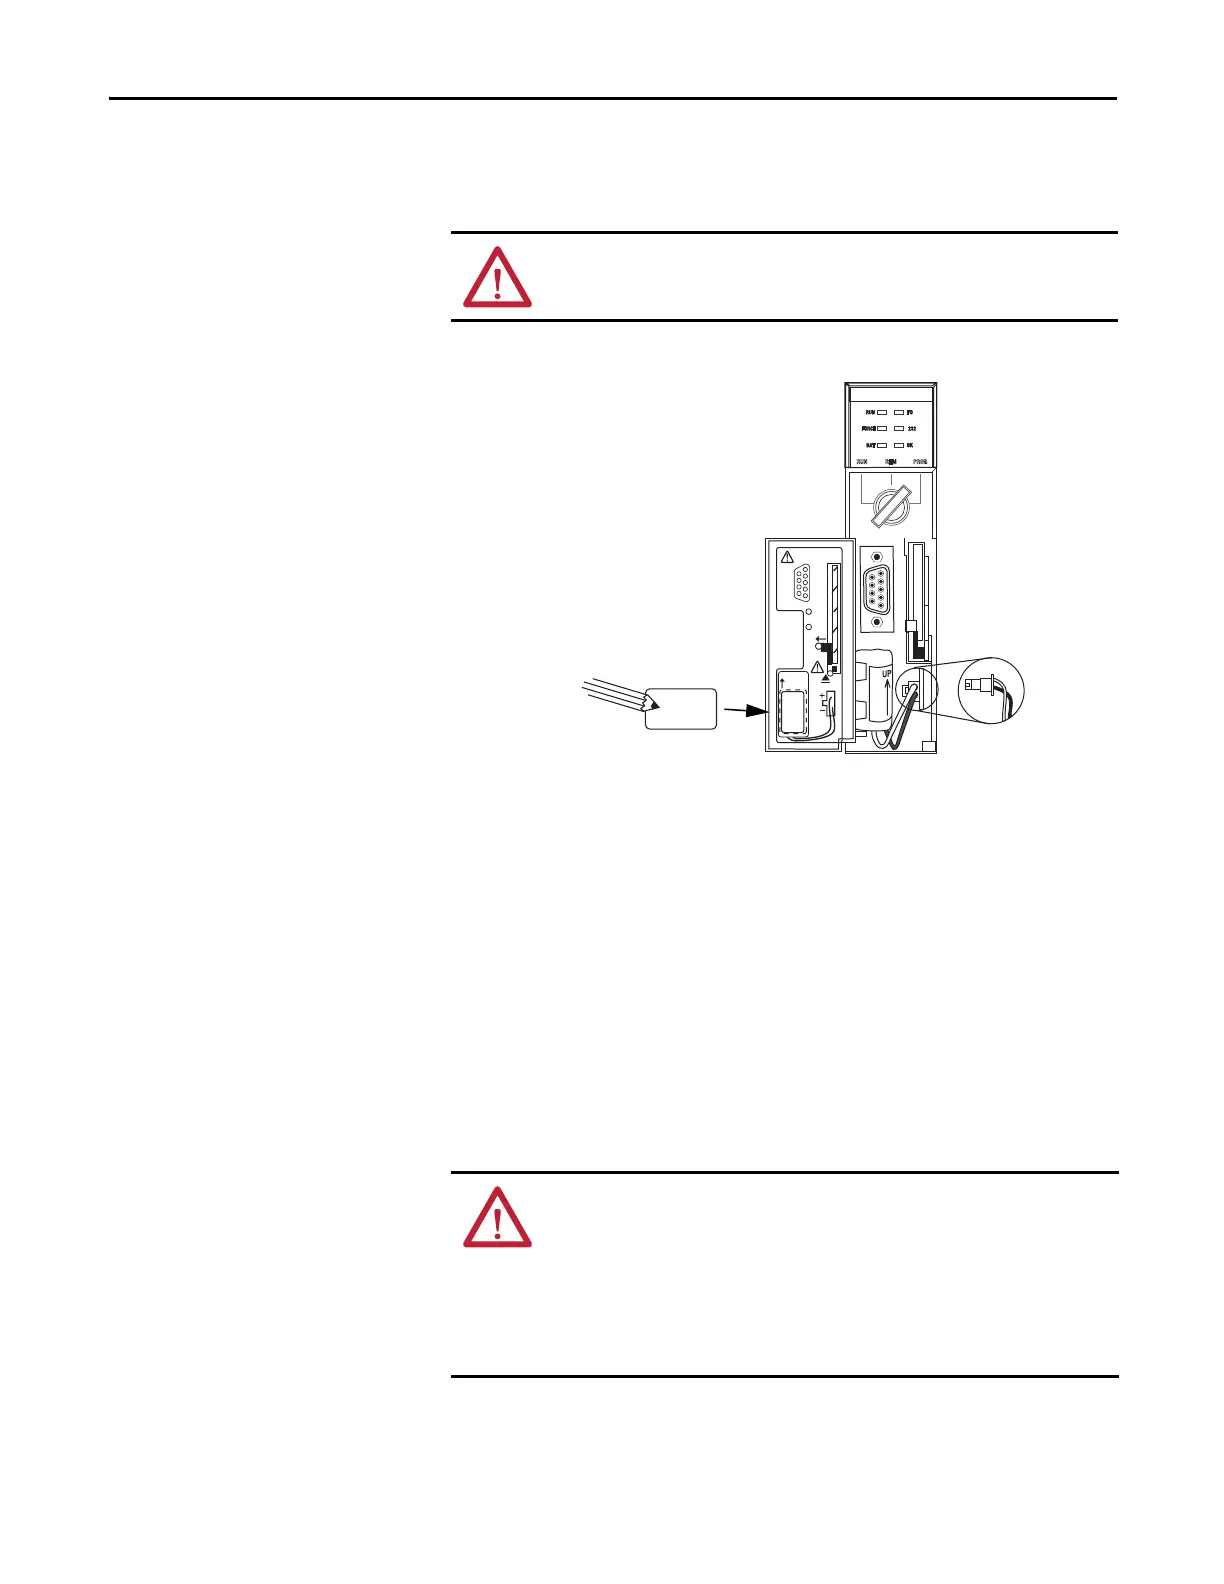
Install the Battery on a Series B Controller
Complete these steps to install the battery on a series B controller.
1. Insert the battery, with the arrow pointing up, into the battery slot.
2. Plug the battery connector into the battery port (+ Red, - Black).
3. Write the date on the battery label.
4. Attach the label to the inside of the controller door.
Insert the Controller into the
Chassis
When installing a ControlLogix controller, you can do the following:
• Place the controller in any slot.
• Use multiple controllers in the same chassis.
You can install or remove a ControlLogix controller while chassis power is on and
the system is operating.
ATTENTION: For a series B controller, connect only a 1756-BA2 battery. The
use of other batteries may damage the controller.
RS232
BATTERY
PORT
1-DCD
2-RXD
4-DTR
3-TXD
5-GND
DSR-6
CTS-8
RTS-7
N/C-9
1
2
BATTERY
DATE
UP
COMPACT
FLASH
2
To
Insert 1
To Eject
1 + 2
2
1
1
WARNING: When you insert or remove the module while backplane power is
on, an electrical arc can occur. This could cause an explosion in hazardous
location installations. Be sure that power is removed or the area is nonhazardous
before proceeding.
Repeated electrical arcing causes excessive wear to contacts on both the controller
and its mating connector on the chassis. Worn contacts may create electrical
resistance that can affect controller operation.

 Loading...