14 Rockwell Automation Publication 1783-UM001B-EN-P - May 2010
Chapter 1 Basic Configuration
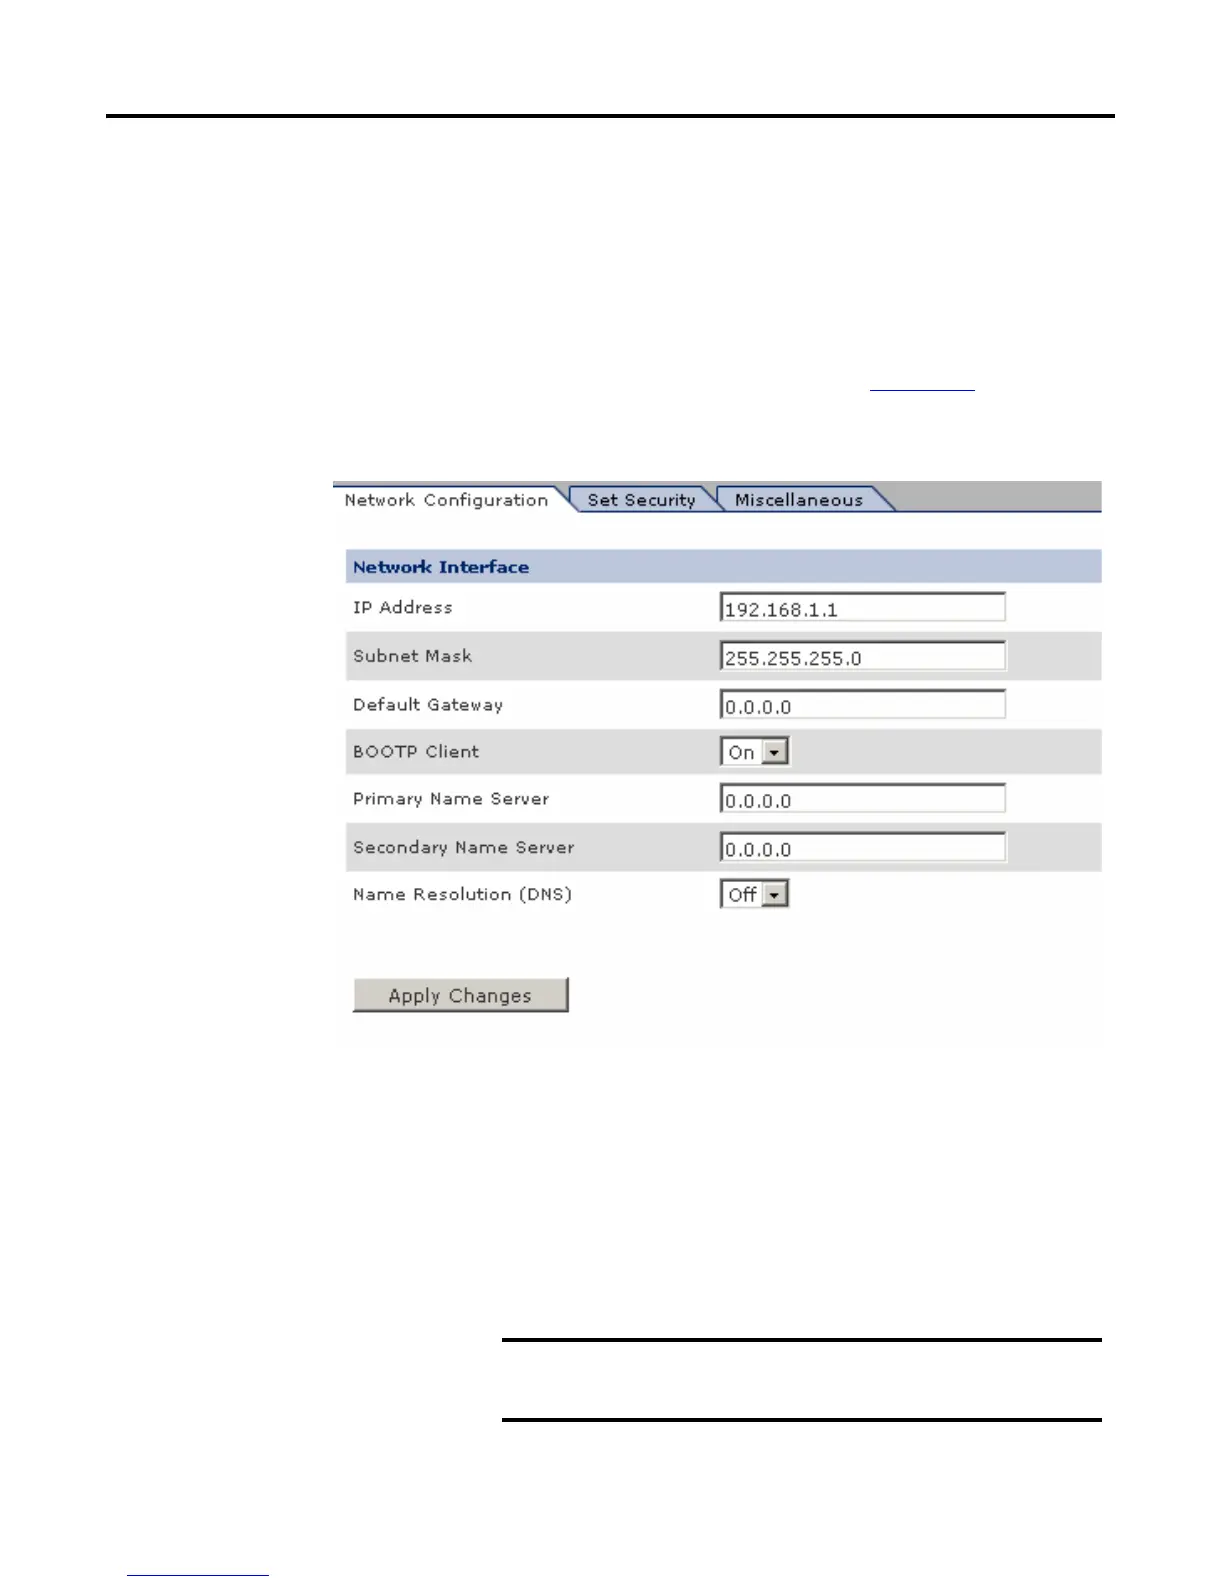
Set the IP Address
You normally need to change your IP address to install the switch into your
Ethernet network. To change the IP address, use this procedure.
1. Find an available IP address on your subnet.
2. Connect the switch to your computer’s LAN card.
For additional information, refer to the Stratix 6000 Ethernet Managed
Switch Installation Instructions, publication 1783-IN004
.
3. Click the Basic Configuration folder.
4. Click Network Configuration.
5. Type your new IP address.
6. Change the subnet mask and default gateway, if needed.
7. Turn BOOTP Client off to prevent dynamic IP address assignment.
If using hostnames on the network, Name Resolution must be turned on
and the DNS server addresses must be configured (usually required if using
the email function).
8. Click Apply Changes to change the IP and subnet.
IMPORTANT
The switch does not load the new IP and subnet
address until power is cycled.
 Loading...