66
use and maintenance RS 125
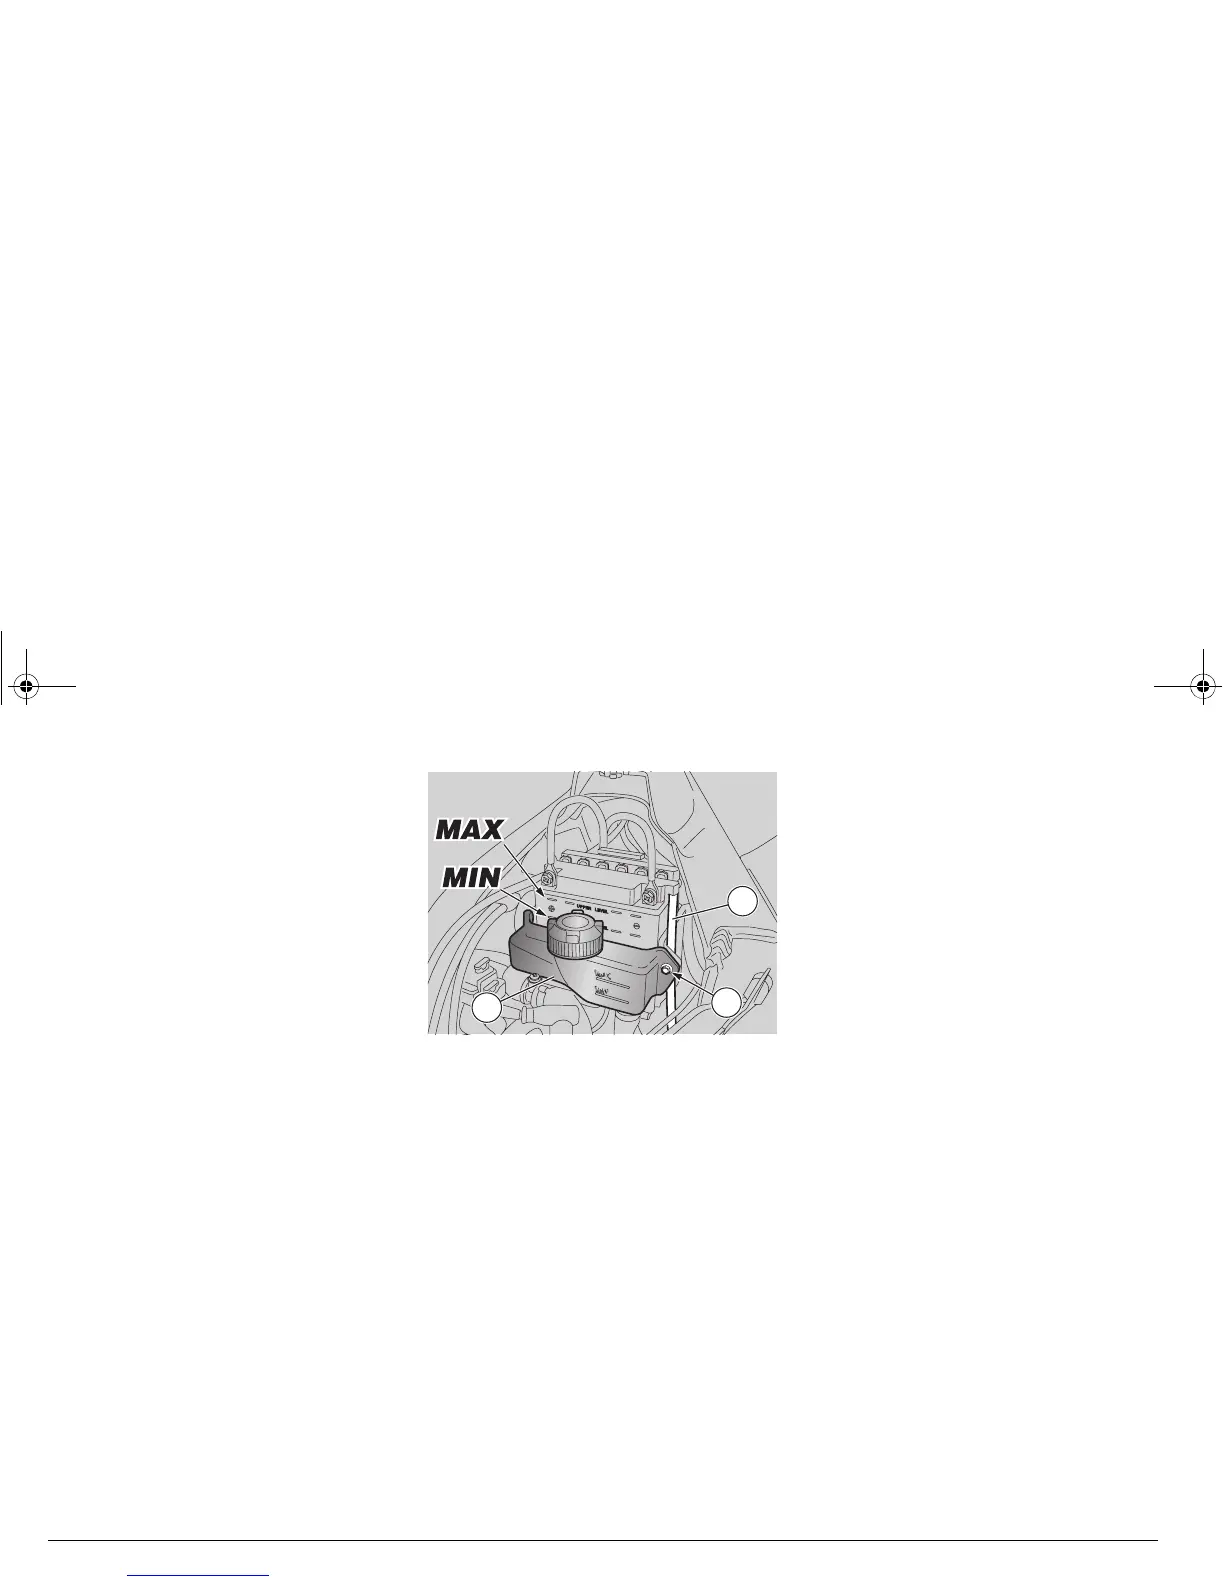
CHECKING
THE ELECTROLYTE LEVEL
Carefully read page 64 (BATTERY).
To check the electrolyte level, proceed as
follows:
u
Lift the fuel tank, see page 57
(REMOVING THE LOWER FAIRING).
u
Keep the vehicle in vertical position, with
the two wheels resting on the ground.
u
Make sure that the fluid level is included
between the two "MIN" and "MAX"
notches stamped on the battery side.
Otherwise:
u
Remove the battery, see page 65
(CHECKING AND CLEANING THE
TERMINALS).
u
Remove the element plugs.
Top up with distilled water only.
Do not exceed the “MAX” mark,
since the electrolyte level
increases during the recharge.
u
Top up by adding distilled water.
RECHARGING THE BATTERY
Carefully read page 64 (BATTERY).
u
Remove the battery, see page 65
(REMOVING THE BATTERY).
u
Remove the element plugs.
u
Check the electrolyte level, see beside
(CHECKING THE ELECTROLYTE
LEVEL).
u
Connect the battery with a battery
charger.
u
A recharge with an amperage equal to
1/10th of the battery capacity is
recommended.
u
After the recharging operation, check the
electrolyte level again and if necessary
top up with distilled water.
u
Put back the element plugs.
Reassemble the battery only 5-10
minutes after disconnecting the
recharge apparatus, since the
battery continues to produce gas for a
short lapse of time.
INSTALLING THE BATTERY
Carefully read page 64 (BATTERY).
u
Make sure that the ignition switch is in
position “
”.
u
Lift the fuel tank, see page 57
(REMOVING THE LOWER FAIRING).
u
Put the battery in its container.
u
Connect the breather pipe.
Always connect the battery
breather pipe, to prevent the
sulphuric acid vapours from
corroding the electric system, painted
parts, rubber elements or gaskets when
they exit the breather pipe itself.
u
Connect, in order, the positive (+) and
negative (–) cable.
u
Cover the terminals of the cables and of
the battery with neutral grease or
Vaseline.
u
Position the coolant expansion tank (2)
correctly.
u
Tighten the screw (3).
u
Lower and lock the fuel tank.

 Loading...