52
use and maintenance SR 50
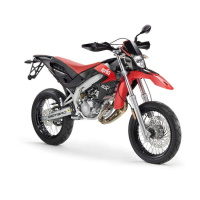
REMOVING
THE RIGHT AND LEFT
INSPECTION COVERS
Carefully read p. 39 (MAINTENANCE).
NOTE Handle the painted components
with care and avoid scraping or damaging
them.
◆ Position the vehicle on the centre stand,
see p. 38 (POSITIONING THE VEHICLE
ON THE STAND).
◆ Remove the battery/tool kit compartment
cover (1), see p. 20 (BATTERY / TOOL
KIT COMPARTMENT).
◆ Remove the tool kit compartment (2).
◆ Unscrew and remove the two screws (3).
NOTE Carry out the following operations
on the side of the inspection cover to be re-
moved.
◆ Unscrew and remove the screw (4) and
the screw (5) of the rear part of the fairing.
NOTE Upon reassembly, fit the screw (5)
(with shorter diameter) of the rear part of the
fairing in the relevant seat.
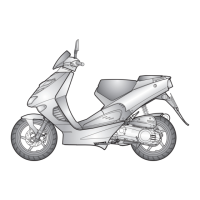
◆ Slightly raise the inspection cover (6), re-
lease it from the footrest and withdraw it
sidewards.
NOTE Upon reassembly, insert the rear
part of the inspection cover in the rear part
of the fairing, making the seat (7) coincide
with the end of the rear part of the fairing (8).
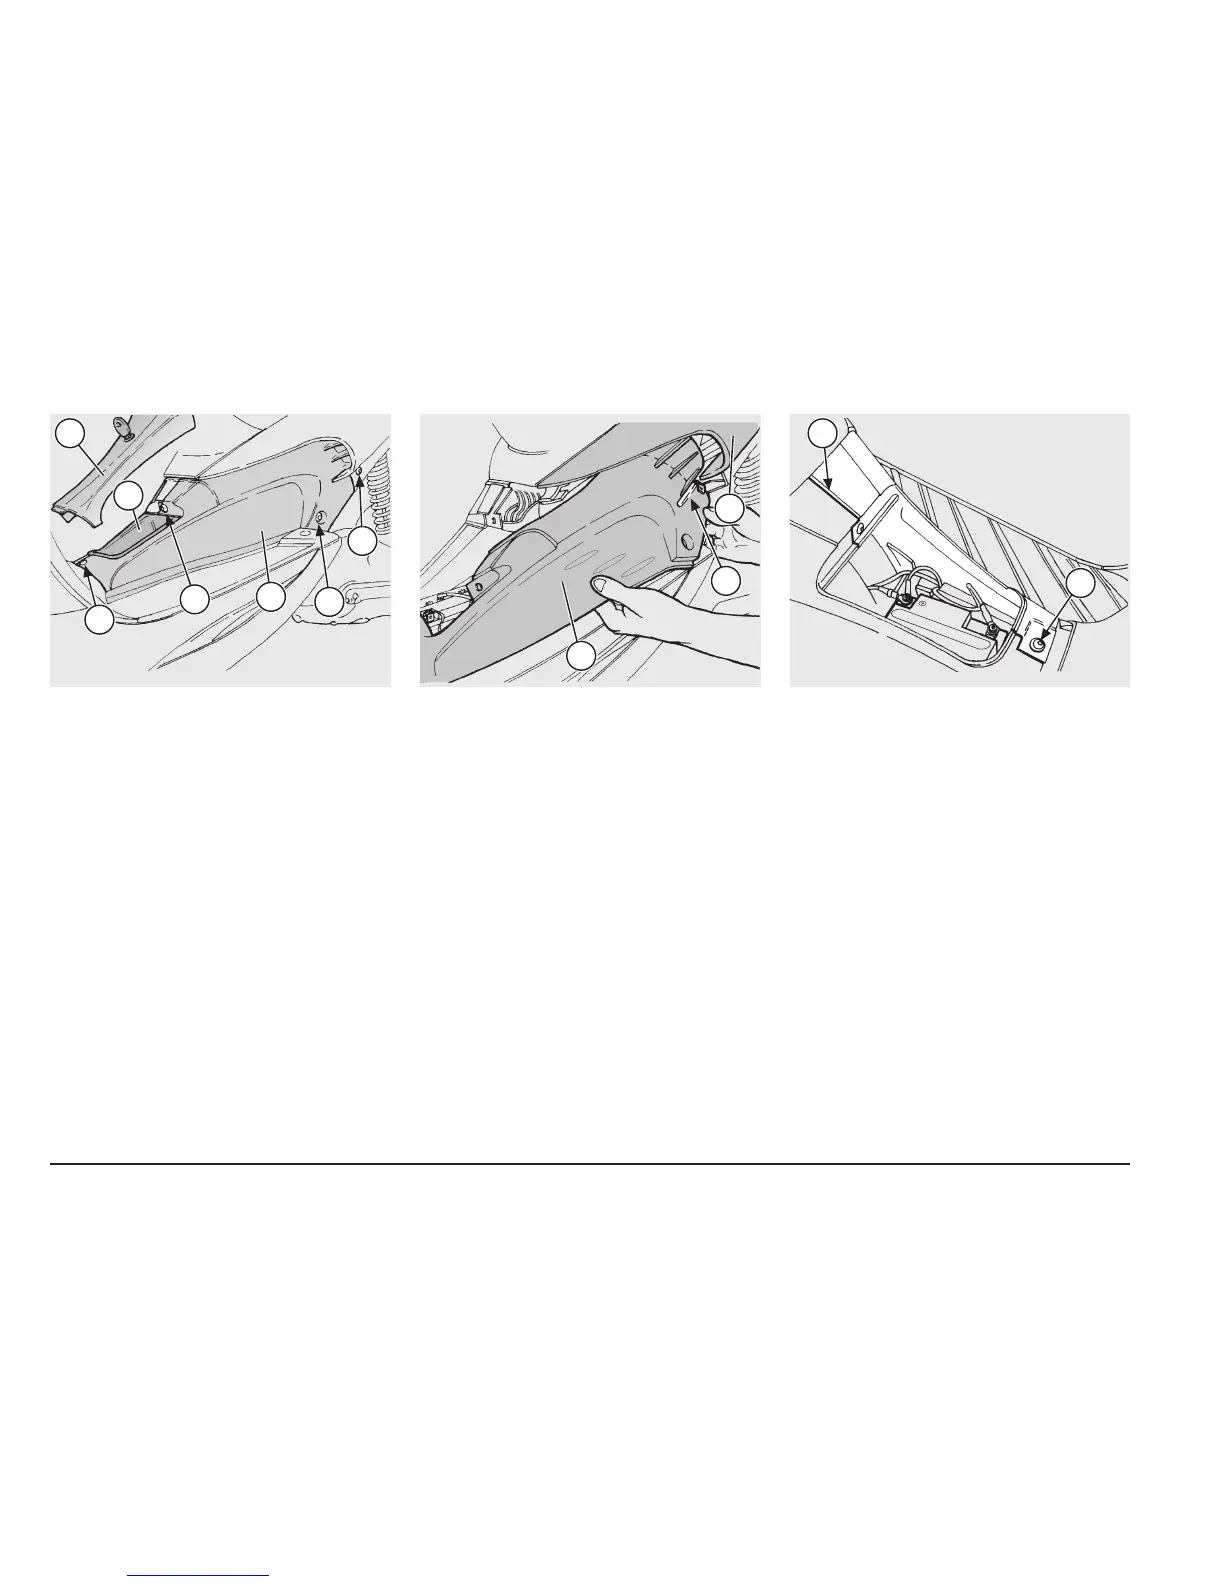
NOTE In points (9) and (10) the left inspec-
tion cover must overlap the right inspection
cover.
If both inspection covers have been removed,
reassemble first the right and then the left
cover.
1
3
2
3
5
6
4
8
7
6
9
10
 Loading...