ATI Q46D Dissolved Oxygen System Part 5 – Sensor Assembly
23
O&M Manual
Rev-N (4/21)
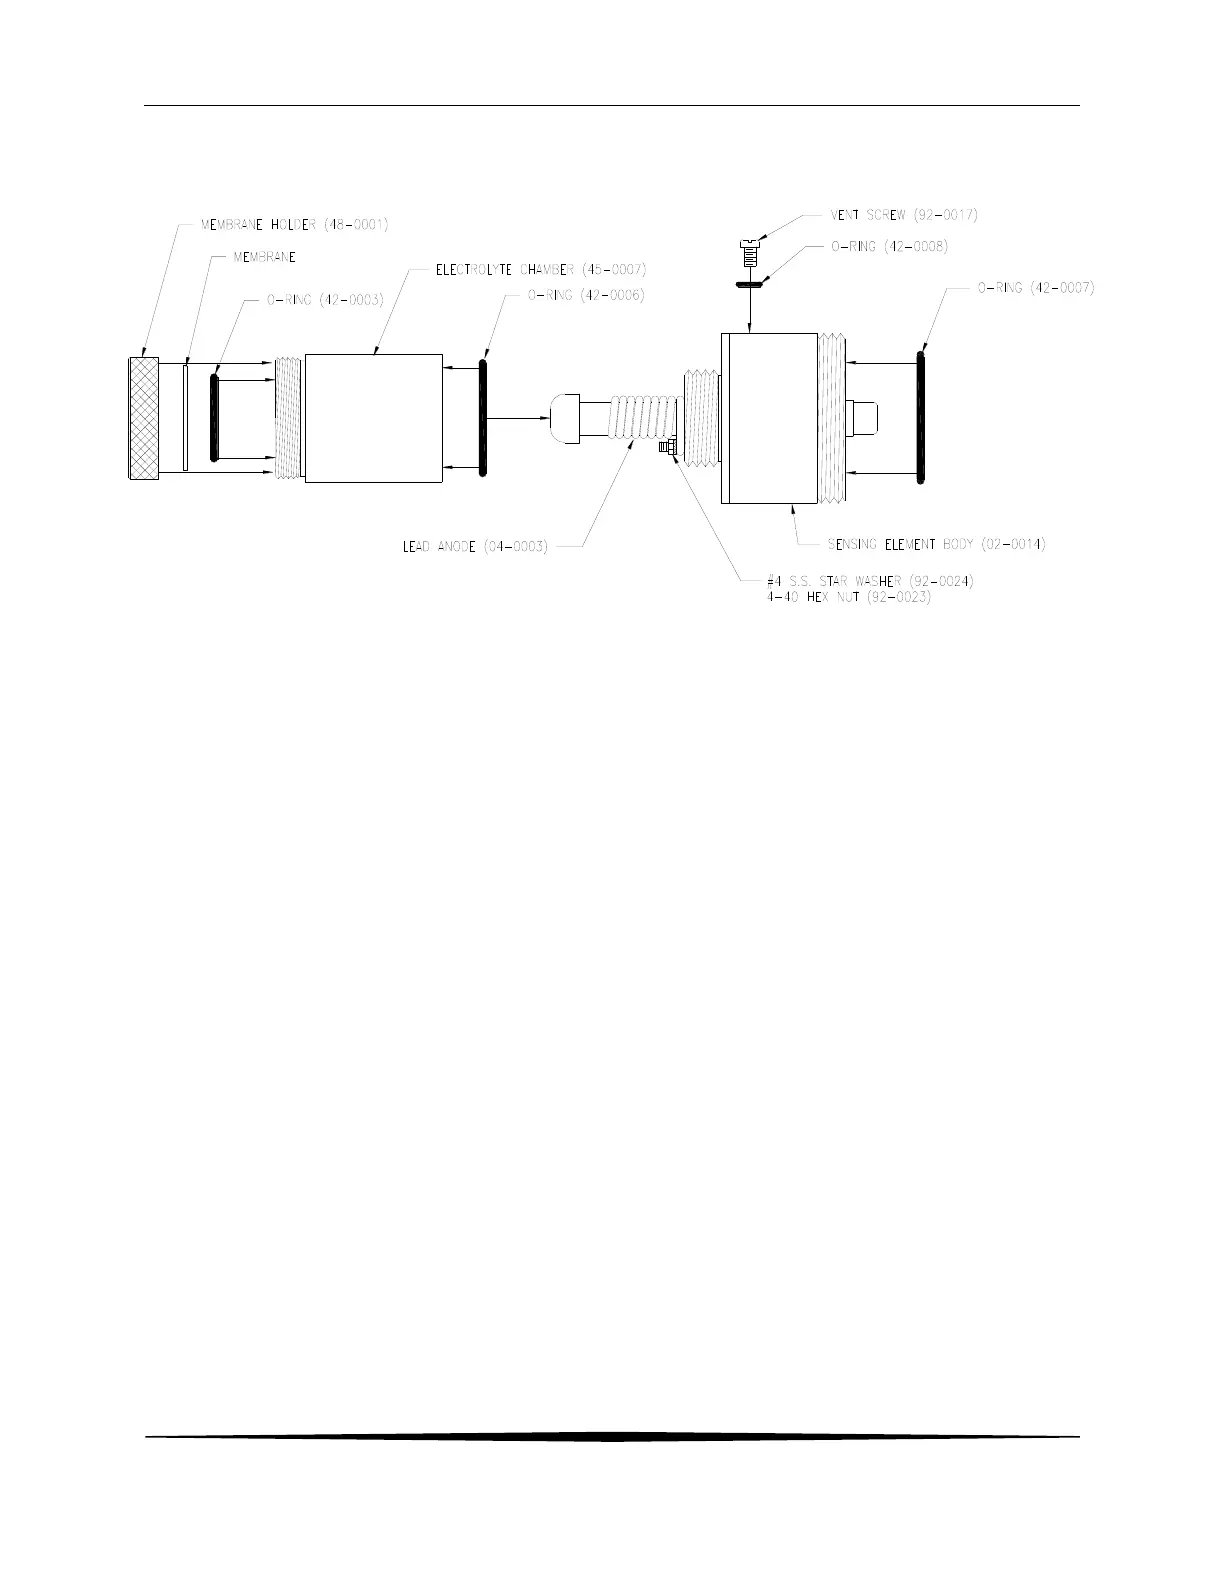
Figure 17 - Submersible Sensor Module Exploded View
Follow the procedure below to prepare the D.O. sensor module for operation:
1. Unscrew the electrolyte chamber from the assembled sensor and also remove the vent screw
from the side of the sensor body.
2. Remove the front nut from the bottom of the chamber and discard the protective membrane.
O-rings are contained in grooves on both the bottom and top of the chamber. Be sure that
these o-rings remain in place.
3. From the package of membranes (either 2-mil or 5 mil) supplied with the sensor, place a new
membrane into the front nut, holding the membrane by its edge to avoid fingerprint oil from
contaminating the membrane. The membrane is clear and is separated from other
membranes by a light blue paper spacer.
4. Screw the front nut on to the chamber until you feel the o-ring compress. Hand tight
compression is all that is needed. Do not use tools to tighten. The membrane should be flat
across the bottom of the chamber without wrinkles.
5. Fill the chamber with electrolyte until the level reaches the bottom of the internal threads.
6. Slowly screw the chamber onto the sensor body. A small amount of electrolyte will run out of
the hole from which the vent screw was removed. Place a paper towel around the sensor to
absorb the electrolyte overflow. The electrolyte is harmless and will not irritate skin. Tighten
the chamber until the o-ring at the top of the chamber is compressed. Once again, do not
use tools to tighten.
7. Shake excess electrolyte from the vent hole on the side of the sensor and replace the vent
screw.
 Loading...