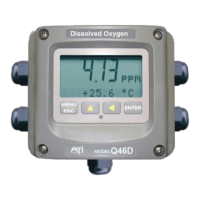
ATI Q46D Dissolved Oxygen System Part 7 - Calibration
43
O&M Manual
Rev-N (4/21)
Part 7 – Calibration
7.1 Oxygen Calibration
Once power is applied, the sensor must be given time to stabilize. This is best done by following
the zeroing procedure below. Establishing a stable zero is critical to the proper operation of the
monitor. A complete calibration will include zeroing and spanning the sensor. It is generally
unnecessary to set the zero at every calibration, however, it should be done during the initial
installation.
7.11 Oxygen Span Cal
The system provides three methods of D.O. calibration: 1-Point (sample), and % Saturation (air
cal), and Zero. These three methods are significantly different.
It is important to note that ONLY the Air Calibration method outlined in section 7.13 may
be used to calibrate a D.O. monitor that has been programmed as “Instrument Type 3” in
the configuration menu. This type of instrument is designed to measure % Saturation and
must be calibrated in air using ambient air as a 100% saturation standard.
7.12 D.O. Span Cal (1-spl)
The 1-Point (sample or comparison) method is intended to be primarily used as an on-line
calibration; however, the sensor can be removed, cleaned and then calibrated in a bucket of
clean water if necessary. During calibration, the system will display the current ppm reading and
the user can manually enter a reference value from a lab sample or comparative reference
instrument. In the Q46D system, the 1-Point calibration adjusts the slope of the sensor output
response.
1. Determine whether the calibration will be done on-line or with the sensor removed and placed
into a bucket of clean water. If the sensor is removed from the application, rinse and clean if
necessary.
2. If the sensor has been removed and placed into a bucket of water, allow sensor to
temperature equilibrate with the solution as much as possible. With the sensor coming from
an application which differs greatly in temperature, the user may have to wait as much as 20
minutes. If the sensor is on-line, the user may want to set the output HOLD feature prior to
calibration to lock out any output fluctuations.
3. Scroll to the CAL menu section using the MENU key and press ENTER or the UP arrow key.
Cal DO will then be displayed.
4. Press the ENTER key. The screen will display a flashing 1-spl for 1-point, a 2-%sat for
Saturation calibration, or a 3-zer for zero calibration. Using the UP arrow key, set for a 1-spl
calibration and press ENTER.
5. The system now begins acquiring data for the calibration value. As data is gathered, the units
for ppm and temperature may flash. Flashing units indicate that this parameter is unstable.
The calibration data point acquisition will stop only when the data remains stable for a pre-
determined amount of time. This can be overridden by pressing ENTER.
 Loading...