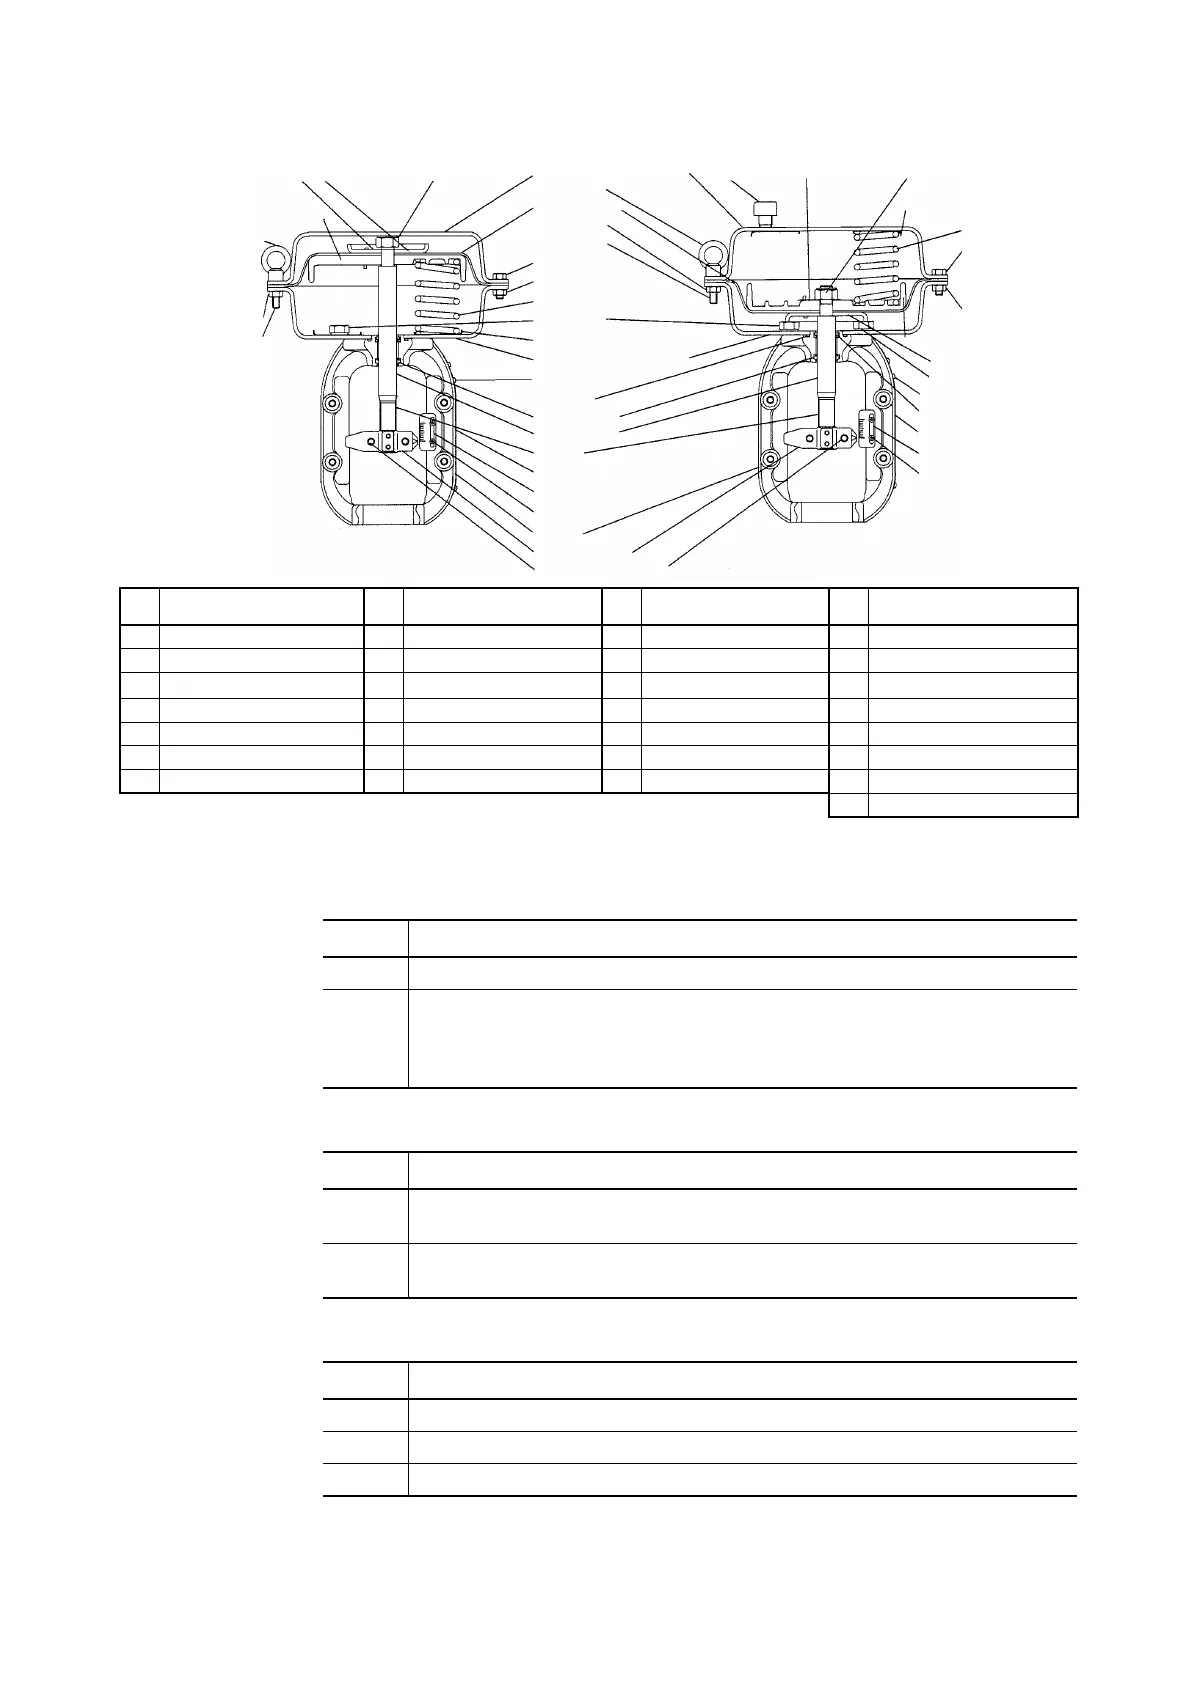
(6) Mounting bolt
(5) Hex nut
(4) Eyebolt
(14) Diaphragm plate
(29) Single-tongued washer
(13) Diaphragm holder
(1) Locknut
(2) Upper diaphragm case
(4) Eyebolt
(3) Diaphragm
(5) Hex nut
(6) Mounting bolt
(16) Hex bolt
(17) Hex nut
(15) Spring
(19) Hex bolt
(18) Spring plate
(7) Lower diaphragm case
(26) Drive screw
(22) O-ring
(9) Dust seal
(8) Round bushing
(23) Rod
(27) Nameplate
(25) Scale
(24) Truss head screw
(10) Yoke
(11) Stem connector
(12) Stem connector bolt
(28) Cap
(29) Single-tongued washer
(1) Locknut
(18) Spring plate
(15) Spring
(16) Hex bolt
(17) Hex nut
(14) Diaphragm plate
(13) Diaphragm holder
(20) Sealing washer
(26) Drive screw
(21) Rod packing
(27) Nameplate
(25) Scale
(24) Truss head screw
No. Part name No. Part name No. Part name No. Part name
1 Locknut 8 Round bushing 15 Spring 22 O-ring
2 Upper diaphragm case 9 Dust seal 16 Hex bolt 23 Rod
3 Diaphragm 10 Yoke 17 Hex nut 24 Truss head screw
4 Eyebolt 11 Stem connector 18 Spring plate 25 Scale
5 Hex nut 12 Stem connector bolt 19 Hex bolt 26 Drive screw
6 Mounting bolt 13 Diaphragm holder 20 Sealing washer 27 Nameplate
7 Lower diaphragm case 14 Diaphragm plate 21 Rod packing 28 Cap
29 Single-tongued washer
Figure 6-5. Structure of the PSA1–4 actuator
(3) Removing the upper diaphragm case and the diaphragm unit
Step Procedure
1 Remove the upper diaphragm case.
2 For direct operation actuators, remove parts in the order: diaphragm unit, springs, and
spring plate(s). For reverse operation actuators, remove parts in the order: spring plates,
springs, and diaphragm unit. When removing the diaphragm unit, pull out the rod along
with it. Note that, for model PSA2D, the spring plate cannot be removed in this step.
(4) Removing the lower diaphragm case and sealing parts
Step Procedure
1 Remove the hex nuts that connect the diaphragm case to the yoke in order to separate
them. For model PSA2D, remove the spring plate in this step.
2 For reverse operation actuators, remove the sealing washer, O-ring, rod packing, and
dust seal. For direct operation actuators, remove only the dust seal.
(5) Disassembling the diaphragm unit
Step Procedure
1 Using a screwdriver, etc., straighten the single-tongued washer whose tongue was bent.
2 Loosen and remove the setnut.
3 Separate the rod, diaphragm, diaphragm plate, and diaphragm holder.
6-5

 Loading...
