(3) Tightening
Step Procedure
1
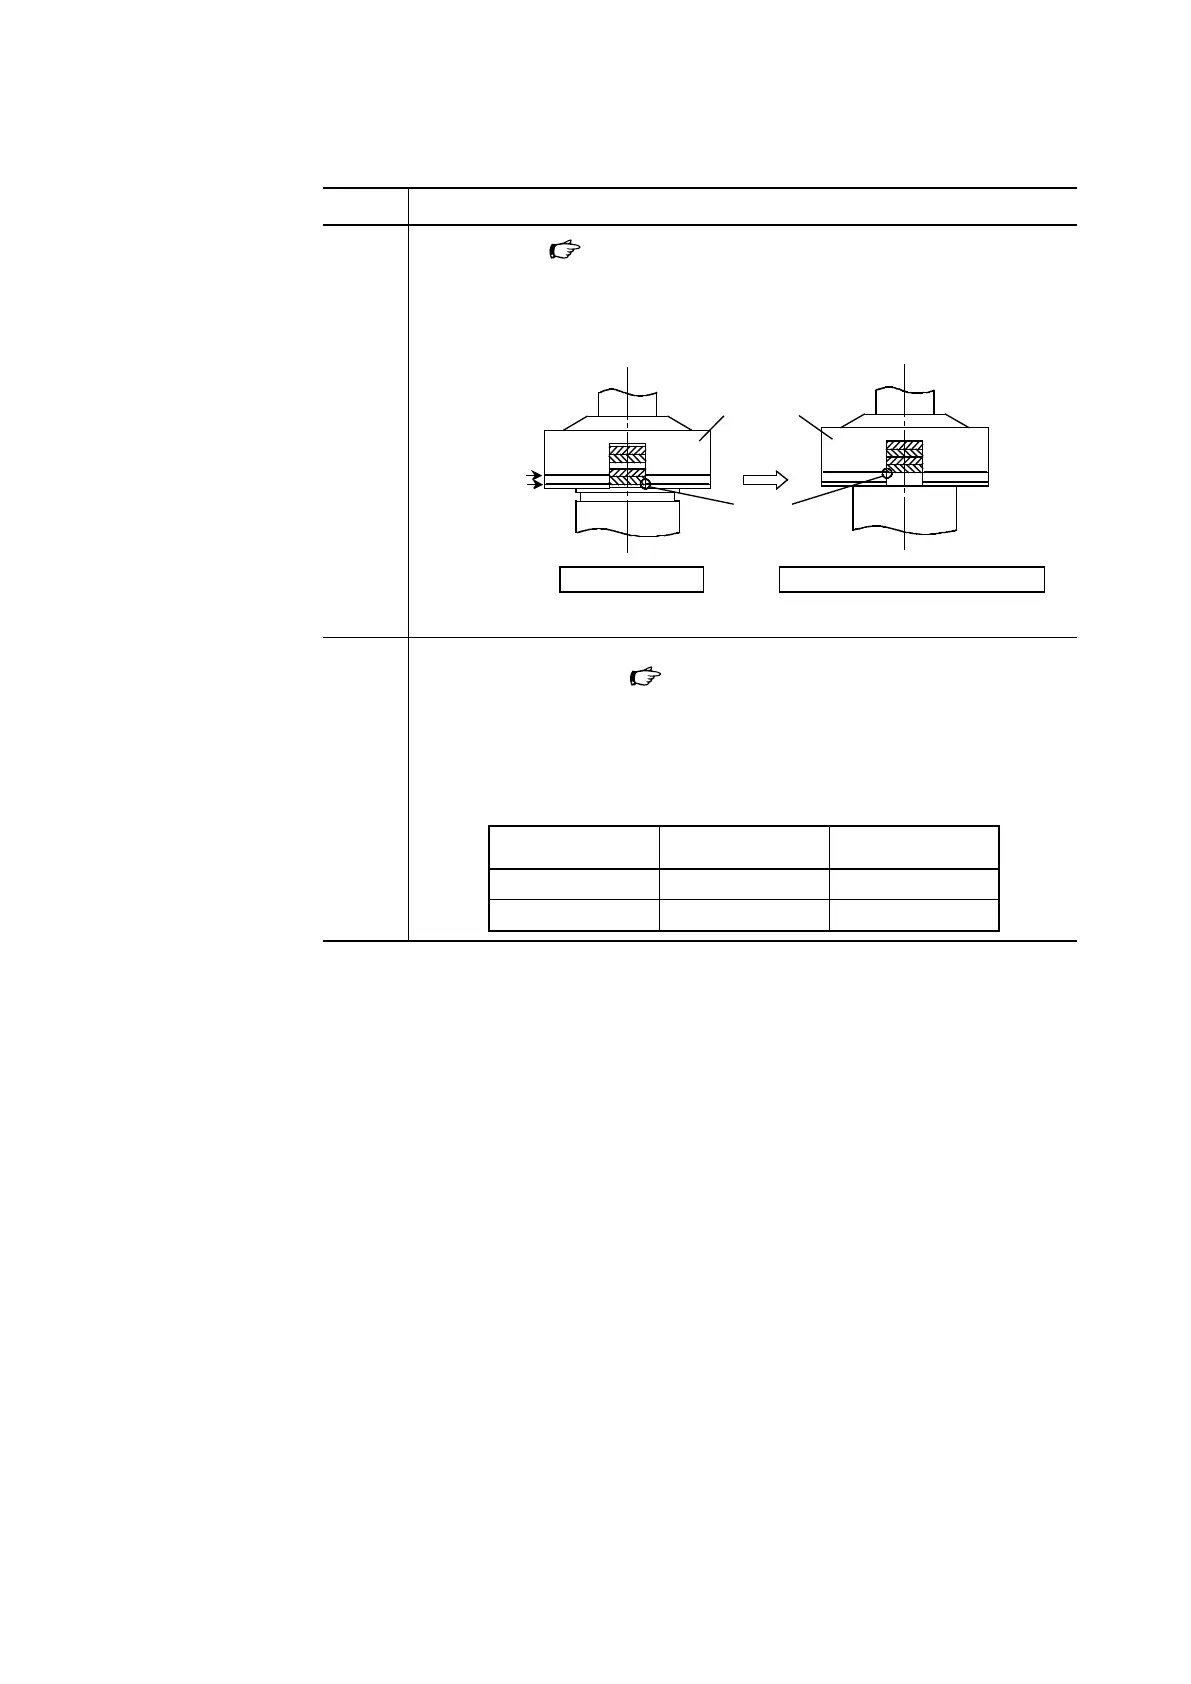
With reference to
Figure 8-5, check the position of the Belleville springs through
the front window of the spring case. When the Belleville springs are set properly, the
bottom of the lowest Belleville spring and the lower scale line on the spring case will
be at almost the same level. (The level may not be exactly the same due to the dimen-
sional tolerance of the Belleville springs)
Spring case
(front)
Bottom
of the lowest piece
Before tightening Tightened to the specied torque
Figure 8-5. Load on Belleville springs
2 Tighten the left and right gland nuts alternately, making approximately a half turn each,
until the torque indicated in
Table 8-4 is reached. Note that if the tightening torque
is insufficient, the amount of leakage may exceed the specified value. On the other
hand, tightening the gland nuts with excessive torque increases the friction on the
stem and causes the gland packing to wear out faster, which may lead to an amount of
leakage exceeding the specified value in a short period of time.
Table 8-4. Gland nut tightening torque
Actuator model Valve stem size Tightening torque
PSA1, PSA2
φ 13 mm
6 to 7 N·m
PSA3, PSA4
φ 16 mm
15 to 17 N·m
8-3-3. Retightening
In the following cases, retighten the gland nuts with the specified torque:
a) In the inspection before control valve installation
b) In a trial operation or start-up operation of the equipment
c) If the amount of leakage from the gland exceeds the specified value during operation of
the equipment
Note that, if the amount of leakage from the gland still exceeds the specified value after
retightening, reassemble all parts of the gland. In that case, replacement of the gland packing
and Belleville springs with new ones is recommended.
8-5

 Loading...
