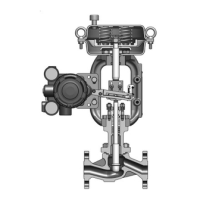
6-7. Mounting the Side Handwheel on the PSA Actuator
Step Procedure
1 Turn the handwheel so that the pointer on the lever drive nut indicates AUTO.
2 Remove the stem connector from the actuator, screw the connector onto the rod, and
fasten it with the rotation stopper.
3 Loosen the bolts and nuts on the levers to widen the space between the levers.
4 Attach the side handwheel main unit to the actuator tightly with the bolt.
5 Hook the bosses on the connector into the holes near the leading edge of the levers.
6 Secure the lever with the bolts and nuts to complete assembly.
7 Rotate the handwheel to check for smooth operation of the control valve.
8 Before starting automatic operation of the control valve on the equipment, set the
pointer of the side handwheel to the AUTO position and lock the handwheel with the
handle lock.
6-16

 Loading...