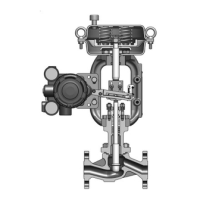
6-2. Reassembly of Model PSA Actuator
Precautions
• Check that there is no problem with the parts, referring to the checklist in
"4-1-2. Periodic Inspection". If any damage is found, repair or replace the parts as
needed.
• Always use a new sealing washer, dust seal, and rod seal.
• Before starting assembly, check the inside of the diaphragm case to make sure there is no
foreign matter produced by maintenance. · For mounting of the side handwheel on the
actuator after assembly of the actuator, refer to "6-7. Mounting the Side Handwheel on
the PSA Actuator".
Assembly procedure
Check the size of the actuator and assemble it, referring to
Figure 6-1 to Figure 6-4.
(1) Assembling the diaphragm unit
Step Procedure
1 Assemble the rod, diaphragm, diaphragm plate, and diaphragm holder with the sin-
gle-tongued washer and nuts. If you use a new single-tongued washer, bend the tongue
in the same manner as the old one.
2 Mount the lower diaphragm case on the yoke temporarily (do not mount the sealing
parts). Set the diaphragm unit in place, and attach the stem connector to the threads of
the rod temporarily.
3 Fix the stem connector in place utilizing the rotation stopper and then tighten the set
nut of the diaphragm unit with the tightening torque indicated in
Table 6-1.
4 Apply a sealant *
1
to the threads of the rod. Then, bend the single-tongued washer
along the set nut.
5 After assembly of the diaphragm is completed, separate the lower diaphragm case,
yoke, and the stem connector.
*1. Use No. 1104 liquid gasket made by ThreeBond Holdings Co., Ltd., or the equivalent.
(2) Attaching the sealing parts
Step Procedure
1 Apply a lubricant*
2
to the rod packing, O-ring, and dust seal (for reverse action actua-
tors) or to the dust seal (for direct action actuators), and attach them to the yoke. For
each of these parts, apply even pressure over the entire surface.
*2. Use Plastilube No. 3 made by U.S. company Sulflo Inc., or the equivalent.
(3) Mounting the lower diaphragm case
Step Procedure
1 Check the matching marks and put the lower diaphragm case on the yoke in the manner
illustrated in
Figure 6-7 to Figure 6-14.
2 For reverse operation actuators, apply a liquid sealant to the sealing washer and set it
around the screw hole of the lower diaphragm case.
3 Apply an anti-seizing agent*
3
to the hex bolts and tighten them with the tightening
torque indicated in
Table 6-1.
*3. Use Never-Seez made by the U.S. company Bostik or the equivalent.
6-6

 Loading...