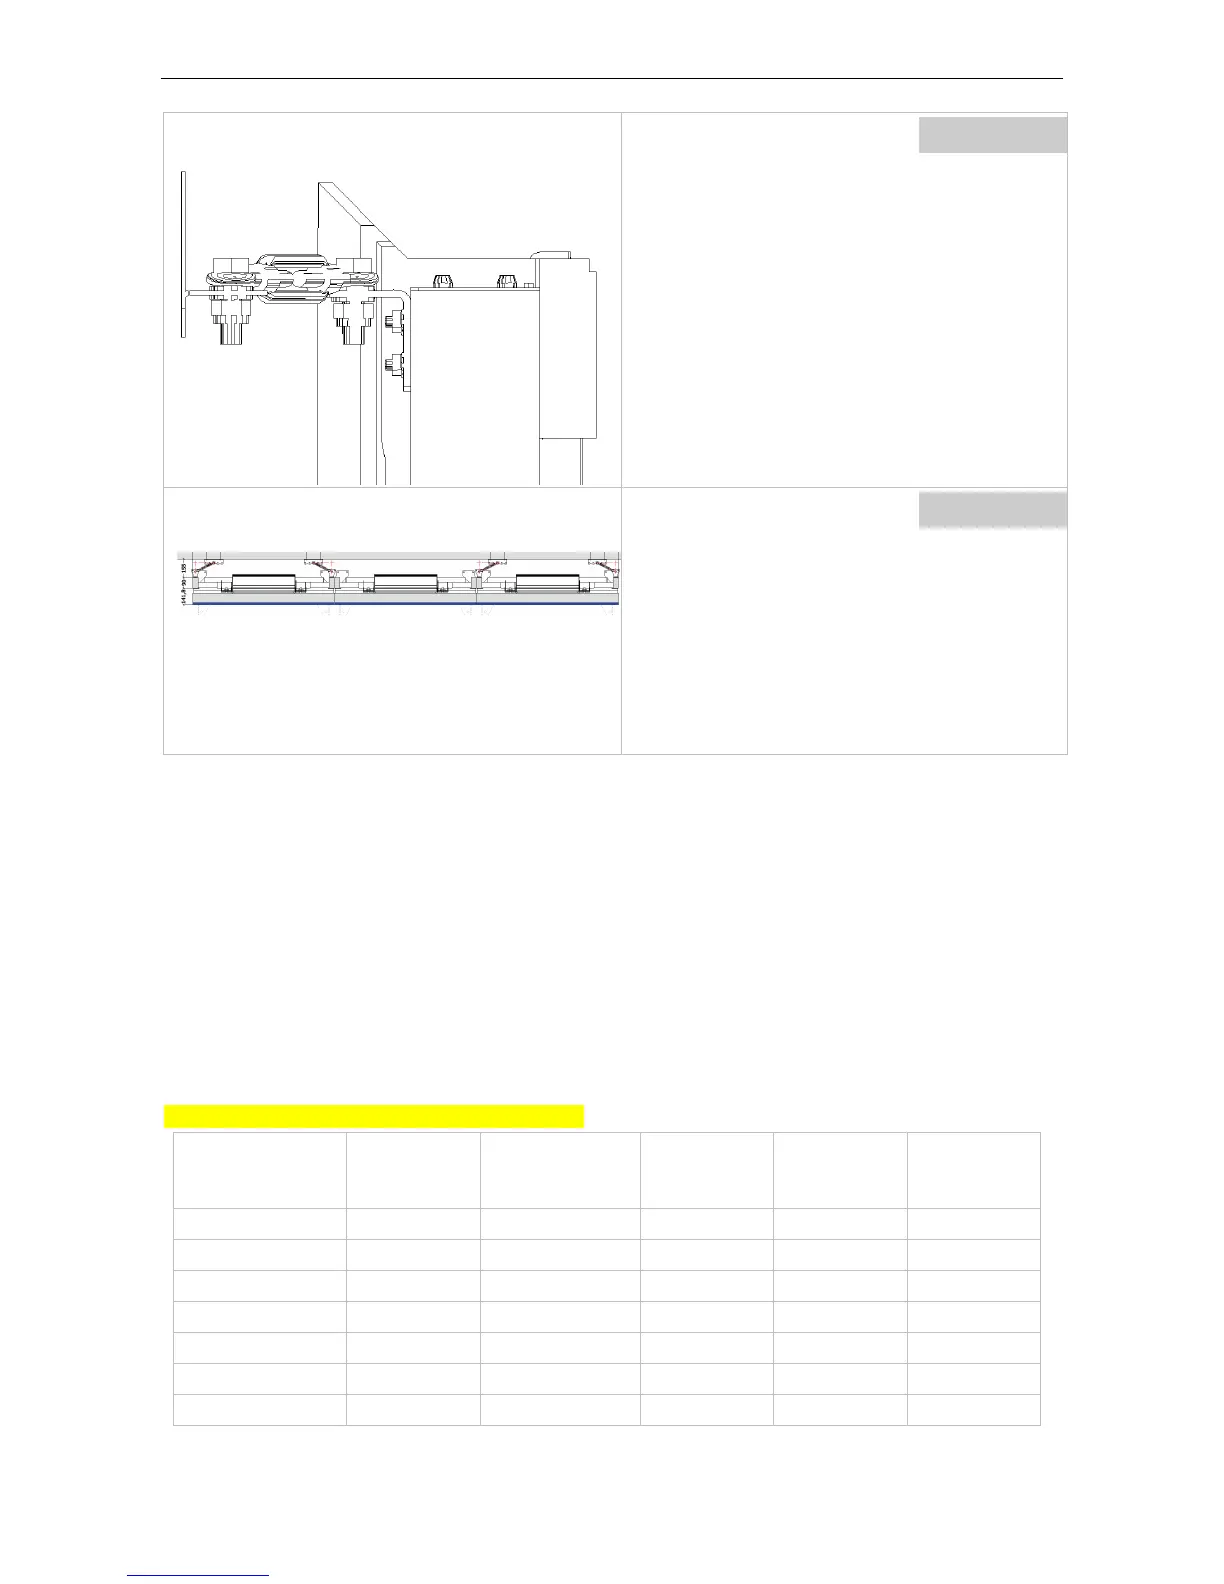
When making the connection to the wall it is rec-
ommended to keep the turn-buckle as horizontal
as possible, i.e. the eyes are plane: this ensures
the quality of connection.
Top view on wall fixation.
Please mind the fixation angles: make as much
opposite pairs as possible.
the wall and the set length of the outer turn-
buckles) make the mid wall fixation perpendicu-
lar to the wall.)
5.2.2 Mounting the wall fixation brackets for video walls with (kind of standard) supports
Since the system is installed nearby the wall at minimum distance it gets very difficult to fix the brackets to the
wall after the video wall has been setup.
Therefore it is recommended to first drill the holes to the wall and to mount the wall fixation brackets before
setting up the video wall.
Fixation material to the wall is not included in the delivery. It has to be M10 and selected according the material
of the wall to withstand the forces.
Walls of re-enforced concrete of quality C20/25 or higher with a thickness of at least 16cm are required. For wall
fixation, the edge distance as to be 200mm or higher!
In any case fixation needs to be done on multiple levels: first on the support plane (screen height), and then on
the top of every third row (rows<=3) or on the top of the last row(rows<3).
The figures in the table refer to KVD and IVD displays.
Number
of rows
Level -1
(measured
from level 0)
Level 0
(top of pedestal,
screen height)
Level 2
(measured
from level 0)
Level 3
(measured
from level 0)
Level 4
(measured
from level 0)
1 -120 491.7
2 -120 1178.35
3 -120 1865
4 -120 1865 2551.65
5 -120 1865 3238.3
6 -120 1865 3924.95
7 -120 1865 3924.95 4611.6
Barco - LCD 5521 V4 - R591734 - Installation manual - Revision 00 - March-2017
_____________________________________________________________
28
 Loading...