19General instructions
On screen stitch selection/stitch display/functions
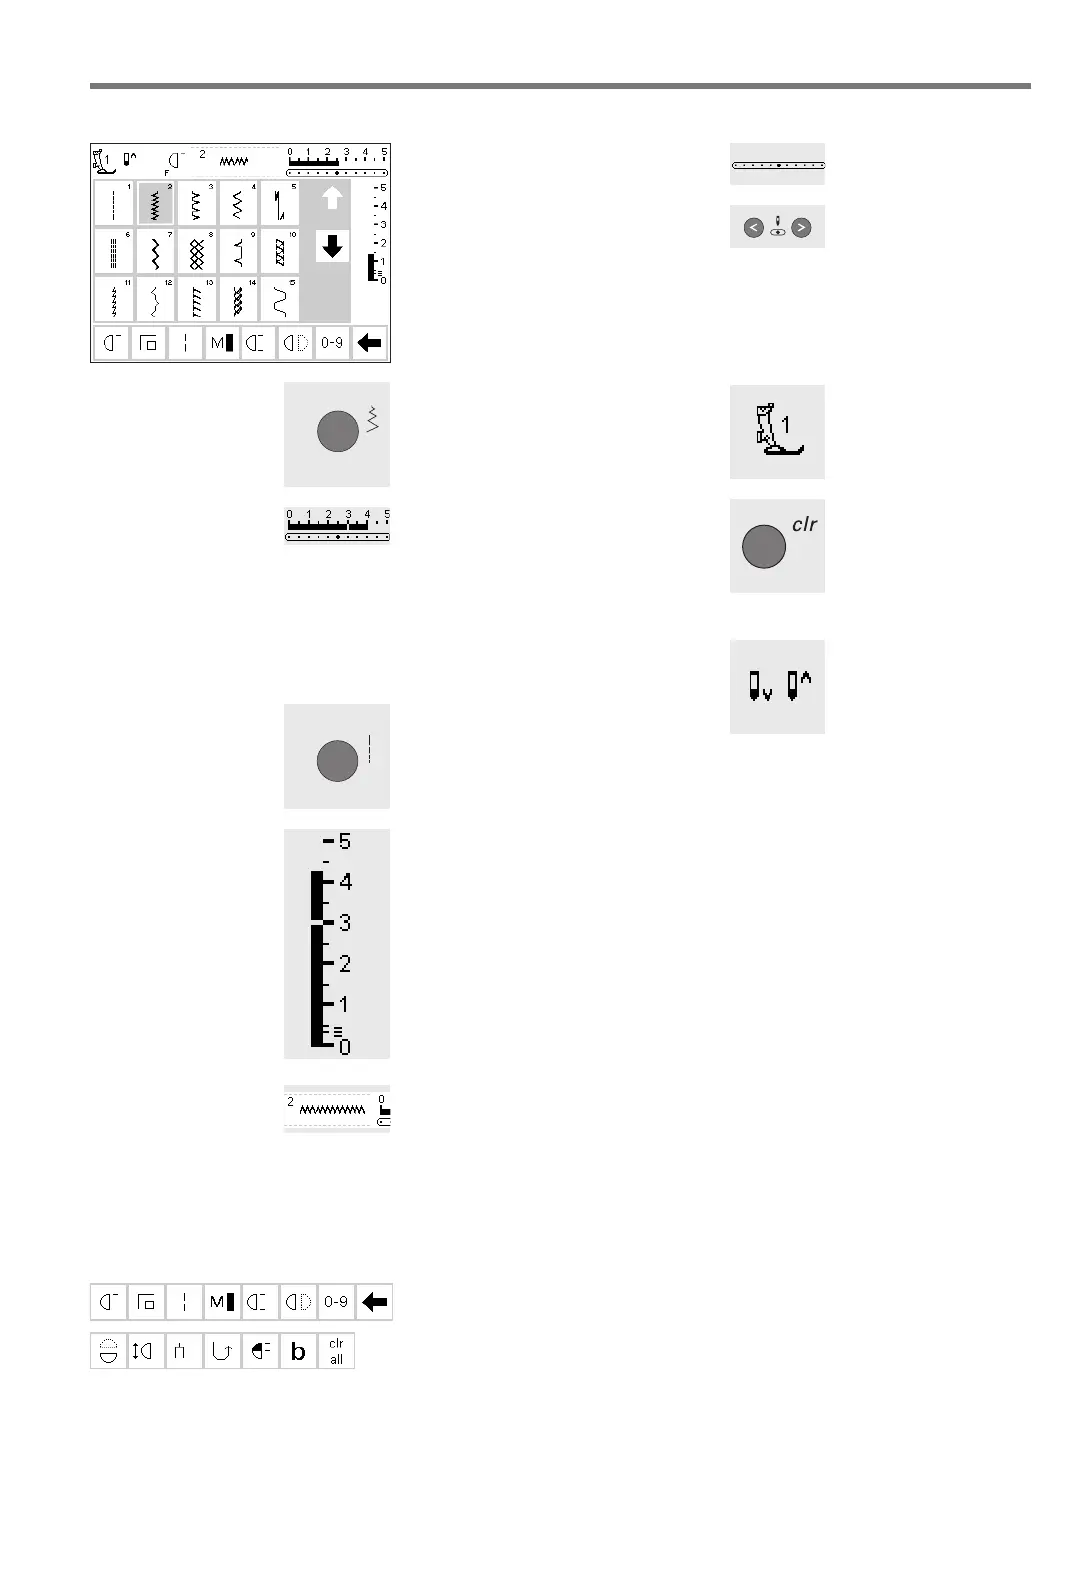
Select a stitch
· touch the stitch of your choice
· the stitch is highlighted
· every stitch is displayed with its
number
Altering the stitch width
·turn the upper knob
· altered width is shown on the
stitch width bar (basic setting
visible)
· stitch is displayed with altered
setting
· the stitch width can be altered
from 0–5.5 mm
· stitch width bar automatically
shows 0–5
Altering the stitch length
·turn the lower knob
· altered length is shown on the
stitch length bar
· the basic setting will be visible
(shown at 3mm)
· stitch length can be altered from
0 mm to 5.5 mm on most stitches
Display of selected stitch
(to the left of stitch width bar)
· the stitch number is always visible
in the center of the upper portion
of the screen
· stitch number is displayed to the
top left of the stitch graphic in the
center of the upper portion of the
screen
Selecting functions
· touch the function of your choice
· the selected function is highlighted
(a number of different functions
can be selected simultaneously)
· touch the function toolbar arrow to
scroll more functions
· activate another function if desired
· touch the toolbar arrow to scroll
again
· the toolbar can be customized in
Setup
· for more information functions, see
pages 22–28
Altering the needle
position
·press the right or
left needle position
button
· each press moves
the needle one
point to the right or
left
Return to basic set-
tings
·press the external
clr button
· the stitch will revert
to its basic settings
Presser foot indicator
· the recommended
presser foot is
displayed by number
Needle stop
adjustment
·press the needle
stop button
·arrow points down
· the machine always
stops with the
needle down
·press needle stop
button again –
needle stop reverts
to up (arrow points
up)
BA_165_engl 16.4.2004 9:34 Uhr Seite 19
030787.52.04_0401_a165_EN
 Loading...