1 689 975 223 2013-10-21| Robert Bosch GmbH
22 | ACS 751/651 | HMI moduleen
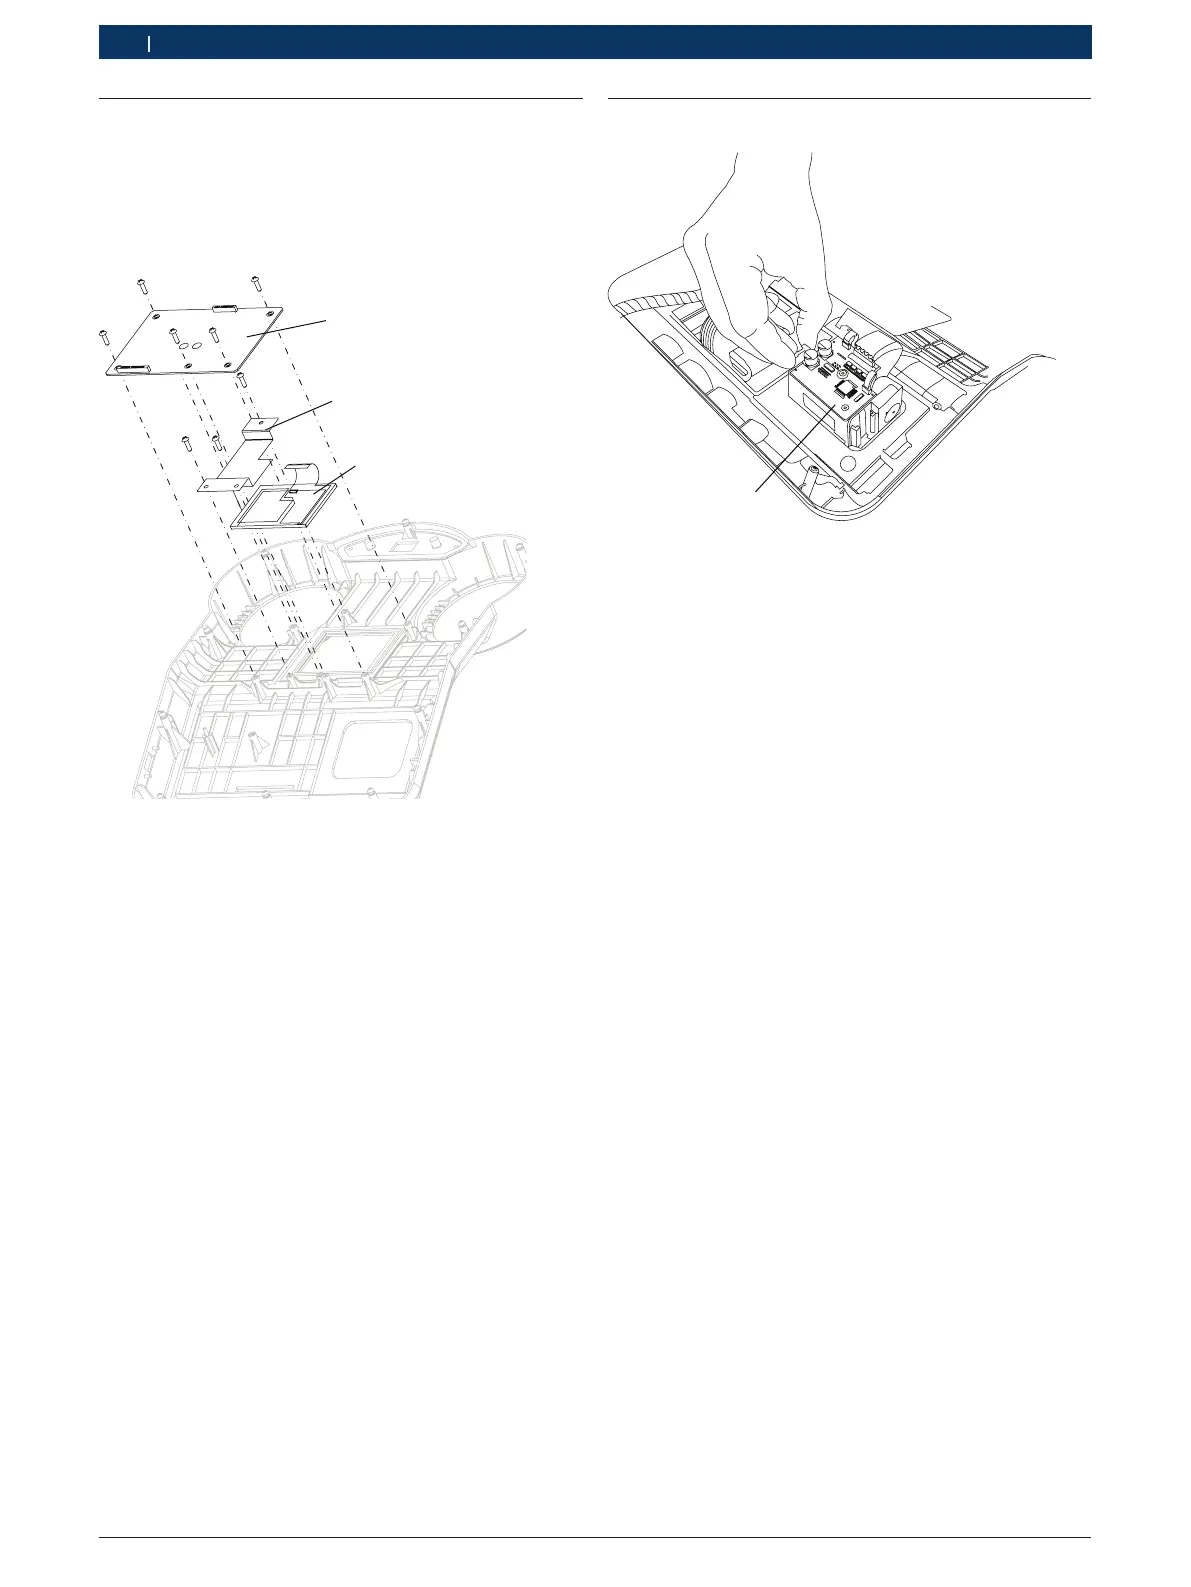
7.2 Replacing the LCD
1. Open the HMI (chap. 7.1).
2. Undo all the electrical connections to the HMI board.
3. Unfasten the HMI board
4. Remove the HMI board from its position.
459898_3Nkv
1
2
3
Fig. 22: View of the LCD Plate
1 HMI Board
2 LCD retainer plate
3 LCD
5. Unfasten and remove the LCD retainer plate.
6. Place the new LCD in position.
7. Fix the retainer plate back into position.
8. Fix the HMI board back into position.
9. Restore the electrical connections to the HMI board.
10. Close and fix the HMI module back in position.
11. Check the display.
7.3 Replacing the printer
459897_19Nkv
1
Fig. 23: Detaching the printer from the HMI module
1 Printer
! Do not expose the printer paper to direct sunlight,
sources of heat, oil ,grease, tannin and plasticized
material (e. g. PVC-sheet protector).
1. Remove the printer paper from the printer.
2. Open the HMI (chap. 7.1).
3. Undo the electrical connections to the printer.
4. Press the printer latches.
5. Lift and remove the printer from the mounting posi-
tion.
6. Place the new printer in position.
7. Lock the latches of the printer.
8. Complete the electrical connections to the printer.
9. Place the top cover of the HMI module back into
position.
10. Close and fix the HMI module back in position.
11. Check the printer.
 Loading...