3. INSTALLATION
BAS-326G PS
9
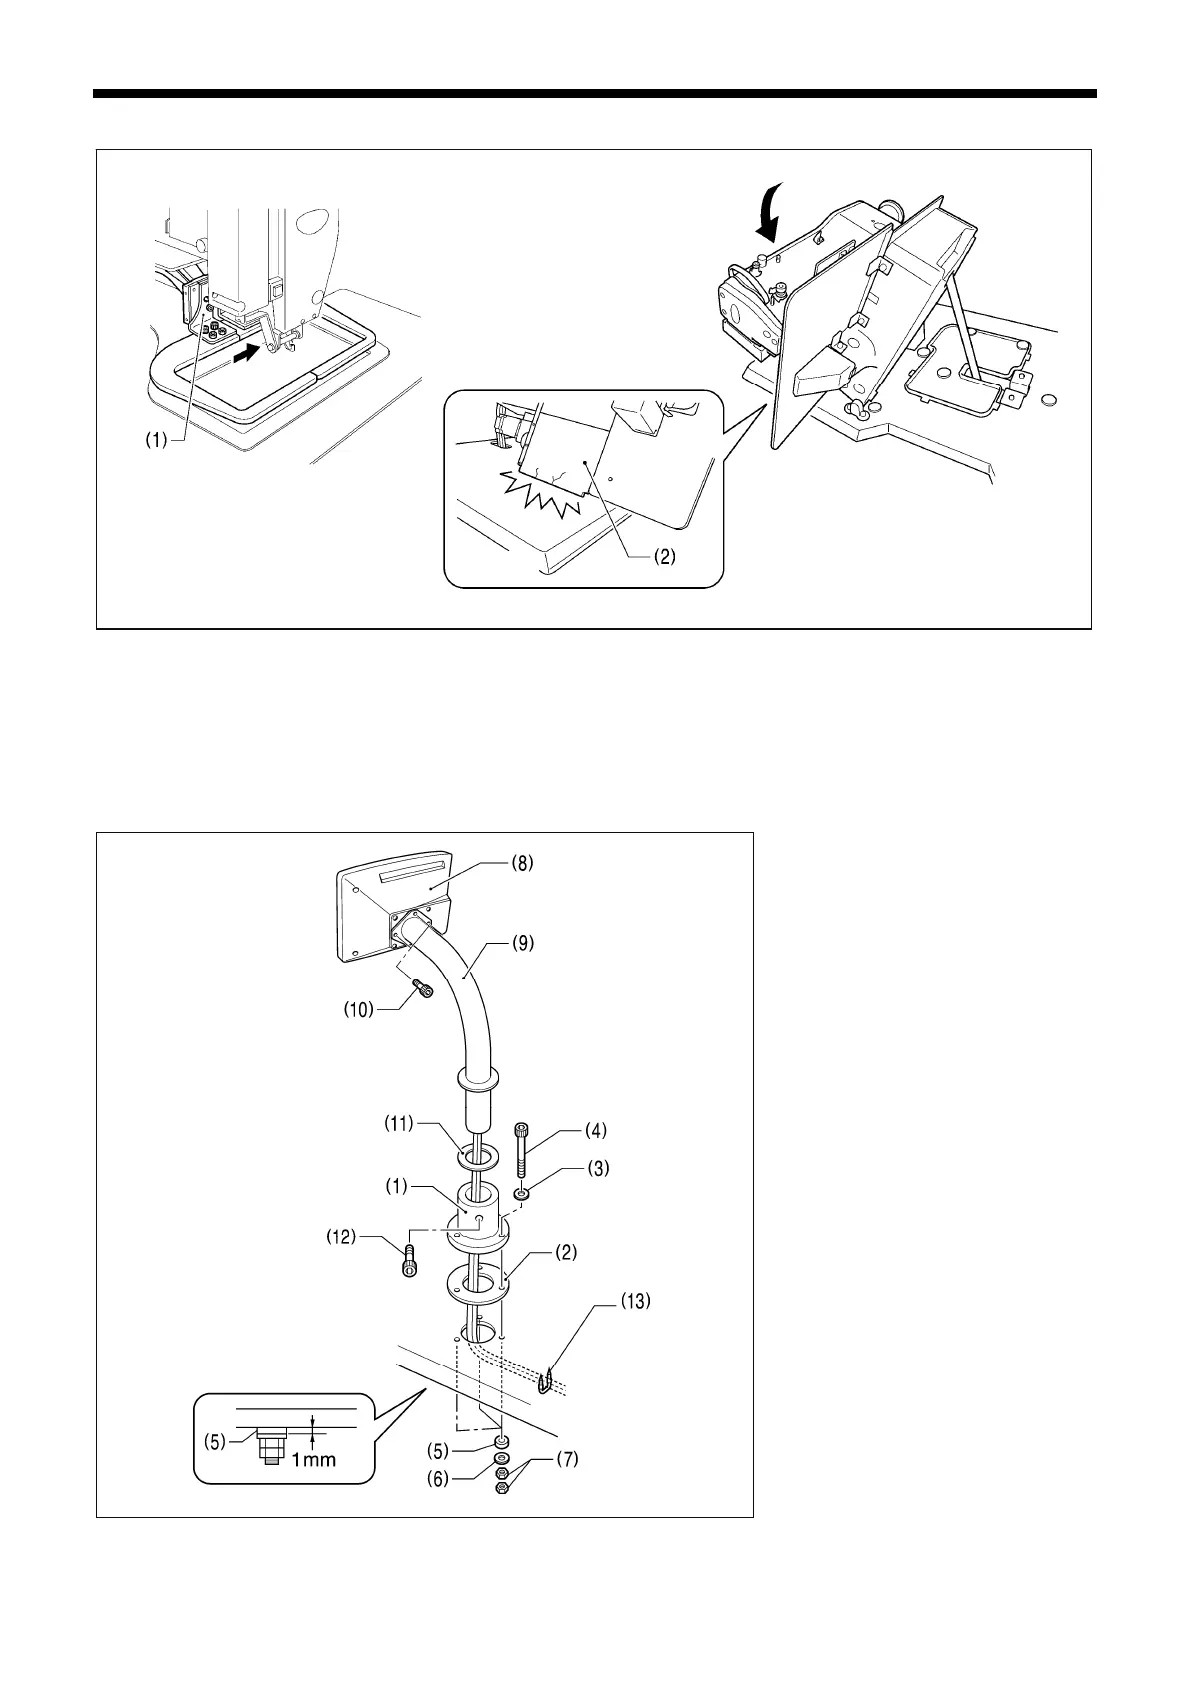
3-5. Tilting the sewing machine head
1. Move the presser arm assembly (1) as far as it will go in the direction of the arrow in the illustration (to the right when looking
from the front of the sewing machine).
2. Stand at the left side of the table, and gently tilt the machine head towards you.
NOTE:
Always be sure to move the work clamp arm all the way to the right before tilting back the machine head. If you try to tilt back the
machine head while the work clamp arm is still on the left side, it may damage the outer cover L (2).
3-6. Installing the operation panel
(1) Operation panel base
(2) Cushion A
(3) Plain washers (medium) [3 pcs.]
(4) Bolts [3 pcs.]
(5) Cushions B [3 pcs.]
(6) Plain washers (large) [3 pcs.]
(7) Nuts [6 pcs.]
Tighten until the thickness of cushion B
(5) is about 1 mm.
(8) Operation panel
(9) Operation panel stand
(10) Bolts [3 pcs.]
(11) Rubber seat
(12) Bolt
• Pass the panel cord through the
operation panel stand (9) and the
rubber seat (11).
• Fit the operation panel stand (9) into
the operation panel base (1), and then
secure it with the bolt (12).
• Pass the panel cord through the hole in
the table, and then insert it into the
control box through the hole in the side
of the control box.
(13) Staples [3 pcs.]
4920Q
2146B 1859B
CAUTION
 Loading...